Custom Monthly Calendar
Save all the important dates on your very own personalized monthly calendar - perfect for your home, office, or just about anywhere!
You Will Need: 14” x 14” cork board, colorful cardstock, ScanNCut, Low-Tack Adhesive mat, non-permanent glue dots, pen or marker, any additional embellishments (like felt, photos, tacks, ribbon etc.)
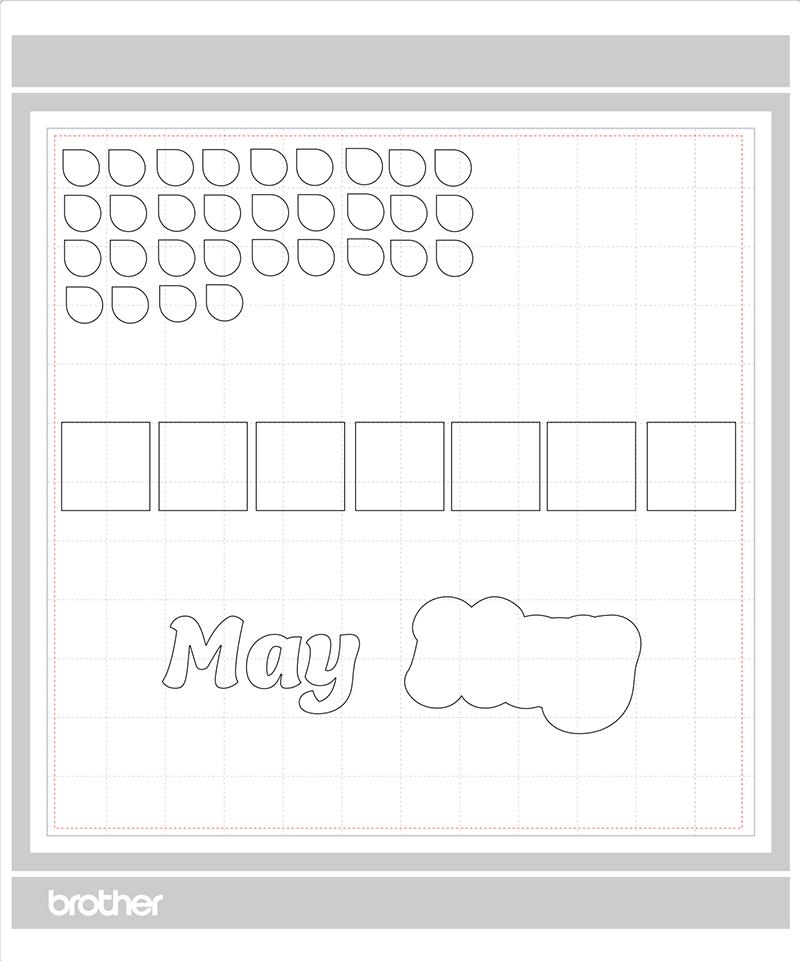
Calendar elements 1.fcmDownload
To create the basic calendar format, open the “Calendar elements 1” .fcm file on your machine. Note: this cutting file has been made for the month of May; feel free to customize for your preferred month by using the Type tool in CanvasWorkspace or on the machine.
Choose the colors you’d like to use for each element - it’s best to cut out pieces of paper by hand and stick them to you mat, then check to see that the elements are aligned to your paper by using the DX’s scanning function.
Cut the paper.
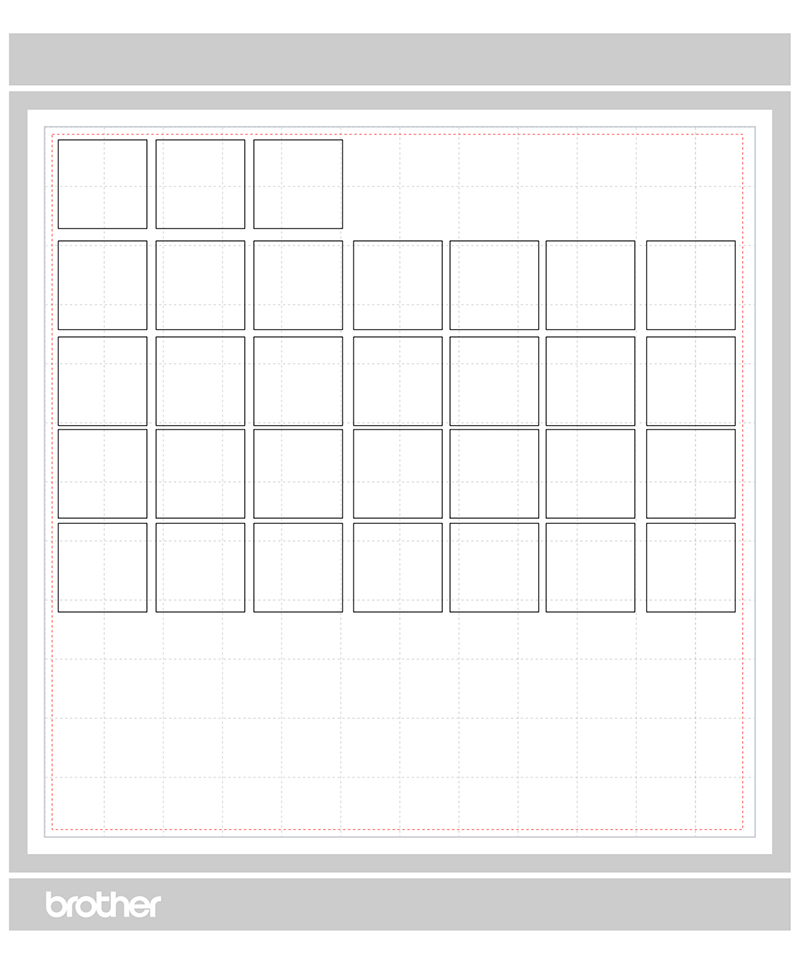
Open “Calendar elements 2.fcm” on your machine. This cutting file contains the squares we’ll use for each calendar day. We used white paper for this portion of the calendar but use whatever color you like.
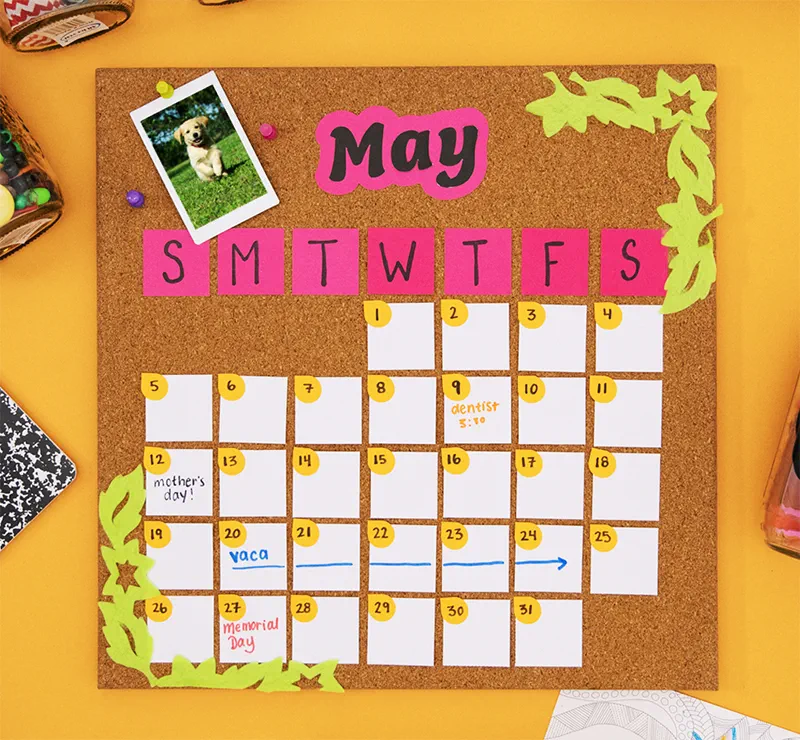
Once all paper elements are cut, gather them and arrange on the corkboard. The first seven square that were cut will serve as day markers (Sunday, Monday, Tuesday etc.) and belong at the top of the calendar. Arrange the calendar day squares in the correct format for the month you’re creating the calendar for.
Use glue dots or another non-permanent adhesive method to attach each element to the corkboard - the corkboard is meant to be reusable and changed around for each month!
Apply the small rounded shapes to the corners of the day squares - these will number the days.
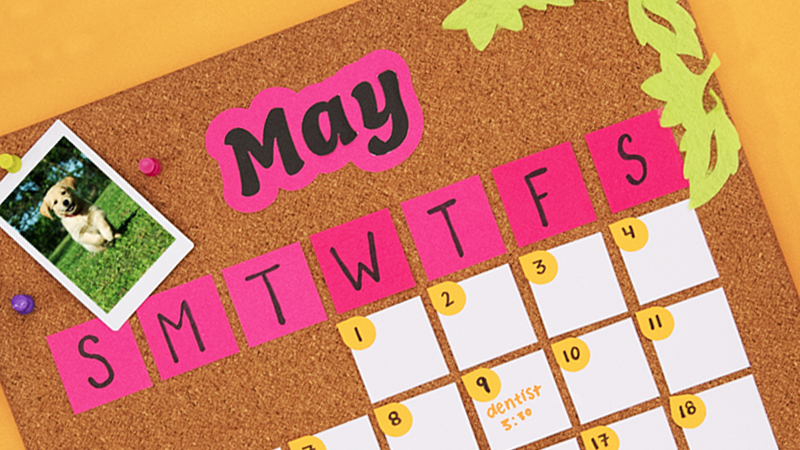
Apply the name of the month to its border shape and stick to the top of the calendar. It should look like this:

Write in all calendar dates, as well as the days of the week on the top of the calendar.
Decorate and personalize your calendar!
Related Projects
Stay Connected
* Required fields