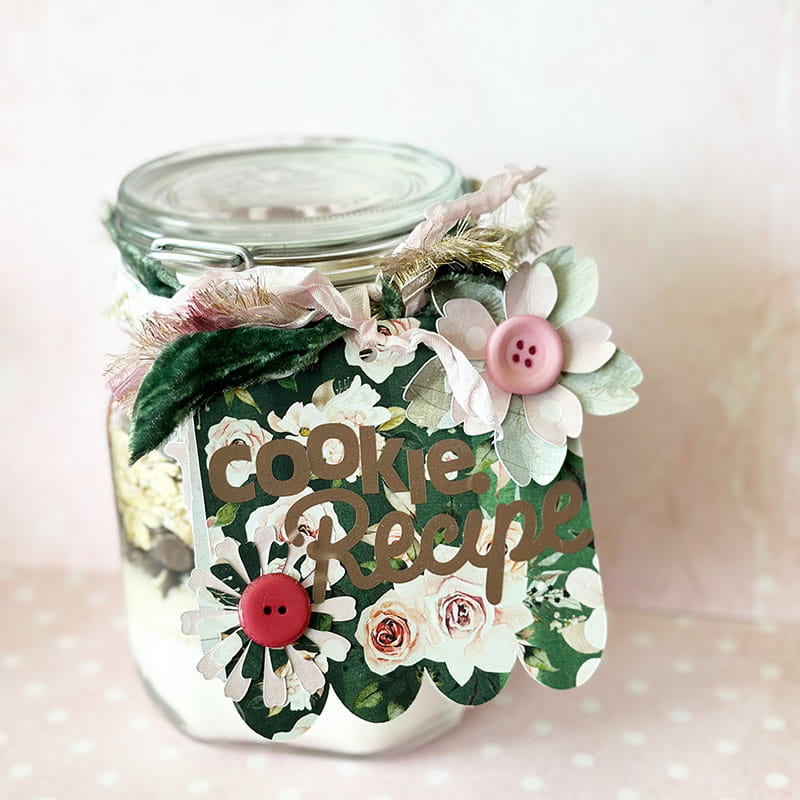
DIY Cookie Jar Recipe Label
What could make a popular DIY gift even better? Use your ScanNCut DX to cut, design, and customize your recipe label and decorate it! Cookie mixes in a jar are very popular for good reason! It’s a fun gift to make or give, they’re adorable, and the customization and options are nearly endless! This is a great way to get crafty with your gift giving all year-round and the how-to couldn’t be easier!
Supplies
- ScanNCut DX
- Standard mat
- Craft (sticker) vinyl
- Transfer material
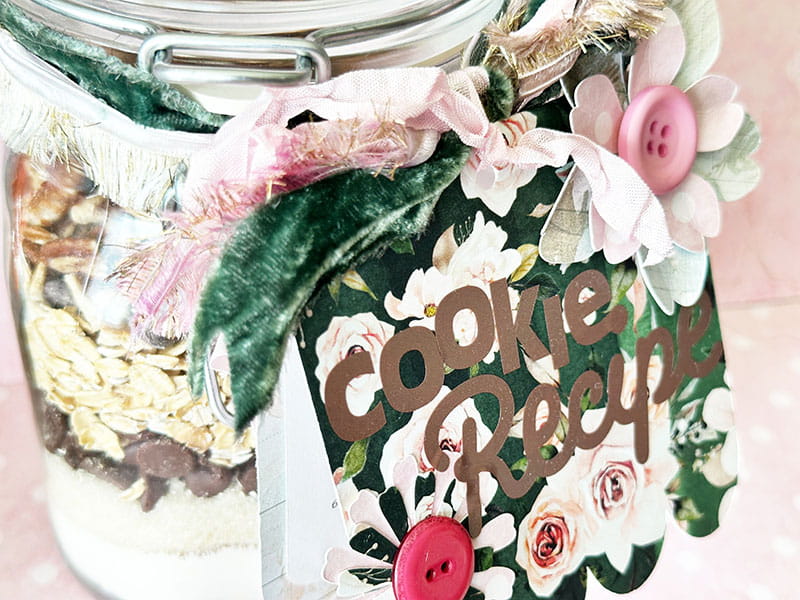
- Jar (with cookie mix inside)
- Patterned paper
- Printed instructions
- Ribbons
- Hole punch
- Adhesive
- Buttons (optional)
Time: 1 hour
Directions
1. Fill a jar with your chosen cookie mix of ingredients
2. Print out (or hand write) the instructions for the recipient including what ingredients they may need to add, how long to cook, etc.
3. Select a design built-in or otherwise from your ScanNCut DX for both the folded outer and inner recipe card, then scan the paper with the instructions into the machine. Re-size your design (such as the one scalloped side square I selected) and customize to your recipe size/shape.
Tip: The arrow button on your re-sizing screen allows you to click and only adjust height or width! So you’re able to adjust for the perfect size. This works best on basic shapes.
4. Add a piece of patterned paper or cardstock to the mat (my project approximately 5x12”) and scan the mat once again. This will allow you to see where to place your second cut design.
5. Using your recipe card cut file as a guide, size your outer design to just over twice the size (if folding) or 1/2-1” larger if not folding the card. Rotate if needed, and place over the patterned paper area.
6. Select cut, and cut out the two papers. Then glue together, and fold outer (if folding).
7. Select additional patterns (I selected 4 total flowers) and cut out from two patterned papers. Adhere (single or layered) to the front of the card.
8. If you’d like to add sticker words – place a piece of craft (sticker) vinyl to your mat, insert into ScanNCut DX, and select your patterns or type your word(s). For my project I selected a pre-loaded word “recipe” and added my own typed word “cookie”. Then scan mat, place onto material (and size as needed), turn half cut on, and cut.
9. Weed vinyl, then using transfer material transfer the words to the front of the card and press into place.
10. To finish, add ribbons around the top and attach the card! Now all that is left is to gift, then bake the cookies.
Related Projects
Stay Connected
* Required fields