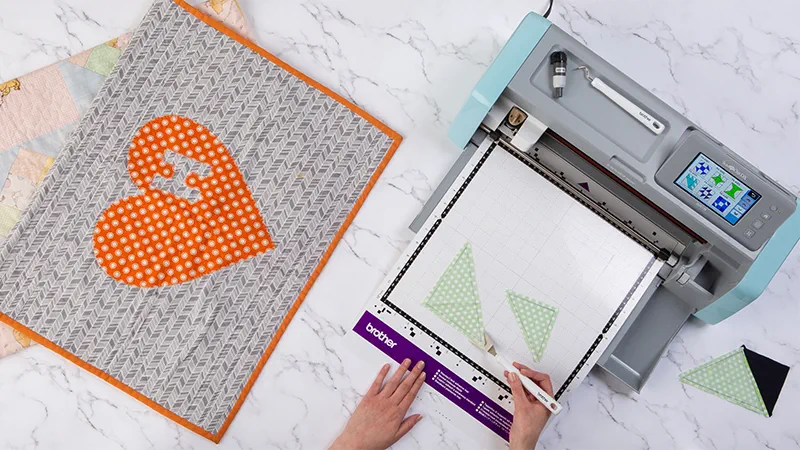
Fabric Cutting 101

Looking to add a new layer of creativity to your crafts? Learn how to cut fabric with your ScanNCut DX in 7 easy steps.
- Choose your fabrics Choose your fabrics and use the appropriate ScanNCut Blade. Use the Thin Fabric Auto Blade for thin fabric and the Auto Blade for thicker, fusible materials.
- Gather your tools Your tools will likely vary based on the project you are creating and the materials you are cutting. We recommend you have a brayer, a scraper, a standard mat, a high tack support sheet and fragrance-free baby wipes.
- Prep your mat Remove the packaging from your mat, and carefully place the high tack support sheet face down within the cutting area on your mat outlined in ruled, black lines. Make sure to place the adhesive side of your fabric support sheet down on your mat. As your gently lay your fabric support sheet down, carefully use your scraper to remove any air pockets from under the sheet. Scrape from end to end to ensure a flat fit. Once bonded, remove the green cover over your sheet.
- Prep your fabric Place your fabric onto your adhesive support sheet, using the brayer to flatten and bond the fabric. Once in place, load your mat into your ScanNCut DX. If you want your cut-out fabric to be clean and free of frayed ends, starch your fabric prior to placing it on your mat or use a fusible material. Note, if you use fusible materials, be sure to use the Auto Blade.
- Ready to cut After you have loaded your mat, select a pattern from the library of designs on the ScanNCut you wish to cut out of your fabric and press “Cut.” Simply press “Start” and your machine will begin cutting.
- Removing your fabric After your machine has finished cutting, carefully peel away the excess fabric from your design. Then, gently remove your cut out from your mat.
- Cleanup Finally, after you have removed the cut-out from your mat, use a fragrance-free baby wipe to remove excess threads from your high tack fabric support sheet.

