How to make a Princess Traveler Notebook
- Brother Crafts Blog
Supplies:
- Notebook
- Cardstock
- Vinyl
- transfer material
- adhesive
- buttons
- ink pad
- rhinestones
- standard mat
- ScanNCutSDX230Di
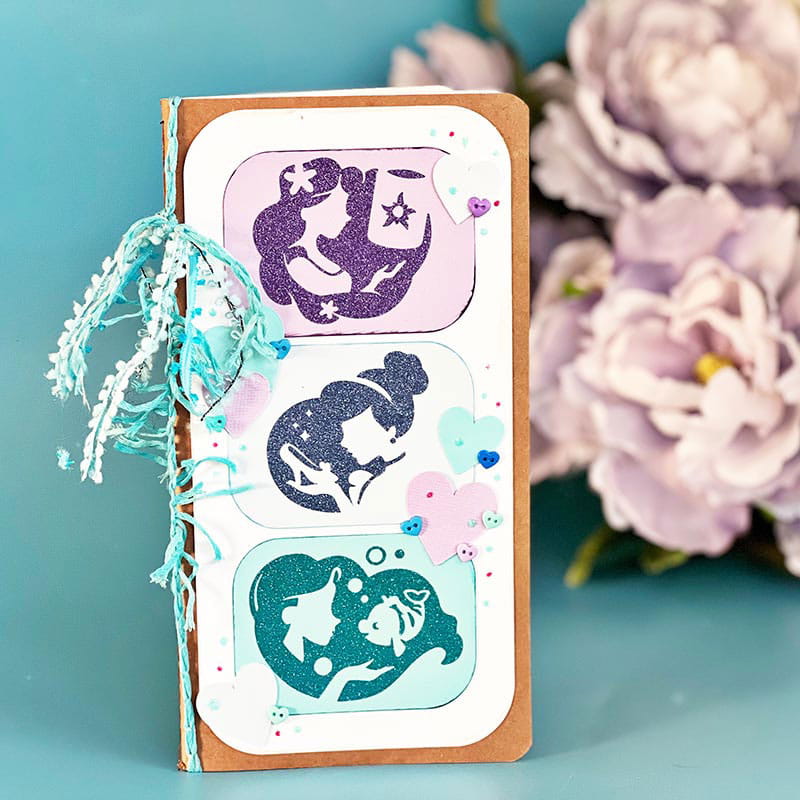
One of my favorite designs in card making and scrapbooking is the grid. Creating a design with 3 or 9 equal shapes is such an easy way to get a striking design while also organizing and creating space for a lot of fun details and pieces. This can be done large or small, simple or with many layers.
I use traveler notebooks, like the one pictured in this project, to journal when I am on trips, at home, to make plans, lists, sort my notes, and even for art journaling. It’s a fun and very portable size, and I absolutely loved finally creating a princess themed one!
One of my own favorite series of designs in this machine is the Princess silhouettes that feature the princess with some element of her classic movie – these are such fun big or small for projects from scrapbooking to vinyl on clothing! They are also fun to mix together because they all are unique but share a similar style. Here I’ve picked out three of the princesses to feature – and I am absolutely in love with the results!
A tip for cutting out designs – always use up your materials! I like to add extra basic or designs I know I can use later to fill space and prep for future crafty adventures. This also gives me spare options on a project like this when I want to see the colors and materials cut out and together. There are lots of way to store spares – I have a small container for fabric, paper, and vinyl ‘scrap’ cuts and it often saves me both time and money as well as reducing wasted materials.
Related Projects
Stay Connected
* Required fields