Why Buy When You Could DIY?

With a little imagination, know-how and your ScanNCut, you can create a dazzling one-of-a-kind t-shirt!
You will need:
A T-shirt, heat-transfer vinyl film, fabric, Brother iron-on appliqué sheet, iron, scrap fabric, ScanNCut, standard mat
Steps:
- Download why buy.fcm to your machine. Trim a sheet of heat-transfer vinyl film to about the width and height of the design, using the scanning function if needed to make sure that everything is aligned.
- Flip the design on the machine using the Object Edit menu. This will ensure that the saying will not come out backwards once cut out and adhered to the fabric!
- Select “Cut” on the next screen. Go into the menu options and make sure that half cut is selected (on the DX, you can use all auto settings when half cut is turned on to get the correct cut). Otherwise, you’ll need to calibrate your blade to make sure that you only cut through the adhesive part of the vinyl (not shiny side) and not the carrier backing (shiny side).
- Place the vinyl film carrier side (shiny side) down on the mat.
- Cut out the design.
- Weed out all unneeded vinyl so that only the design remains on the sticky clear carrier sheet. Set aside.
- Load fabric diy.fcm into your machine. Trim a sheet of heat-transfer vinyl film to about the width and height of the design, using the scanning function if needed to make sure that everything is aligned.
- Repeat steps 2-6. This cut out will act as the bottom layer of the fabric appliqué portion of the design. Set aside.
- Now it’s time to create the fabric appliqué portion. Following the iron-on appliqué sheet instructions, affix the appliqué sheet to the back of the fabric of your choice. Make sure it is firmly adhered.
- Place the sheet of fabric with the adhesive side down onto the standard mat, pressing firmly to adhere.
- Load fabric diy.fcm into your machine. Arrange the design so that it will be cut in the center of the fabric sheet (at least an inch or two of a border all the way around). This will prevent the fabric from tearing or cutting unevenly.
- Cut out the design using the auto blade (make sure to reset the cutting settings so that the blade cuts fully through the fabric and the adhesive layer).
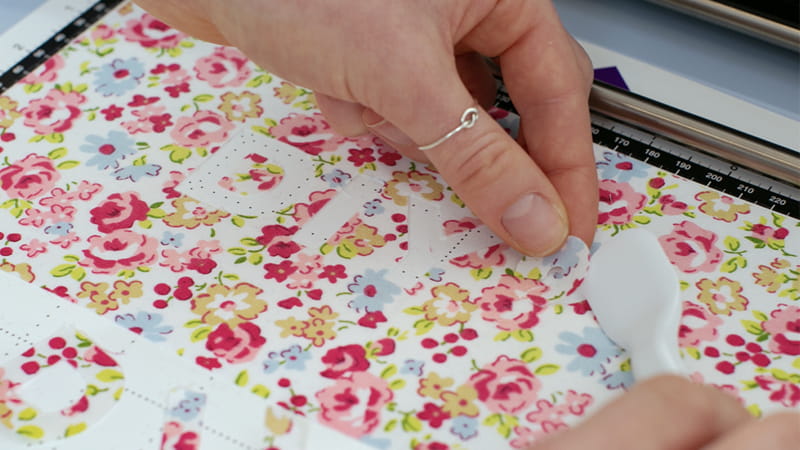
- Carefully peel up the fabric letter designs with a spatula, making sure that the adhesive remains stuck to the backs of the fabric letters. Set all pieces aside.
- Now it’s time to begin adhering the vinyl to the shirt! Place the Heat-transfer vinyl graphics down on the shirt, and move the pieces around until you get an alignment you like. Note that the sticky carrier should stick to the fabric, and through the clear sheet you should be able to see your design that is at the correct orientation (not reversed).
- Place a piece of scrap fabric over the vinyl carrier sheet. Set an iron to medium-high heat (or the setting recommended by HTV instructions), with no steam.
- Using a firm pressing motion, iron over the scrap fabric to seal the HTV to the t-shirt. Make sure to press firmly on the edges.
- Let the carrier sheet cool for a few seconds before touching it, then carefully peel the carrier sheet off. The design should remain firmly on the t-shirt.
- Make sure that both HTV graphics are firmly in place.
- Next, it’s time to apply the iron-on fabric appliqués. Arrange the fabric letters on top of their corresponding HTV “DIY?” letters. We offset the letters a bit to create a slight 3-D effect.
- When the letters are aligned, place the scrap fabric over them (being careful not to shift) and use the iron to press the designs firmly into the t-shirt. Let the t-shirt cool & be careful as the fabric will be hot.
- You’re done!


