Fun and Easy DIY Luggage Tag
Whether you are traveling this holiday time or just need to give your luggage a new look, this cute DIY luggage tag project is quick and easy to make. It can be used to identify your sewing machine bag, computer bag, back pack, baby bag, tote bag and of course a suitcase. There are many cute ribbons you can add on as well. You can select fabric and stitch out a design for a special occasion or just make it out of a fun fabric that will stand out when looking for your suitcase or bag. The Luggage / Bag Tag finishes at 2 ¾” x 4”. The vinyl pocket will fit a standard business card.

Materials:
- (2) 2 ¾” x 4” - Double Sided Fusible “Stiff Interfacing / Firm Stabilizer”
- (2) 4 ½” x 5 ½” – Cotton Fabric for Front and Back of Tag
- (1) 2 ¾” x 3 5/8”- Clear Vinyl – 12-16 Gauge
- (1) 12” long – 5/8” wide Ribbon

Supplies:
- Tape – embroidery tape or painters tape
- Glue Stick
- Applique Sheet
- 90/14 needle – to go through thickness of “Stiff Interfacing / Firm Stabilizer”
- Embroidery Thread – To match or contrast fabric and to support lettering or design on back side of Tag
- 4” x 4” embroidery hoop
Embroidery File information:
- This project will all be done in the hoop. There are 2 different embroidery files: Luggage Tag 1.PES
and Luggage Tag 2.PES
. The instructions below indicate when to use each file.
Fabric Preparation:
- Place the Applique sheet on top of an ironing surface. Center one of the “Stiff Interfacing / Firm Stabilizer” on the wrong side of one of the fabrics.

- Turn over the “Stiff Interfacing / Firm Stabilizer” and fabric on top of the Applique sheet and press with a craft iron.

- Turn the unit over. Press the top and bottom fabric over onto the “Stiff Interfacing / Firm Stabilizer”.


- On the short ends, fold the ends of the fabric at 45 degrees. Press as needed. Use Glue Stick to secure folded fabric. Then fold the end over and press on both ends.


- Repeat the same Fabric Preparation for the second fabric and “Stiff Interfacing / Firm Stabilizer”.

Embroidery Directions Part 1:
- Use a Tear Away Stabilizer in a 4” x 4” hoop.
- Load the Luggage Tag 1
embroidery design. This file contains the Placement stitch for positioning one of the Fabric and “Stiff Interfacing / Firm Stabilizer” unit. - With the design loaded, Click on the Set button.
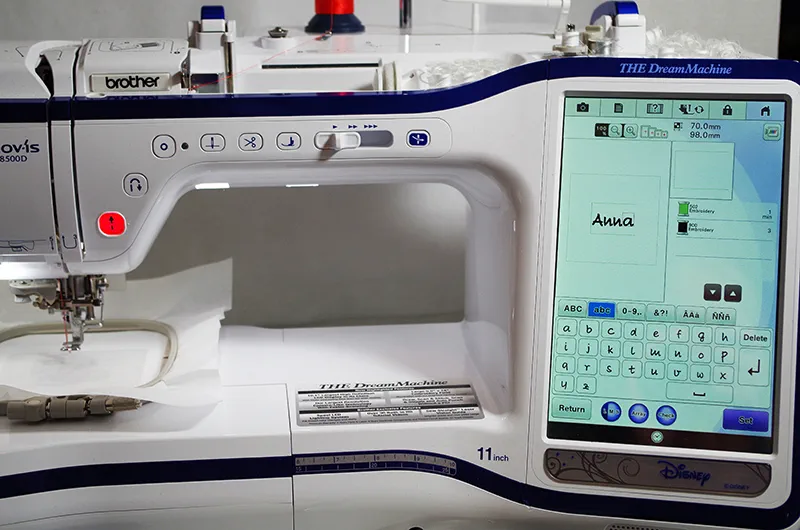
- Click on the Add button to add the design or letters that will be stitched out on the back side of the Luggage Tag.


Note: I used the fonts built into THE Brother Dream Machine to spell out my name.


- Click on the Edit button, then select Size option. Use the various icons to have the text fit within the Placement Stitches.


- Click on the OK button. There are now 2 objects in the window ready to be stitched out. The first is part of the Luggage Tag 1 embroidery file, and the second is the added text. Remember you can add your own embroidery file that will stitch out on the back side of the luggage tag.


- Stitch out the first object onto the Tear Away Stabilizer. This is the Placement stitch to position the back side of the luggage tag.

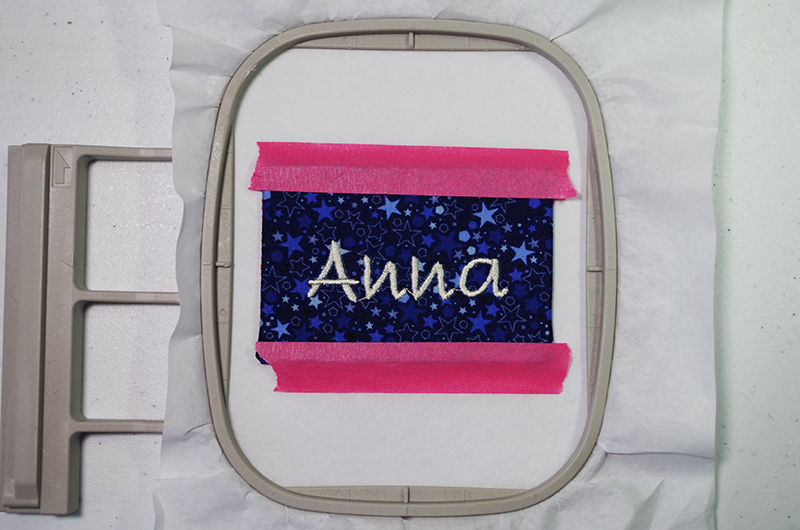
- Remove the hoop from the embroidery unit and place on a flat surface. Place one of the fabric and “Stiff Interfacing / Firm Stabilizer” unit on top of the tear away stabilizer within the Placement stitches. Align to the left, top and bottom. Secure with Tape.


- Return the hoop back to the embroidery unit and stitch out the “added” design. In this example, it is the text “Anna”.

- Remove the tape from the front of the design, then gently remove the fabric unit from the stabilizer in the hoop.

Embroidery Directions Part 2:
- Use a Tear Away Stabilizer in a 4” x 4” hoop.
- Load the Luggage Tag 2
embroidery design.
This file has 3 steps.
- Placement Stitch to position second fabric unit
- Triple stitch to secure the vinyl
- Triple stitch to secure both fabric units and ribbon together.
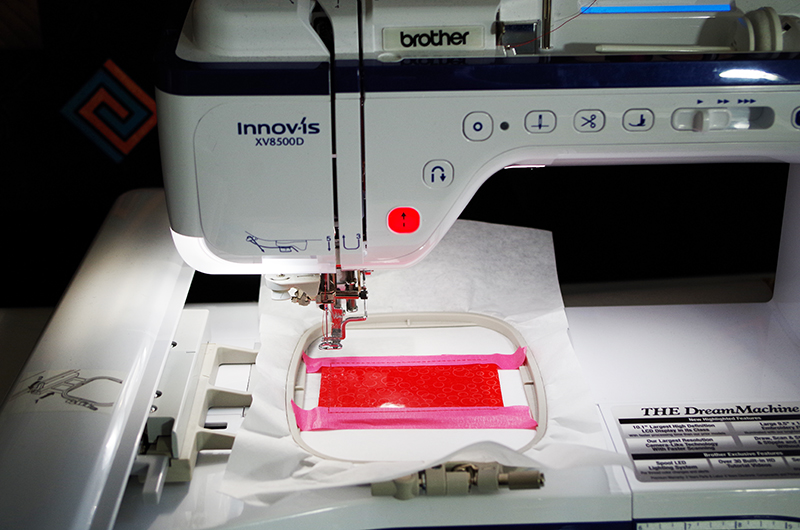
Note: Place Tape over the top right edge of the vinyl so the embroidery foot will not get caught under the vinyl.
- Stitch out the Placement stitch on the Tear Away Stabilizer. Remove hoop from embroidery unit and place on a flat surface. Position second fabric unit and vinyl within the Placement stitches, aligning on top, bottom and left side. Tape both pieces.

- Change color thread to match the fabric. Stitch the triple stitch to secure the vinyl to the fabric and to the stabilizer.

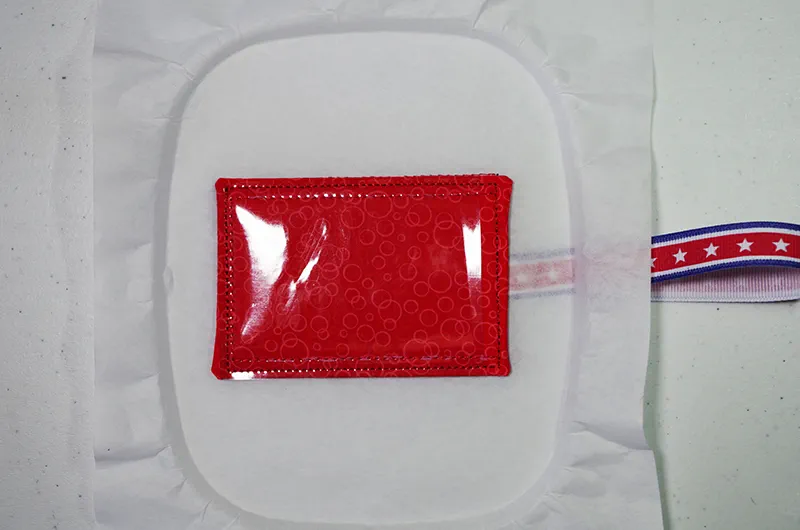
- Remove the hoop from the embroidery unit and place on flat surface. Remove the tape using tweezers.


- Turn the hoop over. Fold the Ribbon in half and tape into place. Position the first fabric unit so that it lines up with the second fabric unit which is on the front of the hoop. Tape into place.


- Return hoop to embroidery unit. Make sure the Ribbon is not under the hoop. Consider changing bobbin thread to match the color of the fabric.

- Remove the hoop from the embroidery unit. Remove the tape from the back fabric. Remove the design from the hoop and gently pull the tear away stabilizer from the design.


- This design can also be stitched out on any Brother single needle or multiple needle embroidery machine that supports a 4” x 4” stitch area.
and Luggage Tag 2.PES
were designed by Anna Aldmon of Anna’s Awesome Appliqué Designs.


