How to Change A Hem into a Cuff
- Brother Sews Ambassador
I’m a huge fan of cuffs over hems. I know this doesn’t work for every pattern, but this is a hack I often add to my sewing. I sew a lot of kids' clothing, and hemming those tiny sleeves is not my favorite. Adding cuffs before the seams are sewn is easy and simple, and today I’m going to show you how to do it. Cuff Supplies:
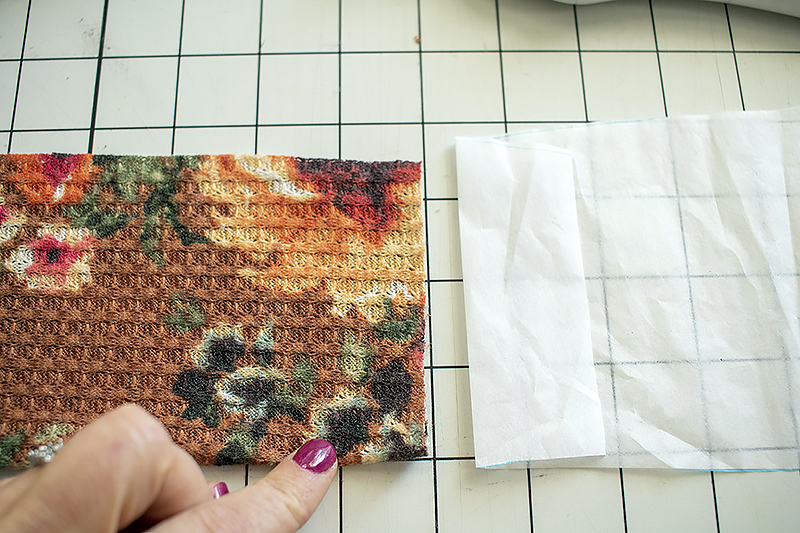
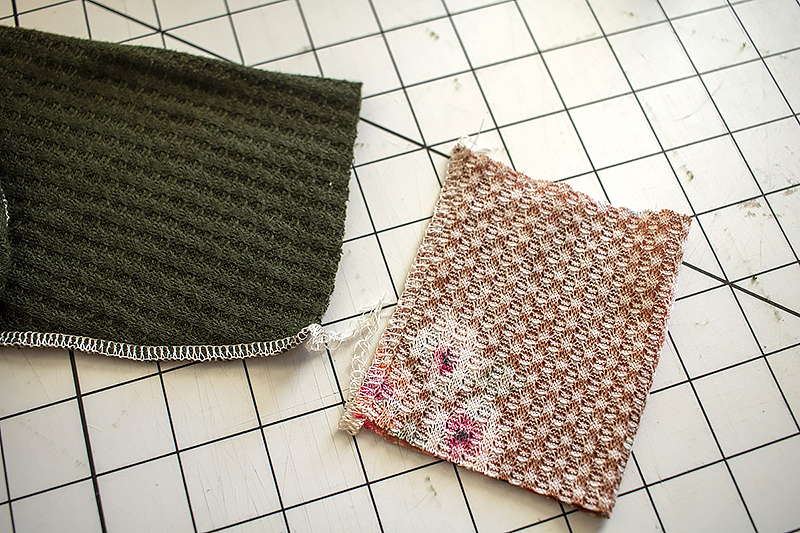
 Cut out the fabric using this adjusted pattern piece. To create the cuff piece grab some knit fabric. It can be the same at the shirt you are sewing, or a different fabric. Ribbed knit works great for cuffs if the shirt fabric isn’t very stretchy (sweatshirts, etc). Fold a piece of fabric in half with the stretch going side to side of the sleeve. The width of this folded piece should be about 1” less than the width of the sleeve. You can make it about .5” shorter of the folded sleeve as shown here.
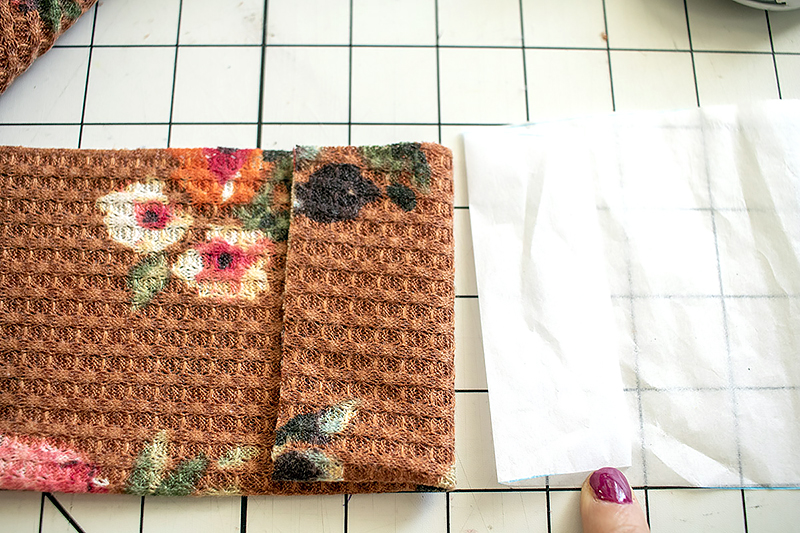
 You can decide how tall you want the cuff by folding the fabric over again as shown. This should be the same amount as you folded over the original pattern. You do not need to add seam allowance as the original pattern included a hem allowance. Once you have determined both the height and the width of your cuff as shown, cut the fabric.
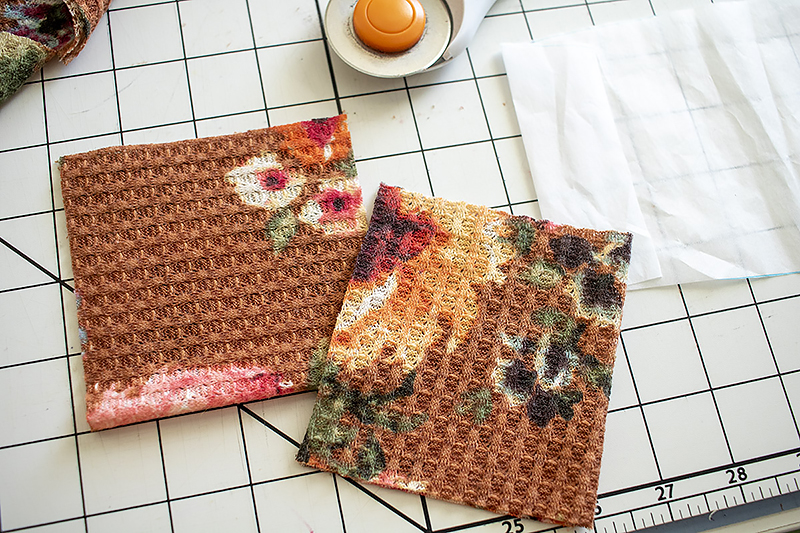
 Use the first cuff as a guide to cut the second one.
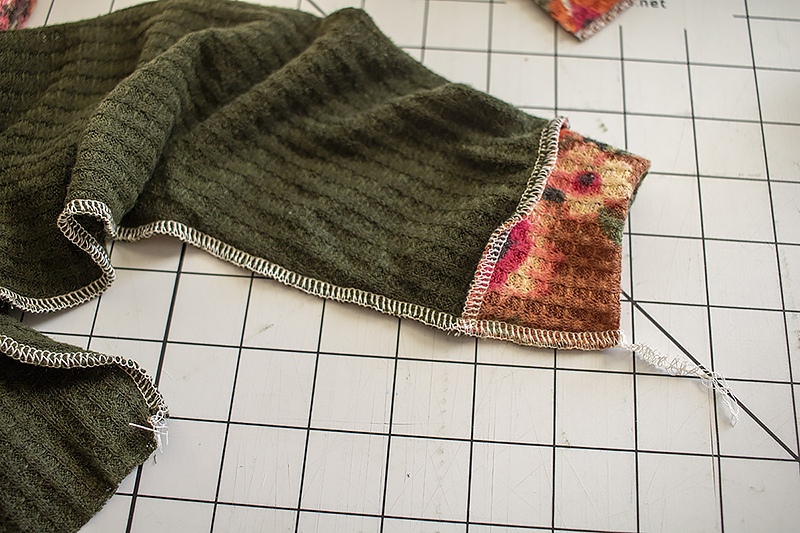
 We will start with the open side seam assembly method because this is my favorite for small clothes. Fold the cuff in half with the greatest stretch going side to side and pin/clip it to one end of the sleeve. Stretch across and pin/clip to the other side. I usually stretch and place at least one more pin/clip in the center.
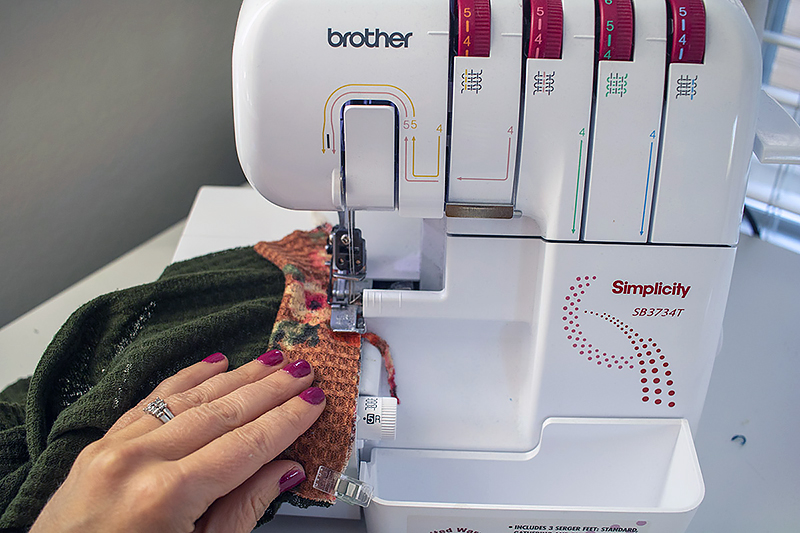
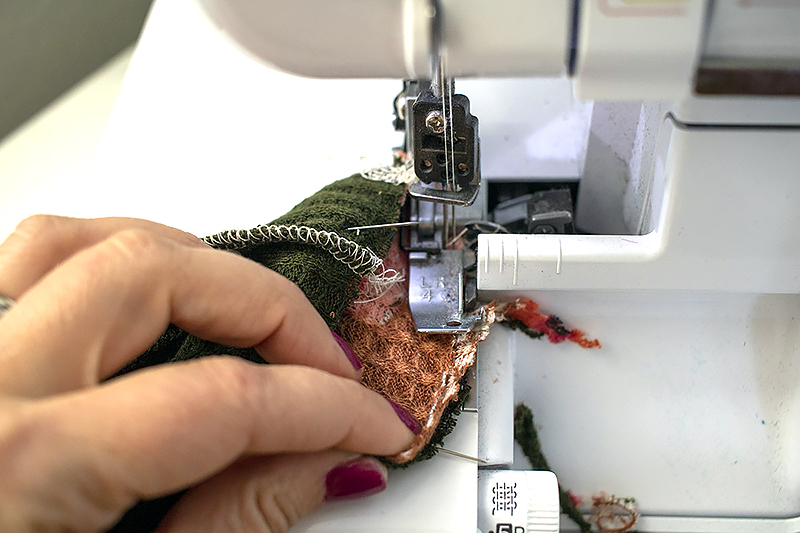
 Use a serger or a knit stitch on your regular sewing machine to sew the cuff to the sleeve. I use a standard ⅜” seam allowance. You are sewing through three layers of fabric, make sure to catch all of them.
 After you have attached the cuff, sew the side seams and finish the raw serger thread ends on the cuff. Finish the rest of the shirt as directed in the pattern.
Now, let’s take a look at method two. This may be a more traditional method of cuff sewing, but it is more difficult. First find the direction of greatest stretch side to side. Then fold those ends over and sew together.
 After you sew, fold the cuff over again. You should also sew the side seam of your shirt at this point as well.
 Place this folding cuff on the right side of the side of the sleeve fabric. Pin or clip, stretching in place.
 Open up the cuff and sew with the cuff fabric facing up. Use a serger or a stretch stitch and a ⅜” seam allowance. Sew slowly, turning the cuff as you go. Turn right side out and check when you are finished to make sure you sewed through all three layers.
 There you go! Two perfect cuffs, each sewn a different way. If you’ve never tried one of these methods I encourage you to try cuffs a new way and see what you like better, or which is easier for you to sew. I hope you will enjoy cuff sewing as much as I do! I really love not having to hem sleeves.

I’m a huge fan of cuffs over hems. I know this doesn’t work for every pattern, but this is a hack I often add to my sewing. I sew a lot of kids' clothing, and hemming those tiny sleeves is not my favorite. Adding cuffs before the seams are sewn is easy and simple, and today I’m going to show you how to do it. Cuff Supplies:
- Shirt pattern of your choice
- Fabric for shirt
- Fabric for cuffs (if different)
- Serger sewing machine
(best for knit fabric)
Cut out the fabric using this adjusted pattern piece. To create the cuff piece grab some knit fabric. It can be the same at the shirt you are sewing, or a different fabric. Ribbed knit works great for cuffs if the shirt fabric isn’t very stretchy (sweatshirts, etc). Fold a piece of fabric in half with the stretch going side to side of the sleeve. The width of this folded piece should be about 1” less than the width of the sleeve. You can make it about .5” shorter of the folded sleeve as shown here.
You can decide how tall you want the cuff by folding the fabric over again as shown. This should be the same amount as you folded over the original pattern. You do not need to add seam allowance as the original pattern included a hem allowance. Once you have determined both the height and the width of your cuff as shown, cut the fabric.
Use the first cuff as a guide to cut the second one.
We will start with the open side seam assembly method because this is my favorite for small clothes. Fold the cuff in half with the greatest stretch going side to side and pin/clip it to one end of the sleeve. Stretch across and pin/clip to the other side. I usually stretch and place at least one more pin/clip in the center.
Use a serger or a knit stitch on your regular sewing machine to sew the cuff to the sleeve. I use a standard ⅜” seam allowance. You are sewing through three layers of fabric, make sure to catch all of them.
After you have attached the cuff, sew the side seams and finish the raw serger thread ends on the cuff. Finish the rest of the shirt as directed in the pattern.
Now, let’s take a look at method two. This may be a more traditional method of cuff sewing, but it is more difficult. First find the direction of greatest stretch side to side. Then fold those ends over and sew together.
After you sew, fold the cuff over again. You should also sew the side seam of your shirt at this point as well.
Place this folding cuff on the right side of the side of the sleeve fabric. Pin or clip, stretching in place.
Open up the cuff and sew with the cuff fabric facing up. Use a serger or a stretch stitch and a ⅜” seam allowance. Sew slowly, turning the cuff as you go. Turn right side out and check when you are finished to make sure you sewed through all three layers.
There you go! Two perfect cuffs, each sewn a different way. If you’ve never tried one of these methods I encourage you to try cuffs a new way and see what you like better, or which is easier for you to sew. I hope you will enjoy cuff sewing as much as I do! I really love not having to hem sleeves.
Tags
Shop this Project
When inspiration strikes, Brother has you covered! The products in this stylish project are available for purchase so you can click, shop, and get to sewing!

Sewing Machines
Related Projects
Stay Connected
* Required fields
Follow Us
- Product Support
- Product Support Assistant
- Terms of Sale
- Product-Registration
- Search Supplies/Accessories
- Ordering & Shipping Information
- Ordering & Account FAQs
- View Order Status
- Warranty & Extended Warranty Information
- Recall Information
- Return Policy
- Security Support Information(Opens in a new tab)
- Contact Brother
