Quick Tip: Create an Appliqué Patch using the Brother Appliqué Option
This technique is featured in the Brother Stitching Sewcial April Free Design project
as an accent for the children’s storage pouch. Making appliqués the Brother way is one of my all-time favorite embroidery adventures! An appliqué patch is the perfect solution for a variety of embroidery situations. For example, there are times when you want to add embroidery to an item that isn’t easily hooped. Or, you want the embroidery to stand out with a bit of a 3-D effect. An appliqué patch will do just that. An appliqué patch is also ideal when you want to make something for groups or clubs and let them apply the patch to the individual’s desired item. On occasion, I like to include an appliqué patch with a gift card. In this case I add fusible backing to the patch and include instructions for fusing with an iron. There are a variety of Brother machine models
that include the Appliqué function, with an array of options depending on the machine. In this tip sheet you’ll see some pictures showing the basic process using the Brother Appliqué Key in Embroidery Edit mode. Select a design and touch the appliqué key to add an appliqué shape around the design. Selecting the Key will trace the exact shape of the embroidery motif. Depending on your machine model you may have other options, such as creating multiple appliqués in a single hooping, and adding various shapes around the design. The setting mode allows for changing the spacing of the appliqué stitch between the design and the outer edge of the base fabric. See Figure #1 and Figure #2. [caption id="attachment_19497" align="aligncenter" width="748"]
 Figure #1[/caption]
[caption id="attachment_19498" align="aligncenter" width="600"]
Figure #1[/caption]
[caption id="attachment_19498" align="aligncenter" width="600"]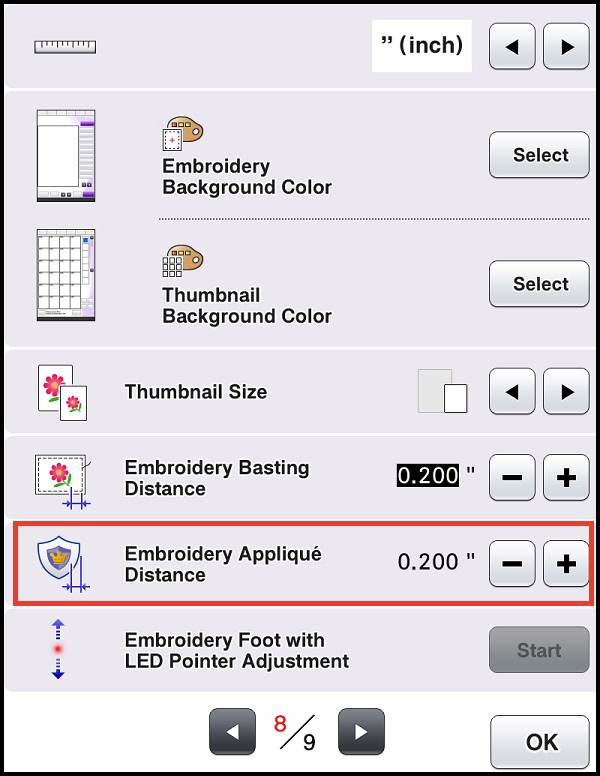 Figure #2[/caption]
I used the Brother model PR670e
Figure #2[/caption]
I used the Brother model PR670eto create the patch for the April Free Design project.
This model has an option for tracing the design or adding a shape to the appliqué. I chose to add the starburst shape around the design. See Figure #3 and Figure #4. [caption id="attachment_19499" align="aligncenter" width="800"]
 Figure #3[/caption]
[caption id="attachment_19500" align="aligncenter" width="800"]
Figure #3[/caption]
[caption id="attachment_19500" align="aligncenter" width="800"]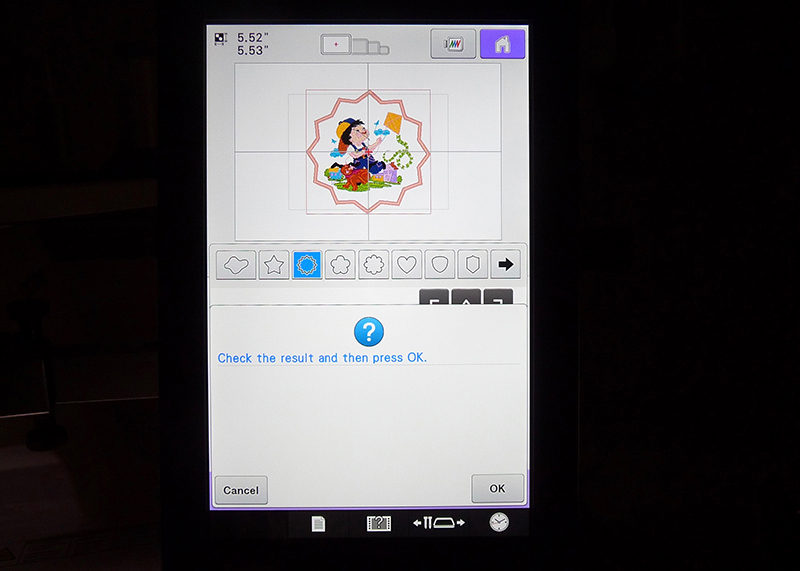 Figure #4[/caption]
When preparing to embroider an appliqué patch I start by stabilizing fabric with a layer of light to medium weight fusible interfacing, then I slip a layer of SA5810 medium weight tear away stabilizer
Figure #4[/caption]
When preparing to embroider an appliqué patch I start by stabilizing fabric with a layer of light to medium weight fusible interfacing, then I slip a layer of SA5810 medium weight tear away stabilizerunder the hoop. The steps for embroidering the patch are simple. Start by embroidering the design on stabilized fabric. See Figure #5. [caption id="attachment_19501" align="aligncenter" width="800"]
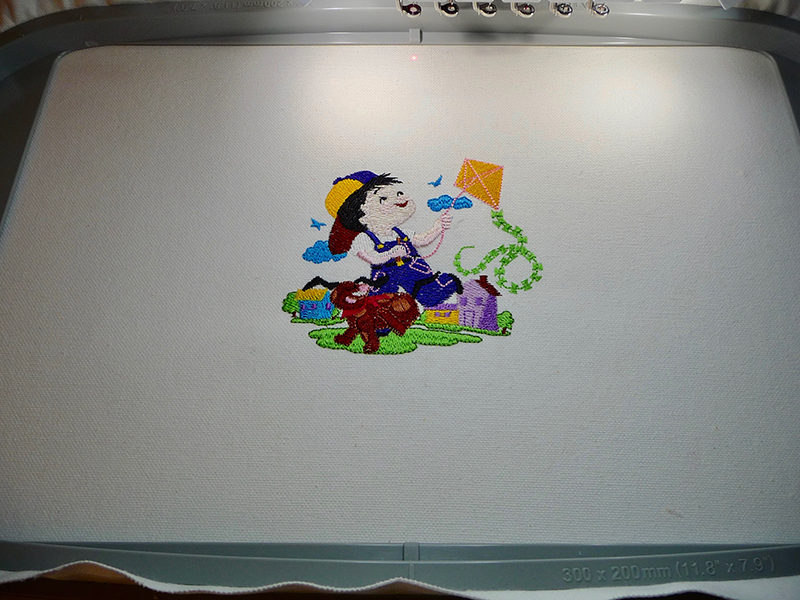 Figure #5[/caption]
When the design is finished the three appliqué steps are next. See Figure #6.
[caption id="attachment_19502" align="aligncenter" width="800"]
Figure #5[/caption]
When the design is finished the three appliqué steps are next. See Figure #6.
[caption id="attachment_19502" align="aligncenter" width="800"] Figure #6[/caption]
Stitch the Appliqué Material step around the design. See Figure #7.
[caption id="attachment_19503" align="aligncenter" width="800"]
Figure #6[/caption]
Stitch the Appliqué Material step around the design. See Figure #7.
[caption id="attachment_19503" align="aligncenter" width="800"] Figure #7[/caption]
Remove from hoop and carefully cut out the shape, cutting right along the stitching line. See Figure #8.
[caption id="attachment_19504" align="aligncenter" width="800"]
Figure #7[/caption]
Remove from hoop and carefully cut out the shape, cutting right along the stitching line. See Figure #8.
[caption id="attachment_19504" align="aligncenter" width="800"] Figure #8[/caption]
Hoop a layer of SA540 Brother lightweight water-soluble stabilizer.
Figure #8[/caption]
Hoop a layer of SA540 Brother lightweight water-soluble stabilizer.Stitch Appliqué Position step on the stabilizer. See Figure #9. [caption id="attachment_19505" align="aligncenter" width="800"]
 Figure #9[/caption]
Apply washable fabric glue to the back of the embroidered patch and secure to the stabilizer, taking care to match the outline. Let glue dry and stitch the Appliqué step to complete the piece. See Figure #10.
[caption id="attachment_19506" align="aligncenter" width="800"]
Figure #9[/caption]
Apply washable fabric glue to the back of the embroidered patch and secure to the stabilizer, taking care to match the outline. Let glue dry and stitch the Appliqué step to complete the piece. See Figure #10.
[caption id="attachment_19506" align="aligncenter" width="800"] Figure #10[/caption]
Wash out stabilizer, dry and press. You are ready to attach the Appliqué by stitching it to an item, fusing it with a fusible web product, or you can choose to glue the piece with special glue designed for permanent attachment to fabric or other surfaces. I’m sure you’ll think of many more ways to brighten your world with embroidered appliqué patches! Enjoy!
Figure #10[/caption]
Wash out stabilizer, dry and press. You are ready to attach the Appliqué by stitching it to an item, fusing it with a fusible web product, or you can choose to glue the piece with special glue designed for permanent attachment to fabric or other surfaces. I’m sure you’ll think of many more ways to brighten your world with embroidered appliqué patches! Enjoy!
Related Projects
Stay Connected
* Required fields
Follow Us
- Product Support
- Product Support Assistant
- Terms of Sale
- Product-Registration
- Search Supplies/Accessories
- Ordering & Shipping Information
- Ordering & Account FAQs
- View Order Status
- Warranty & Extended Warranty Information
- Recall Information
- Return Policy
- Security Support Information(Opens in a new tab)
- Contact Brother
