Serger Style T Shirt & Learn the Blind Hem Foot
This month we are featuring a serger project using the Serger Blind Hem Foot. Learn a fast, flat method of constructing a classic T-shirt. The serger makes quick work of stitching together this easy knit garment and the blind hem foot makes a quick and neat looking hem finish.

Featured Foot of the Month
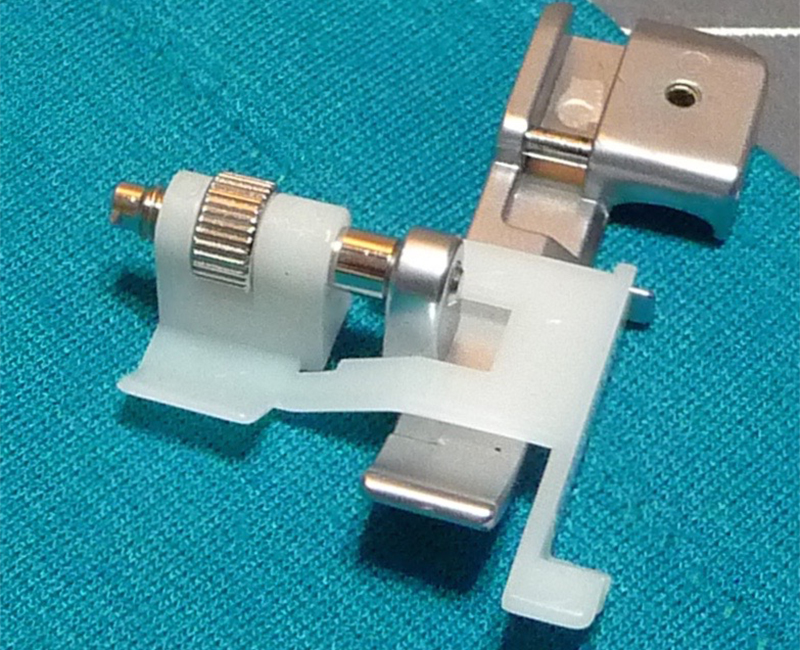
- Blind Hem foot/Blind Stitch foot for Serger Check your serger manual to see if this foot is included with your machine accessories or is available as an option.
Materials and Supplies
- Brother 3/4-thread Serger
with Blind Hem foot, Model 1034D is featured in this project - Serger Manual for your model machine
- Three cones of serger thread to closely match fabric
- Sewing Machine Needle, New, size 70 or 80 as per manual
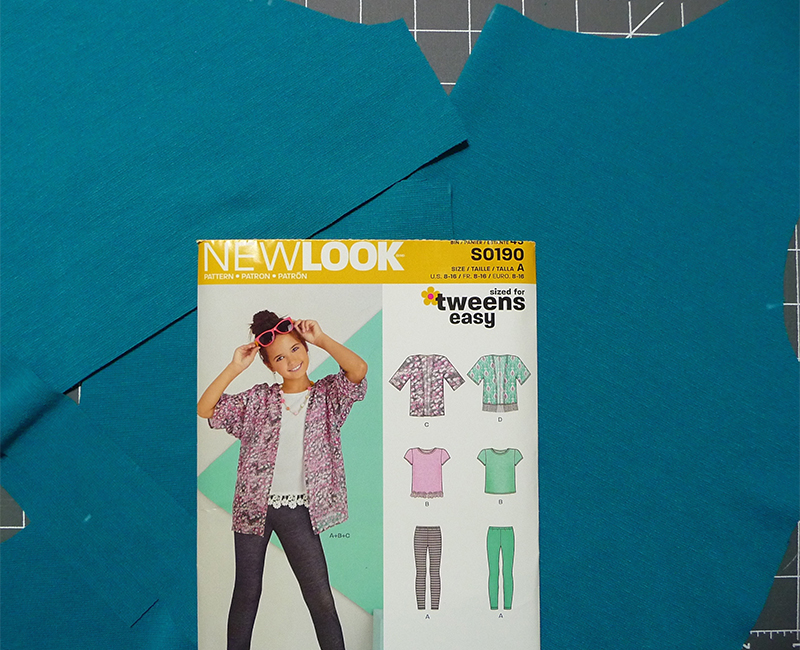
- T-Shirt pattern with separate neckband, I've used New Look pattern #S0190/6445
- Fabric and notions as per pattern
- Basic sewing notions for cutting and sewing
- A wash out marker or pencil
- Ball point pins
Fabric and pattern tips:
- Be sure to follow the pick a knit guide on the pattern you have chosen so your knit has enough stretch. A knit with a little bit of body works best for this technique. This sample features cotton knit with a small percentage of spandex fiber. With lighter weight knits the blind hem stitch will show a bit more and require more tension adjustments.
- Purchase approximately ¼ yard of extra fabric for testing stitches and for adding a deeper hem allowance to sleeve and bottom hem.
- Pre-shrink fabric before cutting and sewing.
- Featured New Look pattern #S0190/6445 is sized for Tweens. Select a similar pattern sized for adults if you choose.
Instructions for Creating the T-Shirt
- Prepare the pattern using the following modifications to make it suitable for this serger method of construction.
- If pattern has curved hems begin by using a ruler to straighten bottom hem of T-shirt front, back, and sleeves. Add to each hem as necessary so hem allowance equals a total depth of 1¼-inches.
Tip: Most T-shirt patterns have a small hem allowance for standard stitching. A wider, straight hem is better when using the blind hem foot. You can leave the pattern as is when sewing a standard hem with a sewing machine.
- Check all seam allowances against the pattern and trim any excess so that each seam has a ¼-inch allowance. This pattern has a seam allowance of 5/8-inch on all major seams with 3/8-inch allowance at the neck. Be sure all corresponding seams are trimmed to ¼-inch.
Tip: Using the left needle on a serger produces a seam that is very close to ¼-inch wide. While it is possible to trim excess seam allowance as you serge, trimming the pattern beforehand makes your pattern “serger ready” and speeds up the entire construction process. As you construct the T-shirt, serge each seam by running the fabric layers through the machine with the serger blades barely skimming the raw edge.
- Cut all required pieces using with nap layout. Mark all notches and other match marks with a wash out marker in place of cutting or snipping notches.
- Set up serger with only one needle, in the left position. Thread machine for a three thread wide stitch.
Begin with standard settings for a balanced three-thread stitch. See picture below.
- Make note of the balanced stitch settings at the beginning so you can refer to them when it is time to serge your actual T-shirt seams.
- Prepare to hem sleeves and bottom hems as follows: Fold and thoroughly press 1¼-inch deep hems on T-shirt front, back, and both sleeves, pressing to the wrong side as you would for a normal hem. See picture below.
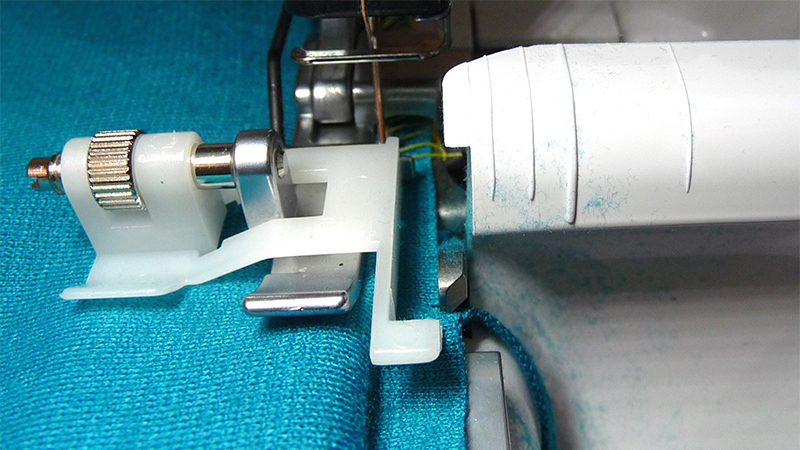
- Set stitch length for the longest possible. Replace standard serger foot with the blind hem foot. In this example the serger is set for a tension similar to a flatlock serger stitch. This type of setting changes the tension so the blind hem stitch can be pulled flat. Tension numbers will vary slightly but in general the needle tension is very loose, the upper looper is at an average setting, and the lower looper is relatively tight. Remember, we don't have the right needle in currently. See picture below for an example.

- In this example the left needle is at zero, the upper looper is at four, and the lower looper is at seven.
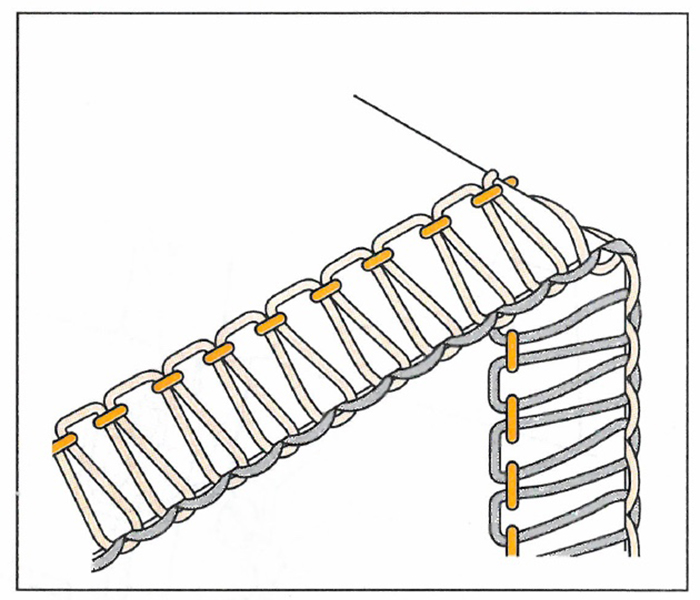
- Cut a remnant of fabric to use for testing the stitch by folding and pressing the fabric as you did in step 3. To stitch the blind hem, fold the fabric a second time, this time folding so that the outside of the hem touches the right side of the shirt, with a scant ¼-inch of the raw edge extending on the right. Place pins perpendicular to the hem with the wrong side of the fabric facing up. Do not press this second fold or it may leave a crease on the right side of your fabric. To stitch the hem, adjust the wheel on the blind hem foot so the adjustable guide follows the fold, and the needle barely pierces the folded edge. See picture below.
- On the side facing up, the stitch looks balanced. See picture below

- On the opposite side the needle thread will form “V” shaped stitches. See picture below.
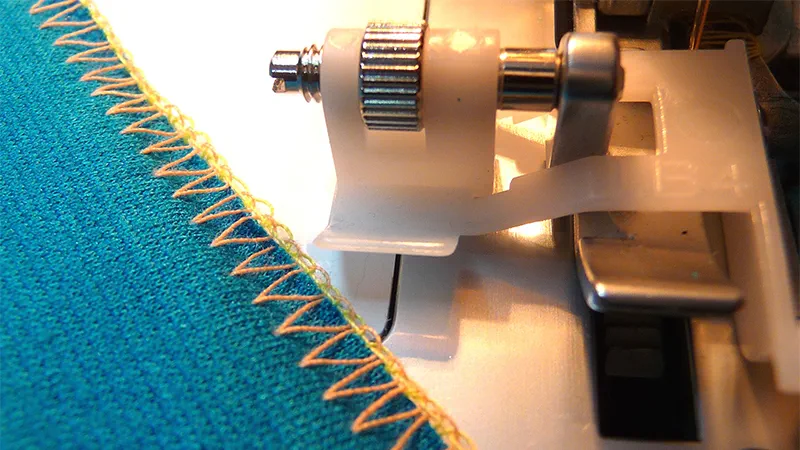
Note: These examples are stitched with contrast thread for better visibility.
Tip: Moving the guide closer to the blades will allow the needle to catch more fabric. Moving the guide further away from the blades will allow the needle to catch less fabric. Have a pin catcher handy and make absolutely sure your pins are removed a good distance before you reach the serger blades.
- Stitch T-shirt hems using the method described above, watching the guide as you stitch and slightly skimming the fabric that extends beyond the blades. Without stretching, take care to smooth the fabric behind the foot as you stitch.
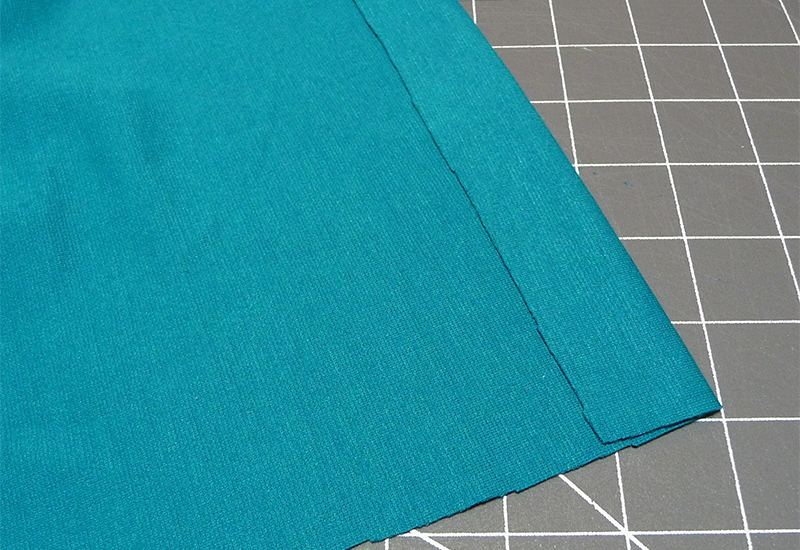
- After stitching, open out hem and pull gently to flatten the stitch and smooth the fabric flat. Press hem from the right side. See pictures below.

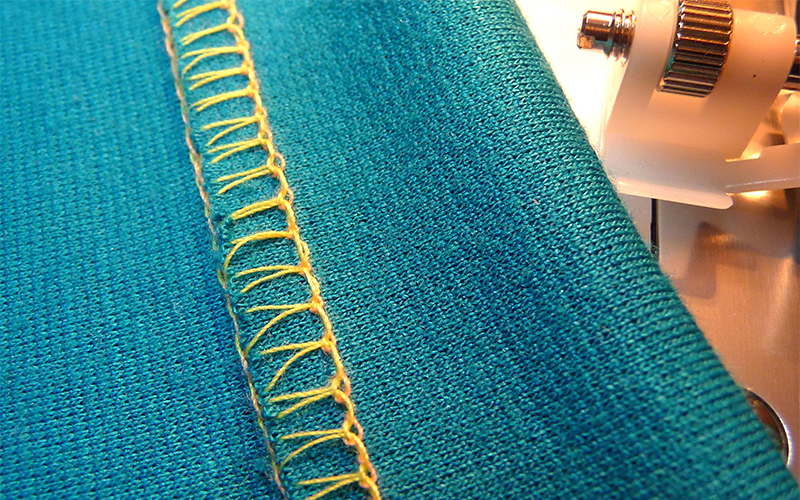
Note: These examples are stitched with contrast thread for better visibility.
- To finish the shirt, set up serger for a three thread, balanced stitch, using the left needle for a seam approximately ¼-inch wide.
- To finish, serge T-shirt seams in the order listed below, serging all seams with right sides together.
- Serge each shoulder seam and press toward back.
- Serge center back seam for neckband. Press flat in any direction. Fold band in half with wrong sides together and press lightly.
- Serge band to neckline, matching all pattern marks and stretching band to fit.
- Serge sleeves into armholes. Press seam away from shoulder.
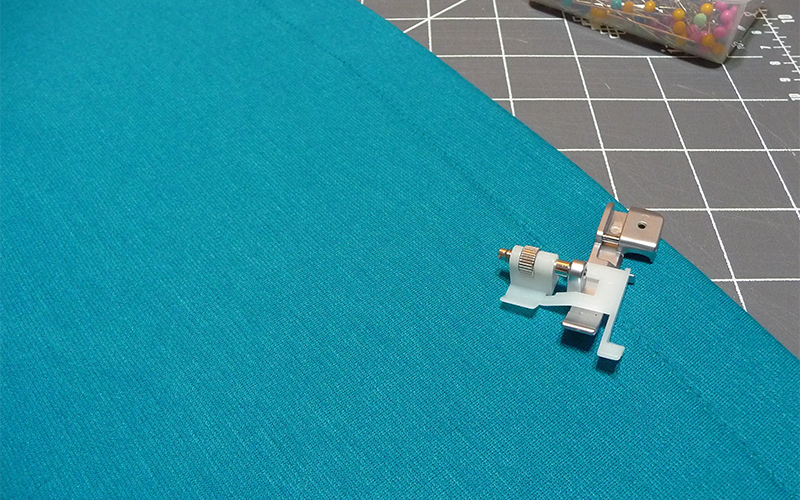
- Serge side seams from one hemmed edge to the other. See below picture.

Tip: Be sure to carefully match the armhole seams and hems. Use ballpoint pins or special sewing clips to keep the edges together. If using pins, you will want to pin perpendicular to the seam on the top side. Remember, it is very important to remove all pins before you approach the blade area on the serger. You can also consider using special wash out fabric glue or tape to secure edges together as you stitch.
- Press hems toward back of garment. Tack down loose seams at sleeve and bottom hemline using a few small hand stitches to keep them flat. You are finished! Enjoy!
-
The New Look pattern is a product of Simplicity Pattern Company Inc., and Brother International Corporation makes no representations or warranties regarding such products.
Related Projects
Stay Connected
* Required fields