Accessory Spotlight: The MuVit Dual Feed Foot
Brother Sews Blogger
Getting to know the MuVit Dual Feed Foot This Accessory Spotlight series is all about the wonders of the Brother MuVit foot. By way of review, this is a unique specialty foot designed to enhance the feeding of fabric layers. It is included with select Brother machines and available as an option for several others. This foot could be considered a close cousin to the walking foot, but it really is quite unique! The MuVit foot is a digitally controlled, motor driven even feed foot designed for powerful, precision sewing on a wide range of fabrics and fabric combinations. Think of it as a walking foot with superpowers! Visit brother-usa.com
to learn more about machines compatible with the MuVit foot and contact your local Brother dealer for a list of current models compatible with this unique accessory. In part one I covered the basics of this foot. In part two I talked about accessory option SA206,
the Dual Feed Quilting Guide set for the Dual Feed MuVit foot. Here in part three we’ll explore the versatility of yet another “snap on” sole for the MuVit foot, SA204,
the Ditch Quilting foot. Note: Machine featured in this tutorial is the Brother XP1 Luminaire, but you can use the same general instructions for any Brother machine with Dual Feed MuVit foot capability.
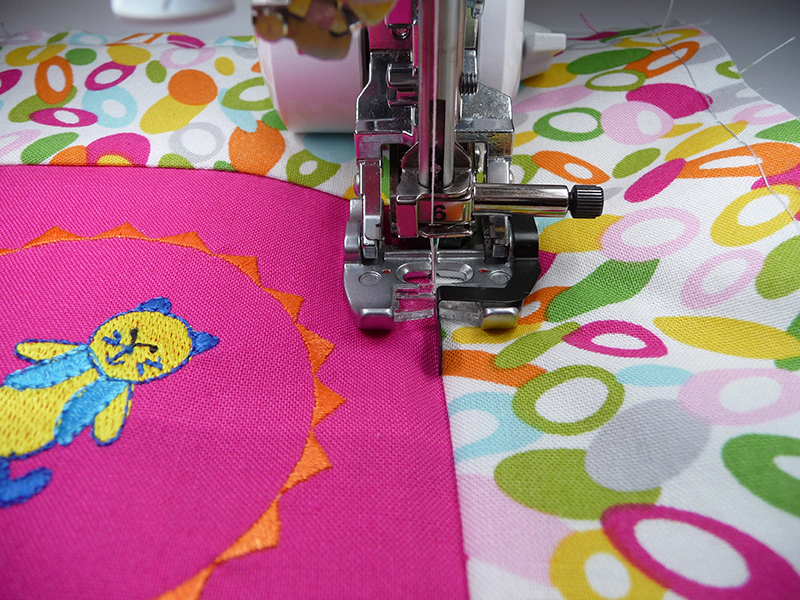 Figure #1[/caption]
Lest you think this foot is only for stitching directly in the ditches, think again! One of my favorite ways to secure layers together with quilting is to stitch close to, but not in the well of the seam. Using the blade as a guide you can sew along the seam and have your line of stitching form very close to the seam itself. In effect, you are top stitching. With this method your stitches are very even and stunningly accurate! Here are the steps:
• Select a straight stitch. In this example I’ve selected the Hand Look Quilting Stitch from the quilting menu.
• Line up the guide so it is directly on top of the seam line.
• Next, shift the stitch so it sews at a very close distance to the seam. You can shift the stitch to the right or the left as you prefer. How to you shift the stitch? Depending on your machine, this is done either by using the width key to move the position of the needle or by using the Left/right shift key.
• Sew with the guide following the seam. In the example below I shifted the stitch to sew on the sashing strips between my blocks. See Figure #2.
[caption id="attachment_24764" align="aligncenter" width="800"]
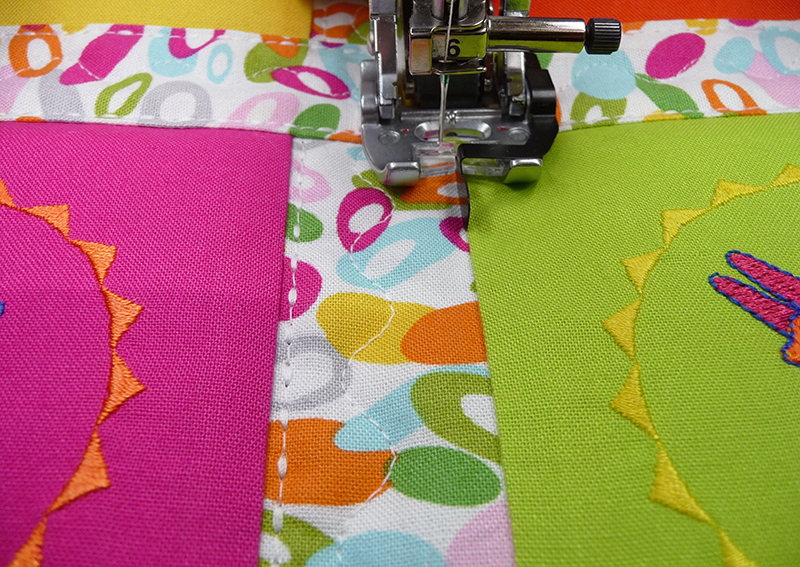 Figure #2[/caption]
But wait, there’s more! You can use the Dual Feed MuVit foot for more than just straight stitches! When the foot is plugged into the machine you can see which stitches are accessible since all others are greyed out. Once again, line up the foot so the guide runs directly along the seam. Tip: Use a small piece of tear away stabilizer under the foot at the beginning of your stitching. This gives the foot something to travel on before it reaches the fabric. See Figure #3.
[caption id="attachment_24765" align="aligncenter" width="800"]
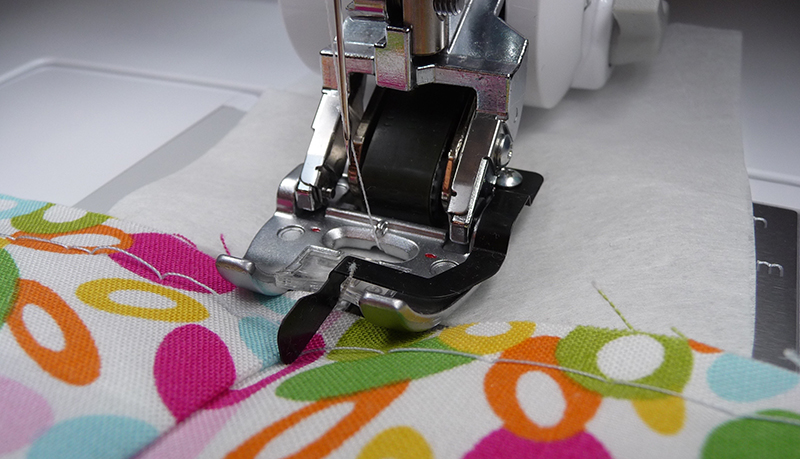 Figure #3[/caption]
Select an accessible stitch that swings from right to left. Stitches shown below in Figure #4 are ideal for quilting through all your layers while catching each side of your patchwork block. The featured stitches shown below sew down the center, stitching in the ditch, and
then they travel on both the right and left sides. This creates a decorative effect while quilting the layers together.
[caption id="attachment_24766" align="aligncenter" width="757"]
 Figure #4[/caption]
Sewing the final seam to anchor binding is another opportunity to make use of the Dual Feed foot and the Ditch Quilting accessory. The even feeding of the foot helps tame the bias, and the guide keeps you on track while you seek to sew a straight line. In the example below I sewed my binding to the back side of a quilted piece, wrapped it to the front, shifted the needle to the right of the center, and stitched it in place as a last step. There are of course other methods for sewing binding but this gives you an idea of how useful it is to have the guide follow an edge so your line of stitching comes out perfect. See Figure #5a and Figure #5b.
[caption id="attachment_24767" align="aligncenter" width="800"]
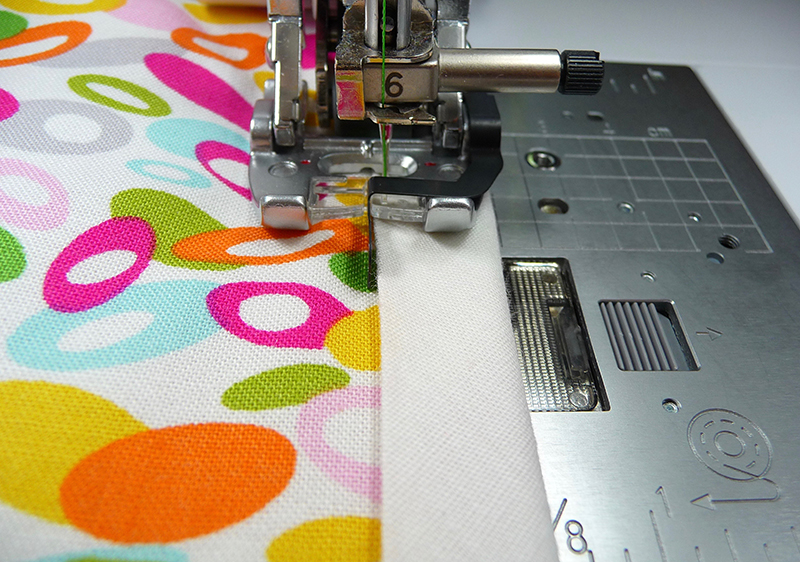 Figure #5a[/caption]
[caption id="attachment_24768" align="aligncenter" width="800"]
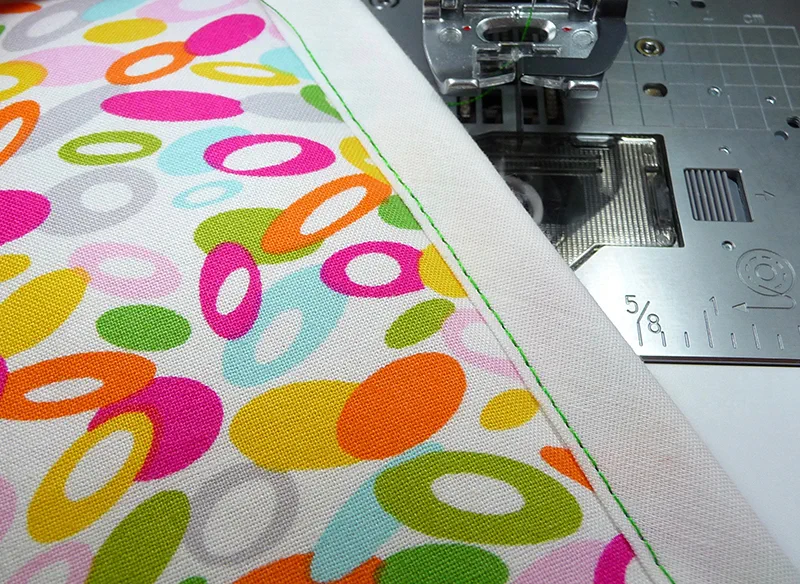 Figure #5b[/caption]
Quilting isn’t the only good use for the Stitch in the Ditch attachment. Garment makers will appreciate using this attachment for anchoring waistbands in place, understitching facings, accurately stitching ribbons and trims, etc. No doubt, there are lots of sewing situations where this attachment will come in handy for quilting, sewing garments, crafts, and home décor too!

Getting to know the MuVit Dual Feed Foot This Accessory Spotlight series is all about the wonders of the Brother MuVit foot. By way of review, this is a unique specialty foot designed to enhance the feeding of fabric layers. It is included with select Brother machines and available as an option for several others. This foot could be considered a close cousin to the walking foot, but it really is quite unique! The MuVit foot is a digitally controlled, motor driven even feed foot designed for powerful, precision sewing on a wide range of fabrics and fabric combinations. Think of it as a walking foot with superpowers! Visit brother-usa.com
to learn more about machines compatible with the MuVit foot and contact your local Brother dealer for a list of current models compatible with this unique accessory. In part one I covered the basics of this foot. In part two I talked about accessory option SA206,
the Dual Feed Quilting Guide set for the Dual Feed MuVit foot. Here in part three we’ll explore the versatility of yet another “snap on” sole for the MuVit foot, SA204,
the Ditch Quilting foot. Note: Machine featured in this tutorial is the Brother XP1 Luminaire, but you can use the same general instructions for any Brother machine with Dual Feed MuVit foot capability.
All About the Stitch in the Ditch Dual Feed Foot
Popular with quilters, this foot has a long, prominent metal blade running down the precise center of the foot. When used with the needle set for a center position, the blade can serve as a guide for stitching in the ditch, also known as the “well” of the seam. In simple terms the ditch is the exact spot where two pieces of fabric meet once they have been sewn together into a seam. Depending on the way a seam is sewn (perfectly straight seams are most forgiving), simply sew with the blade following the seam and the straight stitches get buried where the two pieces are joined, virtually disappearing in the seam. See Figure #1 for an example of straight stitching in the ditch. [caption id="attachment_24763" align="aligncenter" width="800"] Figure #1[/caption]
Lest you think this foot is only for stitching directly in the ditches, think again! One of my favorite ways to secure layers together with quilting is to stitch close to, but not in the well of the seam. Using the blade as a guide you can sew along the seam and have your line of stitching form very close to the seam itself. In effect, you are top stitching. With this method your stitches are very even and stunningly accurate! Here are the steps:
• Select a straight stitch. In this example I’ve selected the Hand Look Quilting Stitch from the quilting menu.
• Line up the guide so it is directly on top of the seam line.
• Next, shift the stitch so it sews at a very close distance to the seam. You can shift the stitch to the right or the left as you prefer. How to you shift the stitch? Depending on your machine, this is done either by using the width key to move the position of the needle or by using the Left/right shift key.
• Sew with the guide following the seam. In the example below I shifted the stitch to sew on the sashing strips between my blocks. See Figure #2.
[caption id="attachment_24764" align="aligncenter" width="800"]
 Figure #2[/caption]
But wait, there’s more! You can use the Dual Feed MuVit foot for more than just straight stitches! When the foot is plugged into the machine you can see which stitches are accessible since all others are greyed out. Once again, line up the foot so the guide runs directly along the seam. Tip: Use a small piece of tear away stabilizer under the foot at the beginning of your stitching. This gives the foot something to travel on before it reaches the fabric. See Figure #3.
[caption id="attachment_24765" align="aligncenter" width="800"]
 Figure #3[/caption]
Select an accessible stitch that swings from right to left. Stitches shown below in Figure #4 are ideal for quilting through all your layers while catching each side of your patchwork block. The featured stitches shown below sew down the center, stitching in the ditch, and
then they travel on both the right and left sides. This creates a decorative effect while quilting the layers together.
[caption id="attachment_24766" align="aligncenter" width="757"]
 Figure #4[/caption]
Sewing the final seam to anchor binding is another opportunity to make use of the Dual Feed foot and the Ditch Quilting accessory. The even feeding of the foot helps tame the bias, and the guide keeps you on track while you seek to sew a straight line. In the example below I sewed my binding to the back side of a quilted piece, wrapped it to the front, shifted the needle to the right of the center, and stitched it in place as a last step. There are of course other methods for sewing binding but this gives you an idea of how useful it is to have the guide follow an edge so your line of stitching comes out perfect. See Figure #5a and Figure #5b.
[caption id="attachment_24767" align="aligncenter" width="800"]
 Figure #5a[/caption]
[caption id="attachment_24768" align="aligncenter" width="800"]
 Figure #5b[/caption]
Quilting isn’t the only good use for the Stitch in the Ditch attachment. Garment makers will appreciate using this attachment for anchoring waistbands in place, understitching facings, accurately stitching ribbons and trims, etc. No doubt, there are lots of sewing situations where this attachment will come in handy for quilting, sewing garments, crafts, and home décor too!


