Button Neckline Pattern Hack
I love taking patterns I already own and recreating them with a new twist. It’s a quick and easy way to enhance my wardrobe. I’ve created several neckline hacks for this sweatshirt pattern, and today I have a button neckline hack you can use with any drop shoulder pattern. Maybe you have a pattern already in your stash that’s perfect for this pattern hack!
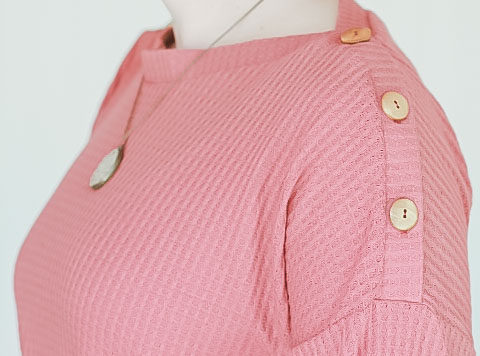
Don’t you love how this looks? The buttons are actually functional as well, so you can create an assortment of different looks by adjusting the buttons.

This is actually a pretty easy sewing hack, and if you can sew a button you can make this shirt. I created a button tutorial a few months ago that you can see here : http://blog.brothersews.com/sewing/make-buttonholes-and-sew-buttons/
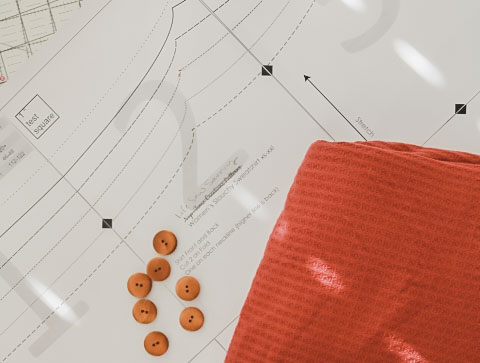
Button Shoulder Pattern Hack Supplies:
- Drop Shoulder Shirt Pattern of your choice
- I used my Slouchy Sweatshirt Pattern Here
- I used my Slouchy Sweatshirt Pattern Here
- Sweatshirt or waffle fabric
- Fusible knit interfacing {it needs to have a bit of stretch}
- 1” buttons (6-8)
- Brother Sewing Machine
with buttonhole foot and button sewing attachment - Brother Serger
for sewing knit fabric
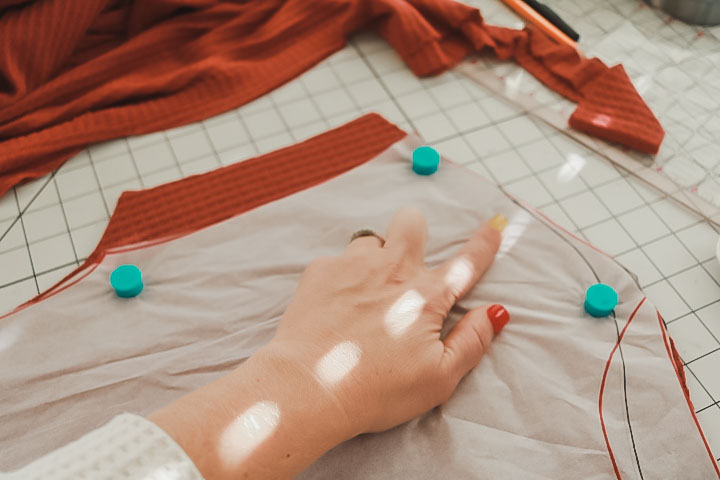
I traced my size onto tissue paper. Here is what it looks like unedited. You can see what the drop shoulder shape looks like here. Now, let’s change it up just a bit to make our button neckline.

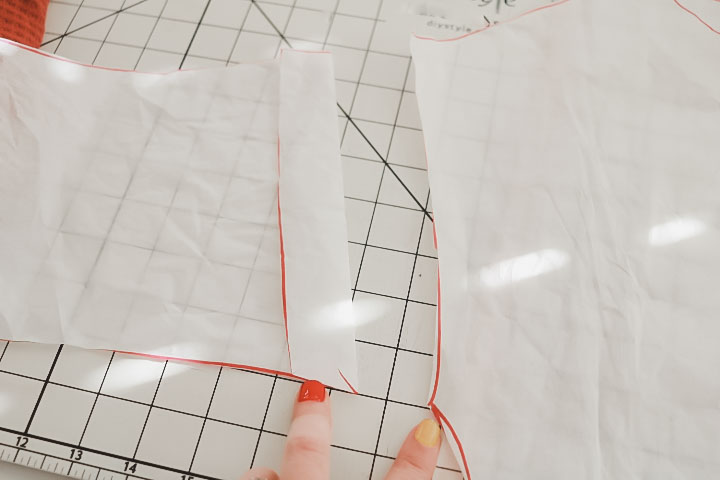
I wanted the neckline to be a bit wider so I could add more buttons, so I lengthened the shoulder by 1” and then took 1” off the sleeve. You will need to adjust the curve just a bit where the arm and body meet.
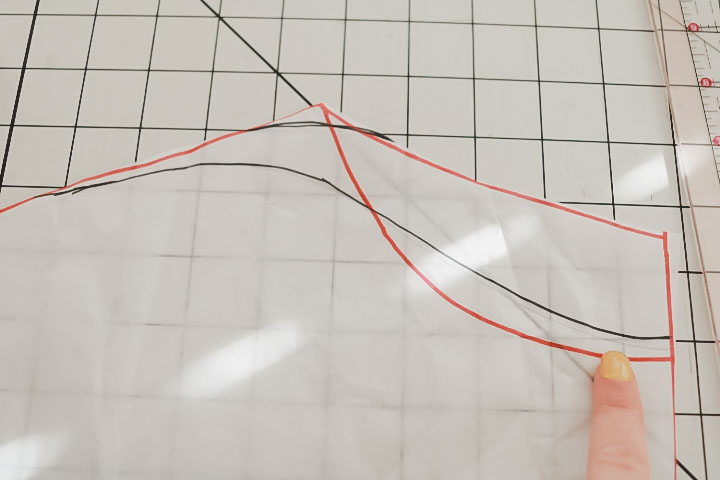
Now let’s adjust the neckline. This pattern was made to just have a neck band, so the curve needs to be adjusted for this look. The red lines show the original front and back neckline and the black shows the new lines. On the back I curved the neck and shoulder apex, and on the front I eliminated all sharp lines. The button binding needs to flow smoothly.
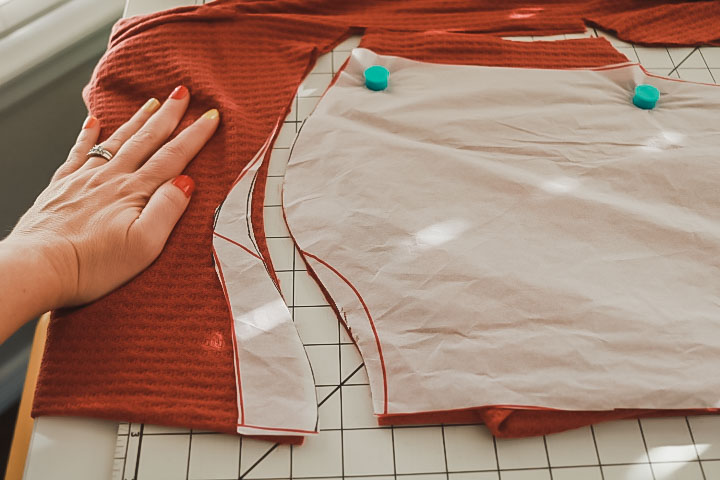
Here is my back cut from fabric and you can see the shoulder extension as well.
And here is how the front curved neckline looks.
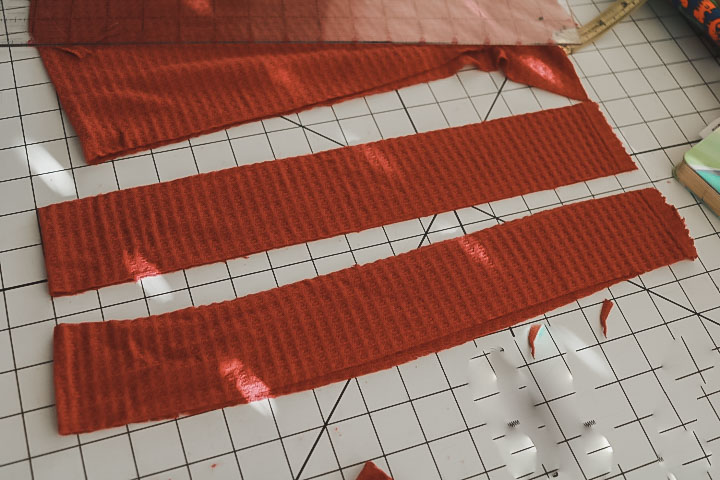
Cut button facings with the stretch going the long way, they should be 2.5” wide.
Make sure the facings are long enough to cover the entire curved neckline. Cut two, one for the front and one for the back.
Cut the fusible interfacing to match the facings.
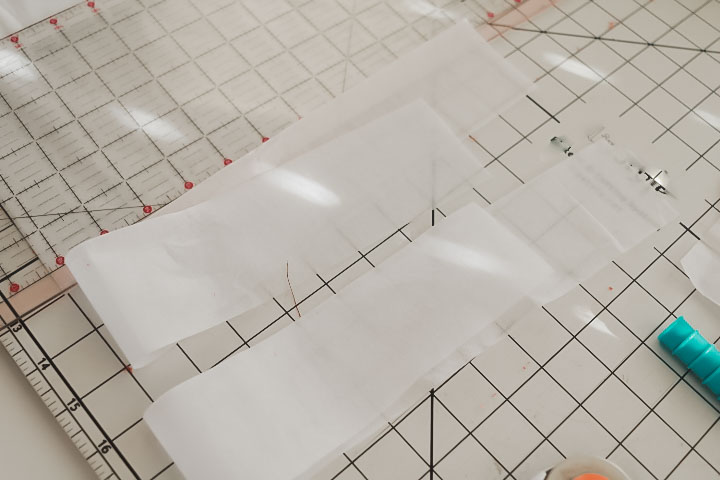
Fuse the interfacing to the back side of the facings.
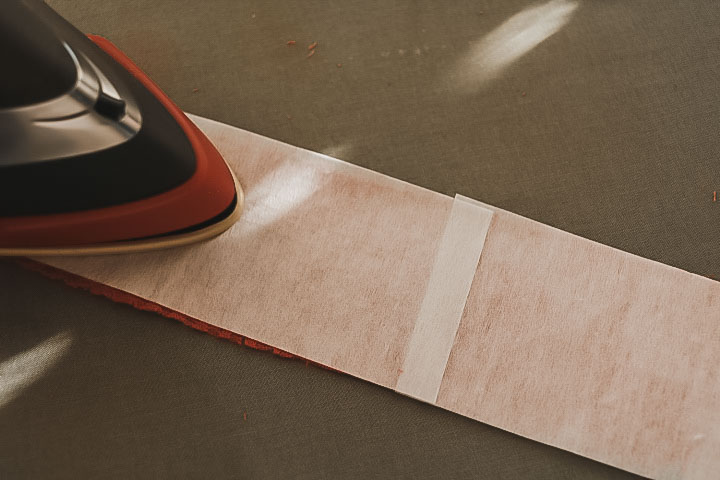
Check to make sure the fabric facings still have a bit of stretch. If they are too stiff it will not lay nicely on the neckline.
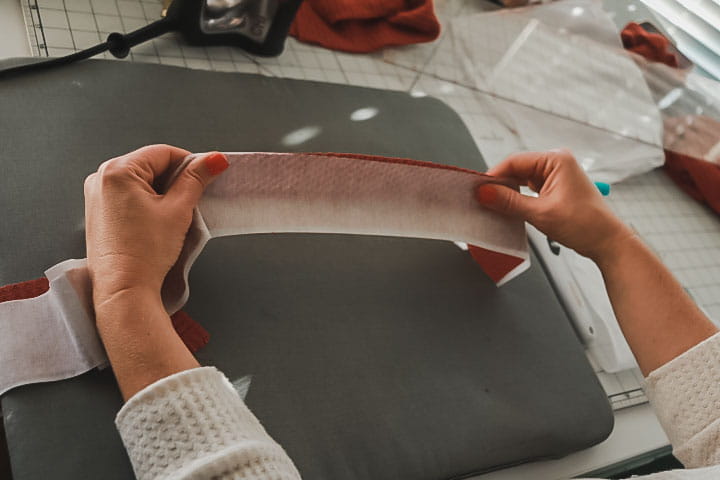
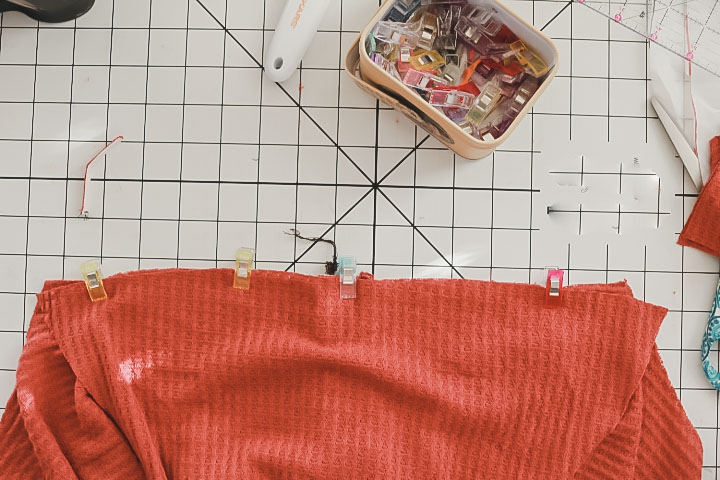
Fold the facing in half with the long sides together and the right sides out. Pin
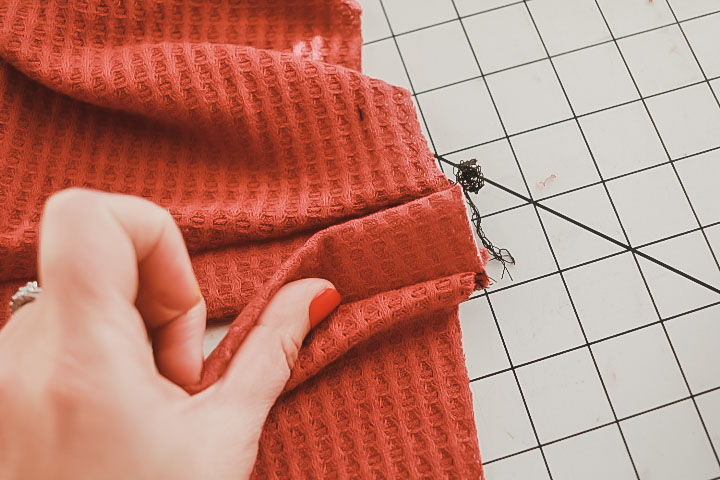
or clip the facing to the curved neckline back and front. Sew with your serger and then press the seam allowance over to the shirt side.
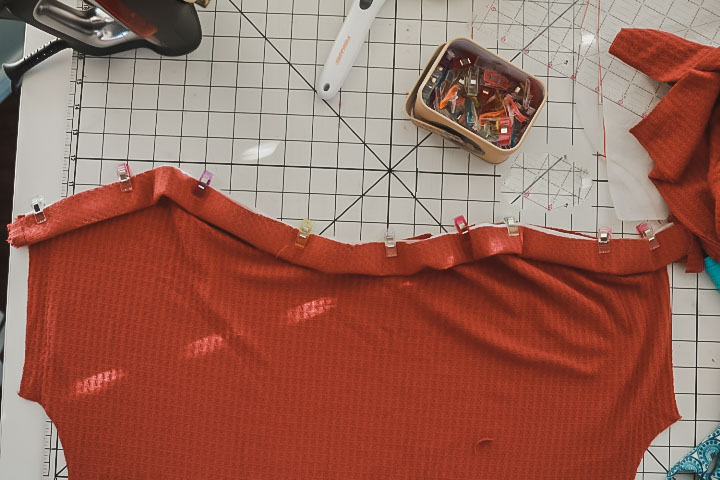
Place the facings one on top of each other with the front of the shirt on top. Baste the facings together.
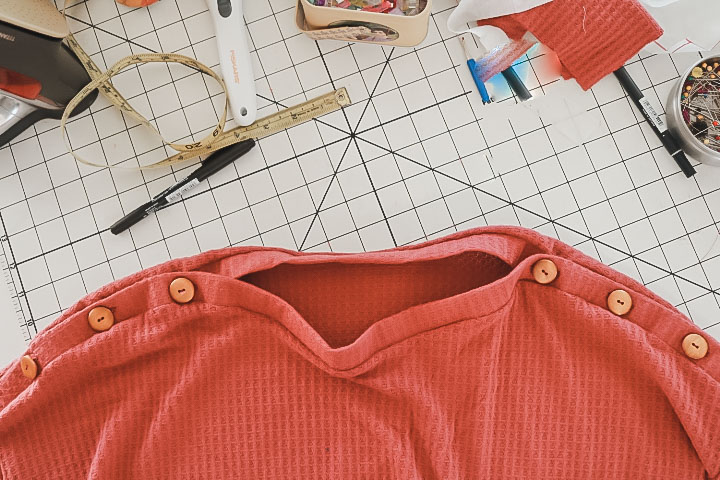
Attach the sleeves to the shoulder edge at this point in the process. This will hold the neck together while you add the buttons.
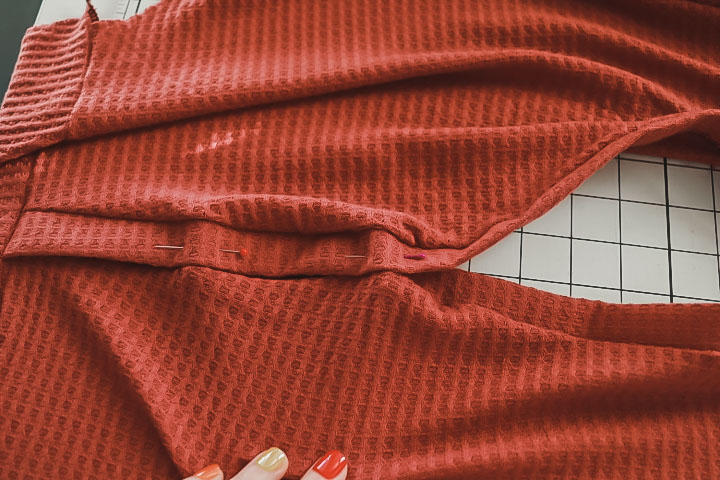
Pin the neck facings together and then lay out the buttons to see what you want. There should be a couple of inches between each one. You can put it over your head to measure how far you want the buttons to come in towards your neck.
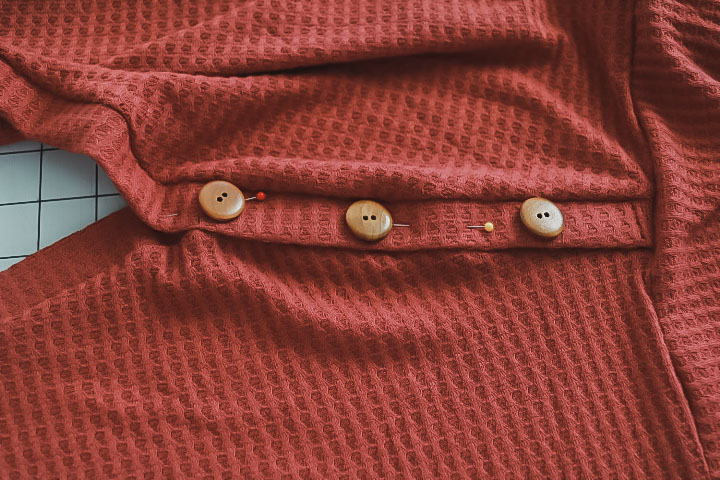
Mark the button placement on each side of the shoulder.
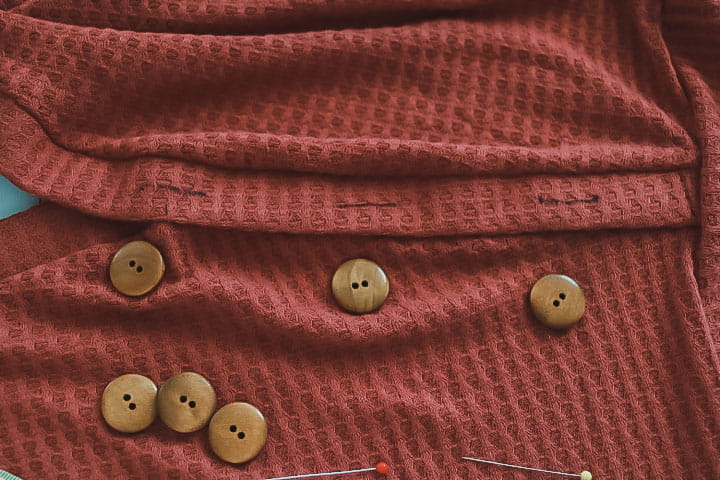
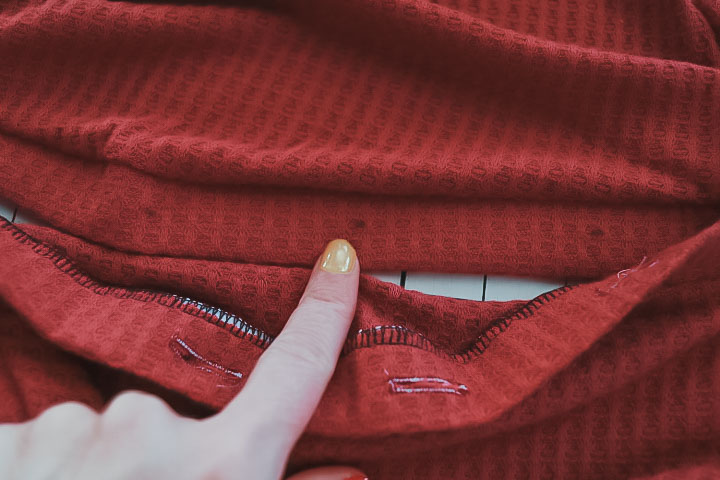
Sew button holes on each of the markings on the top facing. Use the easy buttonhole foot on your sewing machine to make button holes simple. Lay the facing one on top of the other and mark through the center to show where to sew the buttons.
Repeat with the other shoulder.
Then sit back and enjoy your super awesome button shoulders.
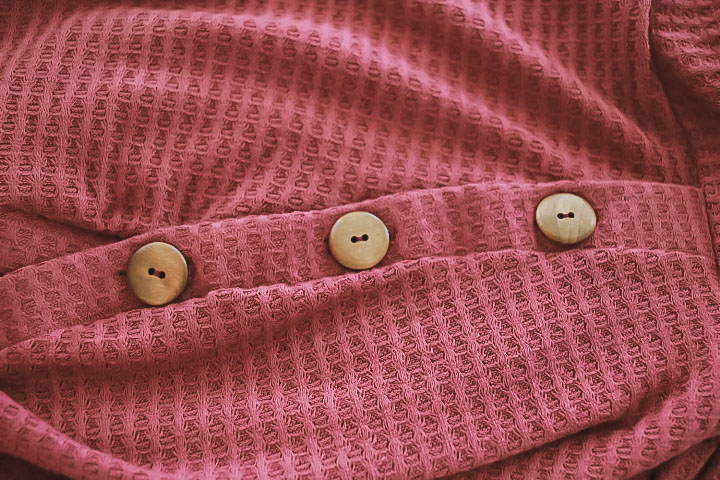
Super cute right? The waffle fabric is just perfection, but so many other fabrics would be great for this pattern hack too.
Does this inspire you to hack one of your favorite patterns? I hope so! I love recreating patterns and I hope you will give it a chance too.
 CLICK HERE FOR PDF!
Tags
Shop this Project
When inspiration strikes, Brother has you covered! The products in this stylish project are available for purchase so you can click, shop, and get to sewing!
Sewing Machines
Related Projects
Stay Connected
* Required fields