Children's Custom Hanger Cover Picot Foot
It’s so easy to take a plain hanger and give it special treatment with a custom stitched cover. You can use remnants from a recent sewing project and make a cover to match most any garment. For this project, we covered a child size hanger and gave it a frilly finish using the Brother Foot-of-the-month, the Narrow Hem Picot Foot. This foot makes it easy to sew a narrow hem with decorative effects.
 2. Use the paper pattern to cut the following:
• One piece of fabric for front of the hanger.
• One piece of fabric for back of the hanger.
• Cut two pieces of fusible fleece for the front and back hanger, trimming away ½-inch from all outside edges to keep fleece out of the seam allowance.
3. Fuse fleece to wrong side of each of the hanger pieces.
2. Use the paper pattern to cut the following:
• One piece of fabric for front of the hanger.
• One piece of fabric for back of the hanger.
• Cut two pieces of fusible fleece for the front and back hanger, trimming away ½-inch from all outside edges to keep fleece out of the seam allowance.
3. Fuse fleece to wrong side of each of the hanger pieces.


 6. To help guide the beginning of the strip into the foot, stitch close to the raw edge for approximately an inch and leave long thread tails at the beginning.
 7. With thread tails at the back, guide the fabric edge into the scroll on the foot, grasping the thread tails with your opposite hand. Feed fabric into the scroll, folding the fabric a scant ¼-inch and holding the fabric edge slightly up at an angle.
 8. Begin stitching and you will find that the fabric is carried into the scroll, the raw edge is rolled under, and the zig zag stitch forms over the rolled hem.


Materials and Supplies
- Brother Sewing Machine(Opens in a new tab)
- SA165 – Picot Foot(Opens in a new tab)
- SA147 – Open Toe Foot(Opens in a new tab)
- Basic hanger
- Paper for pattern
- Two pieces of light weight solid cotton cut to fit pattern size
- Two strips of main fabric (To determine size measure the bottom edge of your custom hanger cover pattern, double this measurement and record number as the length. Cut each strip to equal 1½-inches wide X recorded measurement for length.)
- Lightweight fusible batting – two pieces cut to fit pattern size
- Remnants of printed fabric
- Sew-able fusible webbing
- One piece of ribbon, ¼-inch wide X 12-inches long
Steps to Create Hanger Cover
1. Trace hanger onto a piece of paper, adding two inches along the bottom and a ½-inch seam allowance around outside edges.
2. Use the paper pattern to cut the following:
• One piece of fabric for front of the hanger.
• One piece of fabric for back of the hanger.
• Cut two pieces of fusible fleece for the front and back hanger, trimming away ½-inch from all outside edges to keep fleece out of the seam allowance.
3. Fuse fleece to wrong side of each of the hanger pieces.
Open Toe Foot
4. Fuse webbing to wrong side of appliqué fabric using manufacturer’s directions. Cut out appliqué pieces and fuse to front of hanger cover. Attach the open toe foot to the machine and use a zig zag stitch to sew all around appliqué pieces.
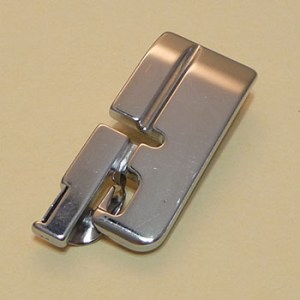
Picot Foot
5. Prepare to hem the ruffle strips using the Picot foot: • Attach the foot to the machine. • Select a medium zig zag stitch with a tight upper tension.
6. To help guide the beginning of the strip into the foot, stitch close to the raw edge for approximately an inch and leave long thread tails at the beginning.
7. With thread tails at the back, guide the fabric edge into the scroll on the foot, grasping the thread tails with your opposite hand. Feed fabric into the scroll, folding the fabric a scant ¼-inch and holding the fabric edge slightly up at an angle.
8. Begin stitching and you will find that the fabric is carried into the scroll, the raw edge is rolled under, and the zig zag stitch forms over the rolled hem.
Gathering
9. Change to the standard sewing foot. Run rows of gathering stitches ¼-inch and ⅝-inch from the raw edge opposite the hem on each of the fabric strips. Gather one strip to fit the bottom edge of the front and one to fit the bottom edge of the back cover. Pin and sew ruffle to each piece with right sides together, using a ½-inch seam allowance.
Finishing
10. Serge finish or zig zag raw edges of ruffle seams. 11. Place the front and back hanger pieces right sides together with all raw edges matching. Mark off a 1-inch opening at the top a of the hanger cover. Sew the two pieces together using a ½-inch seam allowance, leaving the opening at the center of the top edge. Clip curves and trim excess seam allowance. Serge finish or zig zag raw edges of seams. Slip the cover over the hanger. Tie the narrow ribbon at the top and enjoy!More about the Picot Foot: The Picot Foot is a narrow hem foot with a deep groove on the underside of the foot. This foot is designed to be used with a zig zag stitch. A medium width zig zag with a tight upper tension produces a rolled hem with a decorative effect known as a Picot Stitch. The scroll located on the foot works as a funnel to roll under the raw edge of the fabric as the stitch is formed. It is the perfect foot to use for ruffles and frills, especially when you want the stitches to prominently show. Using a thread that contrasts with the fabric makes this stitch decorative and functional at the same time. Please see photos below for detailed photos of the foot and stitch.
Related Projects
Stay Connected
* Required fields