Custom Embroidered Yarn Scarf
Have you ever come across a beautiful yarn, but don’t have the time to crochet or knit? That’s me all the way! I love to crochet, but a small scarf or custom trim on a jacket is all I have time for these days. After looking through the embroidery fills on THE Dream Machine
and the Luminaire XP1,
I decide to try this as a fast way to utilize these beautiful yarns.

Supplies:
- Yarn
- Embroidery thread
- SA540
Stabilizer Roll, lightweight, water soluble - Water topper Embroidery Stabilizer
- I used my Brother Luminaire XP1
- Hoop the wash-away embroidery stabilizer (SA540). Place the plastic embroidery grid marker onto the hoop. Use the grid as a guide for the yarn, as the grid shows the maximum space the embroidery can fill in that particular hoop.

- Place the yarn onto the stabilizer in the hoop, taking care to stay within the grid marks. This is where your creativity comes into play 😊 You can layer the yarn in an unorganized spaghetti style or use a grid and layer straight lines.
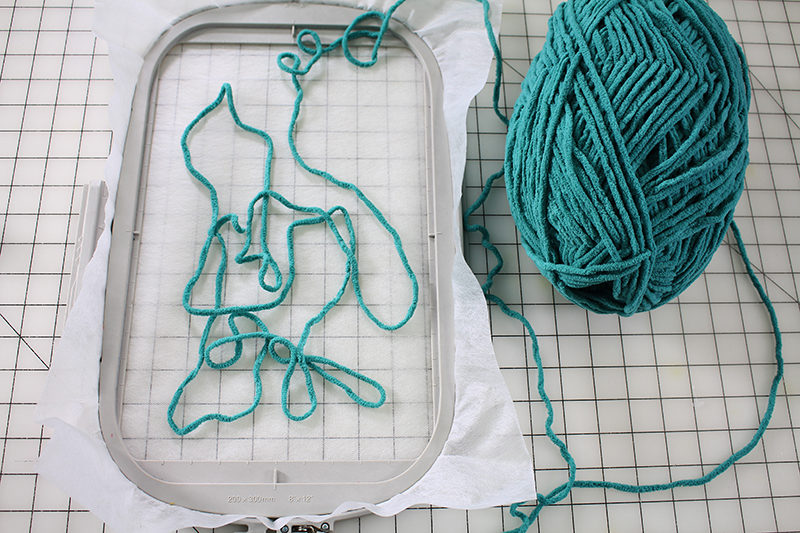

- As you can see, I went with the messy design route! I decided to start the yarn design at the top of the hoop and end at the bottom of the hoop; I didn’t want to cut the yarn, so I let it hang over the bottom edge.

- Place the plastic grid back onto the hoop and double check that the yarn is within the embroidery area.

- Cover the yarn with water topper stabilizer.

- You can tape the water topper stabilizer to the hoop or use the basting stitch to hold the stabilizer in place.

- Place the hoop onto the machine and click on My Design Center.

- Choose the embroidery hoop size you will be using.


- Click on this icon.

- Traditional stippling will not work for this project because the threads do not cross. The threads need to cross in order to keep the yarn together. Instead, click on the icon to the right of the stippling to open the additional embroidery fills.

- Choose a design like boxes, circles, diamonds, etc.

- Click OK. Touch the screen inside the hooping area.


- Turn the design into Embroidery. Click on Edit and click on the Basting Stitch.

- Keep an eye on the water topper stabilizer as the basting stitch works its way around the hoop. Once the basting stitch holds the water topper in place, you are ready to embroider.


- When the embroidery is finished, remove the stabilizer and embroidered yarn from the hoop. Do not cut or wash-away the stabilizer yet, instead treat the entire piece like fabric.
- Hoop another piece of wash-away embroidery stabilizer. Use the plastic grid to line up the previous embroidery to the edge of the new embroidery.


- Once the stabilizer is in place, fill the hoop with yarn the same way you did with the first hooping. Cover the yarn with water topper stabilizer and insert the hoop into the embroidery machine. Embroider the same design with basting stitch.

- Continue to add yarn panels until your fabric is long enough for your project. I am going with a simple scarf, which needed 3 hoopings in a straight line.

- When you are finished embroidering the yarn panels, trim around the edges of the stabilizer.

- Rinse away the wash-away stabilizer.
 That’s it! After the yarn dries, use it as fabric or if you made a scarf, you are ready to go.

 I would love to see how your custom fabric turns out and what you use it for. Share your photos on social media and be sure to tag #angelawolf #brothersews
Cheers,
Angela
I would love to see how your custom fabric turns out and what you use it for. Share your photos on social media and be sure to tag #angelawolf #brothersews
Cheers,
Angela

Related Projects
Stay Connected
* Required fields