Learn how to upcycle an old or oversized sweatshirt into a stylish DIY crop top
-Brother Sews Blogger
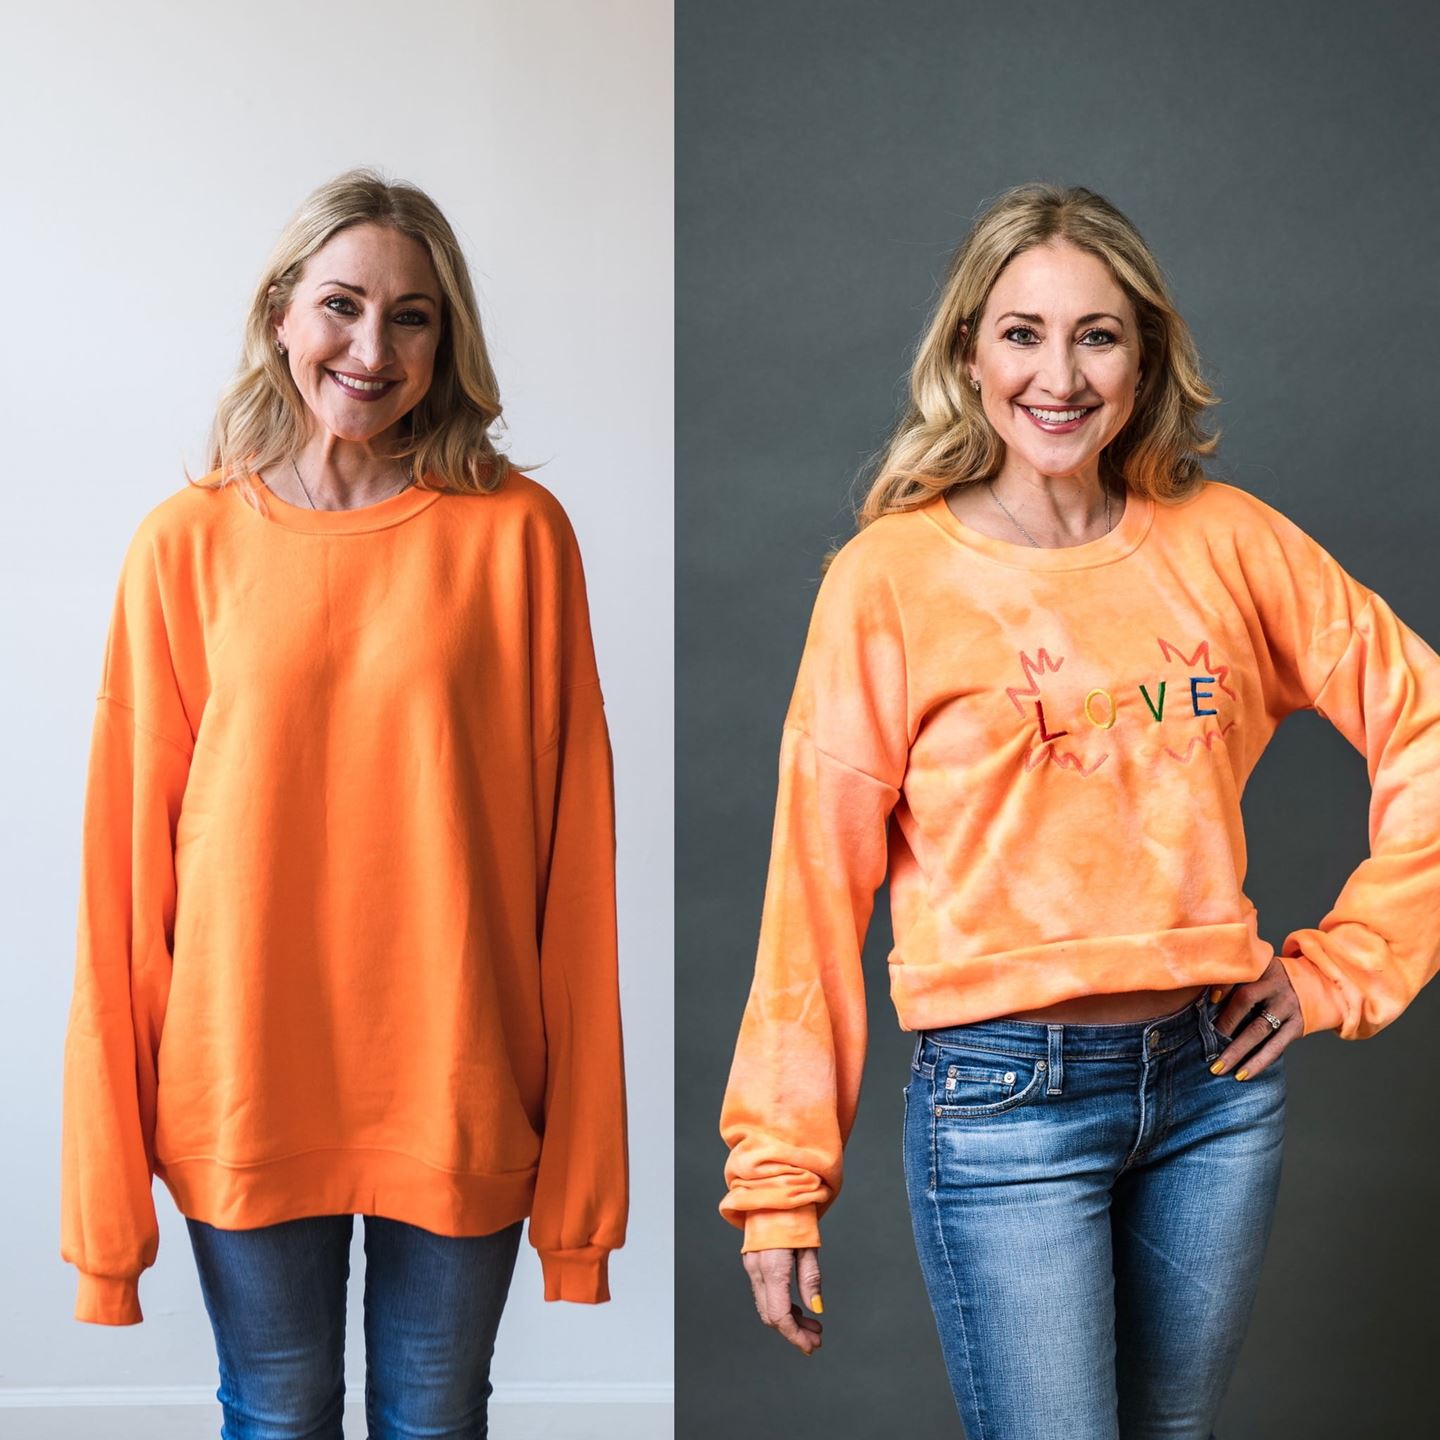
Let’s talk fashion! Since we are all staying home a bit more these days, the casual style of our everyday clothing is at an all-time high. With the cropped look for sweatshirts and hoodies being the latest trend and basically the “it” style of the moment, it’s time to make our own. The look is comfy yet stylish, and all
you need to recreate the look is an oversized sweatshirt or older sweatshirt or hoodie that needs an upgrade. So, go dig into the closet and let’s upcycle
this old garment into something new and stylish.
Supplies:


Oversized or old sweatshirt or hoodie

Pattern paper and marking pencil
- Scissors
- Measuring tape or ruler
- Straight pins
- Rotary cutter and straight edge
- Brother Sewing Machines
- Brother
Serger
STEP 1:
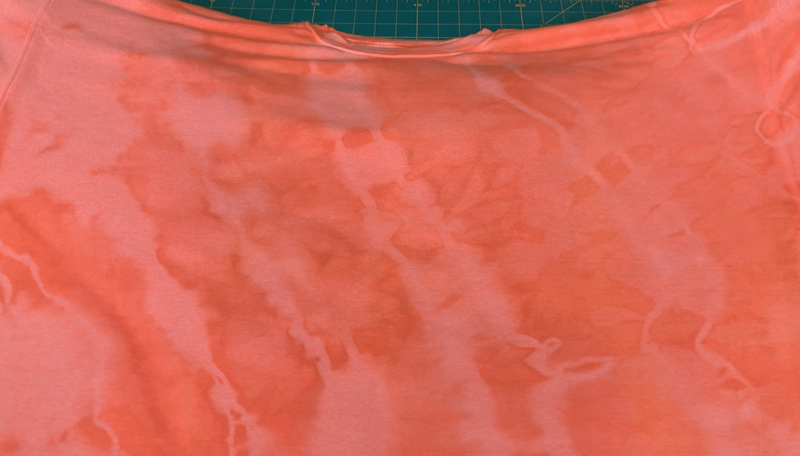
Reverse Tie-Dye
To give this new look an urban edge, distress the sweatshirt with a bleach bath to give it a reverse tie dye look.
This is an optional part of the project. If you choose not to create a reverse tie dye look you can move on to step 2.
To start the process, wrap, fold and twist the shirt into tight bunches using a rubber band to secure it in place.

The areas that are not exposed or less exposed to the bleach bath will remain closer to the original color and the areas that are saturated by the bleach bath change color.
Using a bleach bath made from one part water to one part bleach, submerge the bound sweatshirt.

Be sure the container you are using is bleach safe and you wear protective gloves and goggles in a well-ventilated area. Leave the sweatshirt in the bleach bath until you achieve the color you want; this can take as little as 15 minutes up to an
hour. The change in color will vary based on the fiber content of the fabric; because it is a reverse tie dye the look and your folds and binding areas will differ, the resulting patterns will be different every time you bleach a new garment.
Rinse the soaked sweatshirt in cold water and undo the rubber bands.

Continuing rinsing the sweatshirt for another 10 minutes.
Wash the sweatshirt in a washing machine by itself on a regular cycle.

STEP 2:
Create Pattern
Create a box pattern. We know that cropped sweatshirts have a boxy shape that hit a persona at their natural waist or even higher.

With that in mind, measure the length you want for your new sweatshirt and measure the width for the cropped bottom. Those two measurements should be almost the same. The length of my pattern from the neck down is 18 inches, and the bottom width is 20 inches.
We will use the existing ribbed collar and shoulders of the sweatshirt, so measure them to include in the pattern you are creating.
Because this is a casual, boxy look, it will have a drop sleeve. To do that, create a small curve at the bottom of the arm hole and top of the side seam. Leaving a 8-9 inch arm hole opening.
STEP 3: Cutting Fabric
Fold the dry sweatshirt in half lengthwise with the front sides together. Place the pattern on the fold, pin in place and cut the bottom and sides. Remember we will keep the existing shoulder seams together.

Save your sleeves as is. We will modify and add them back onto the shirt later in the project. Also, save the scraps from the bottom. We will use them to create a bottom band to finish the sweatshirt.
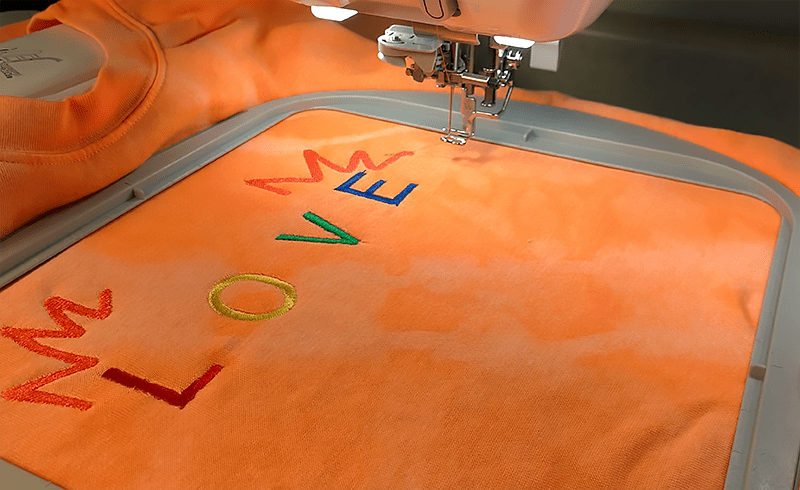
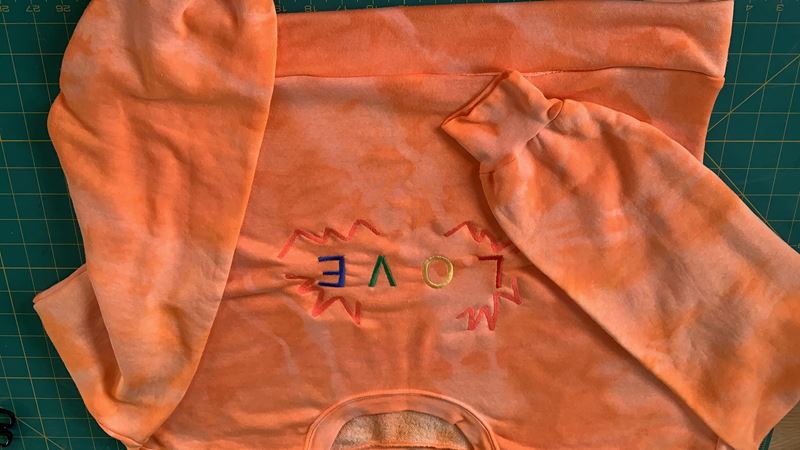
STEP 4: Embroider
Let’s embroider the shirt. With the shoulders and collar still together, lay the front side of the shirt, right side up and secure it in the embroidery hoop.

Using your Brother embroidery machine, create the design for the front of your shirt. Use the built-in designs and fonts to create your own custom style. With a Brother embroidery machine, it’s easy to get creative.


STEP 5: Side Seams
When the embroidery is complete, unhoop the shirt and with the right sides together. Pin them in place and serge or sew the side seams.


STEP 6: Sleeves
Using the sleeves you set aside earlier, turn them right sides out and insert each sleeve into the arm holes of the sweatshirt that is the wrong side out.
If the arm holes are too small to fit the existing sleeve, modify them by first measuring the length of the arm hole on the new sweatshirt.

Measure and mark the size.

Draw a seam line, tapering it to match the existing sleeve seam.


Sew the sleeve. Now insert the sleeves into the shirt arm holes, matching up the shoulder seams and side seams.


Secure pins and sew in place. Do the same on the other side.


STEP 7: Creating Bottom Band
Using the extra scraps from the bottom of the original sweatshirt, cut the bottom ribbed portion off. If there is not enough fabric there to make a new band, use the original bottom band.
Measure the bottom width of the new sweatshirt, the sample here is 20-inches so I need to cut a 40-inch strip of fabric from the scraps.

The width can vary based on how much fabric you have. The demo is a 5-inch width which will finish at 2.5 inches for the bottom band.

Sew the short ends of the strip of fabric together to create a band.

Fold the long band in half lengthwise with the right side out.
Then serge the long edge of the band together all the way around.
STEP 8: Finishing
Lay the sweatshirt right side out and put the bottom band over the top of the sweatshirt so the bottom edges match up.

Pin it in place and sew the band on the shirt.

Serge the two edges to give it a clean finished look.

This trendy DIY look can be paired with joggers or jeans, but you can also give it an elevated look with high waisted trousers or layering it with a blouse.
The best part about this DIY sweatshirt is that it’s eco-friendly and you made it yourself!

Sweatshirt Before and After

Related Projects
Stay Connected
* Required fields