Festive July 4th T Shirts
Brother Sews Blogger
With the 4th of July around the corner, I wanted to make something festive and patriotic to wear for the festivities. Since I was a child, my mom would get us all matching 4th of July shirts to wear for the annual parade and fireworks.
I wanted to keep the tradition alive since having my own family and make my own.
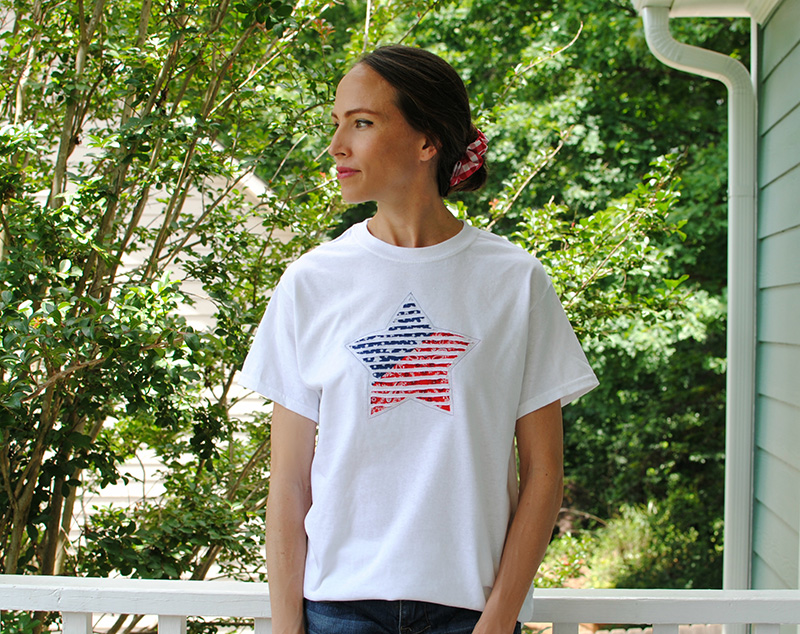
For the design, I wanted an applique with dimension and detail added to a basic t-shirt. I share this unique technique below so you can make your own.
 Step 1 for the Star:
to cut out the built-in star template on parchment paper. My star measured 8” x 8”. You can also print out a template from online. Get an idea of how you want the star to be on the fabric. I wanted the blue up in the top corner like an American flag.
 Step 2 for the Star:


I like how this technique gave the applique work some dimension and detail to your basic 4th of July shirts. I’m going to make a couple more for my boys next.
With the 4th of July around the corner, I wanted to make something festive and patriotic to wear for the festivities. Since I was a child, my mom would get us all matching 4th of July shirts to wear for the annual parade and fireworks.
I wanted to keep the tradition alive since having my own family and make my own.
For the design, I wanted an applique with dimension and detail added to a basic t-shirt. I share this unique technique below so you can make your own.
Supplies:
- T-shirt
- Cotton fabric for applique (I used blue and red)
- Optional ScanNCut(Opens in a new tab)
(can be used to cut out applique star) - Brother Sewing and Embroidery Machines(Opens in a new tab)
 Step 1 for the Star:
- Cut 2 squares (one blue and one red) that measure 8.5” x 8.5” and cut those 2 pieces in a diagonal down the center.
- Sew the 2 pieces right sides together with a 1/4” seam allowance and press down seam allowance.
to cut out the built-in star template on parchment paper. My star measured 8” x 8”. You can also print out a template from online. Get an idea of how you want the star to be on the fabric. I wanted the blue up in the top corner like an American flag.
 Step 2 for the Star:
- Prep the shirt:
- Find the center of the shirt front (fold in half and press to get an easy line) and measure about 3” down from the collar. This is where you want the top of the applique to be. You can adjust however you’d like though.
Tip: Use a light layer of temporary spray adhesive to keep the fabric applique from moving. I sprayed mine on the front of the applique material.
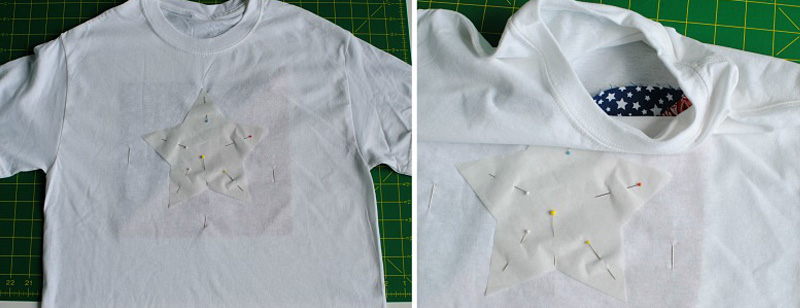
- Place the star over the applique on front of shirt and pin so placement is where you desire.


- Top stitch around the perimeter of the star using the template as your guide. You can trace the star on the t-shirt with a fabric marking tool if you’d like instead of the paper template. (I used a white thread for this step).

- Remove the pinned start template.
- Top stitch another layer just outside the first about 1/8” (I used a navy thread this time).

- Top stitch the interior sections. I started at the bottom corner of the star and made my way to the top. Notice I moved my needle as far to the left as I could and used the end of my foot for the guide on each section.

- It should look like this when complete. If the sections are off a bit at the top or bottom it’s no big deal.
- Cut the excess material from the back.

- Cut down the center of each strip t-shirt material only.
- I also trimmed the strips a little more on each side as well but also keep in mind when you wash them it shrinks a bit as well.

- For the American flag shirt, I did the same as above, but the applique was a flag. Measurements 6 ¼” x 9” total. The blue star square 4 ¼” x 4 ¼”. For the blue star portion, I pressed the right side and bottom edge under ¼” and topstitched on the red material.


I like how this technique gave the applique work some dimension and detail to your basic 4th of July shirts. I’m going to make a couple more for my boys next.


