Foot of the Month: Going Sewing Circle Bag
 This month we are featuring the Brother circular sewing attachment. We used the attachment to make beautiful embellishments for this circular sewing bag. Simply secure the attachment to your machine and see how easy it is to make circles using decorative stitches and alphabet fonts built in to your Brother machine. Give it a try! Sewing in circles is fun!
Materials and Supplies:
- Brother Sewing machine
with circular sewing capability. Visit Brothersews.com
for a list of compatible models - SACIRC1 Brother Circular Attachment Bundle
- SA5810 Brother Pacesetter® Tear Away Stabilizer
- Brother Embroidery Threads for decorative stitching
- Basic sewing notions including thread to match fabrics and a removable marker
Additional items for bag:
- Featured pattern: Store & Go Zipper Case from ©Indygo Junction Inc
- Fabric pieces prepared as described in Step 1 below
- Notions and additional fabric as per pattern
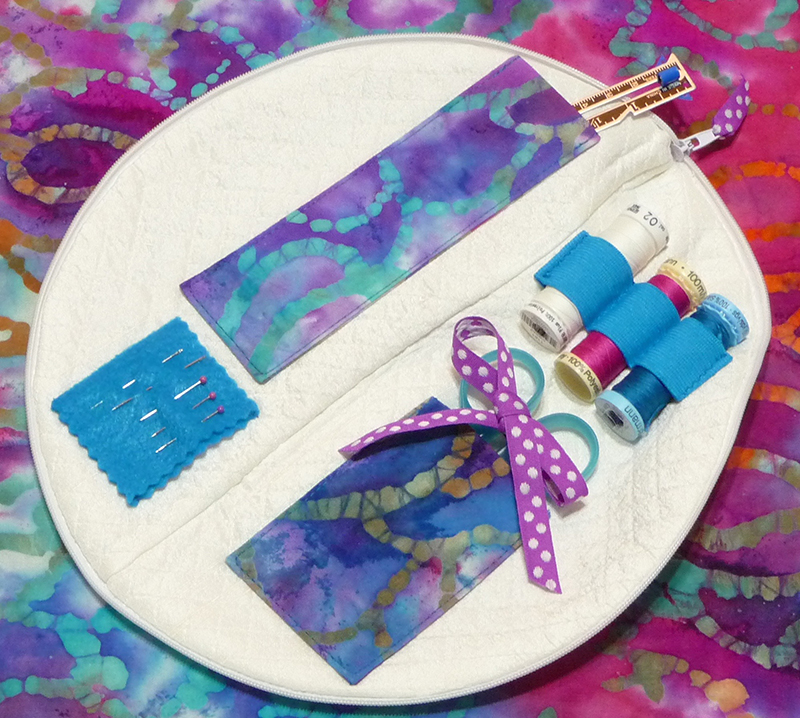
- See Figure #1.
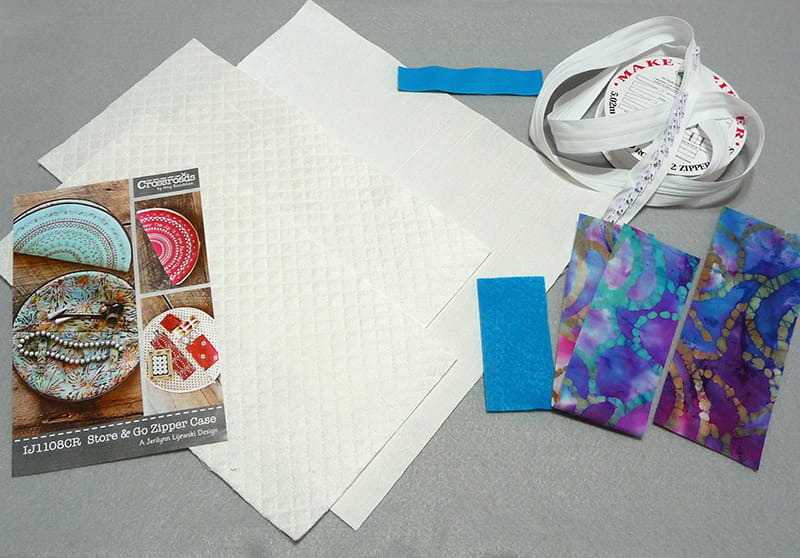 Figure #1[/caption]
Note: Store & Go Zipper Case pattern is a product of ©Indygo Junction Inc., and Brother International Corporation makes no representations or warranties regarding such products.
Important: Please read all instructions included with the Circular Sewing attachment before beginning. The included manual gives details for setup on your machine.
Instructions for Creating Circular Bag
- These instructions include a few modifications from the original pattern. You'll find a list of changes or additions below:
- Silk dupioni fabric is featured for outer bag and lining in place of traditional cotton. In addition, we chose to back the lining with fusible craft fleece and quilted the fabric before cutting into the two required rectangles.
- Use 1-inch wide colored elastic in place of the recommended ¼-inch wide piece.
- Tack a 12" piece of narrow ribbon above the scissor pocket to secure scissor handles.
- Add a small remnant of ribbon to the zipper pull tab.
Note: Follow some or all of these modifications or create the bag exactly as described in the pattern. Making the bag is done in just a few steps, decorating the front, sewing lining and adding pockets & notion holders, attaching zipper, sewing pieces together, and finishing zipper with tab.
Below are basic steps for cutting and preparing fabrics selected for this Sewing Case:
- For Outer Bag - Cut one 12 ½" square of silk dupioni. Add a matching piece of medium weight fusible interfacing to the wrong side.
- For Bag Lining- Cut one 12 ½" X 13" rectangle of silk dupioni with light weight fusible fleece added to the wrong side. Use a straight stitch to quilt lines spaced ½" apart all across the fabric, quilting on the diagonal in both directions. Next, cut this quilted piece into two rectangles measuring 6 ½" x 12 ½."
- Cut pocket pieces from cotton and felt as per pattern instructions. Fuse interfacing to wrong side of pocket pieces to make them more durable.
Tip: Interfacing used for crisp shirt collars and cuffs is ideal for interfacing outer bag piece and pocket pieces.
- Follow assembly instructions in the pattern, sewing lining rectangles together to create a 12 ½" square with required opening in the center seam. Construct inside pockets. Position pockets, elastic thread holder, and felt needle keeper as shown in the pattern, use your own layout, or follow ours. We moved the pieces around and added a ribbon tie above the scissor pocket. It is important to make sure all pieces stay within a circular area measuring slightly less than 10" in diameter. See Figure #2.
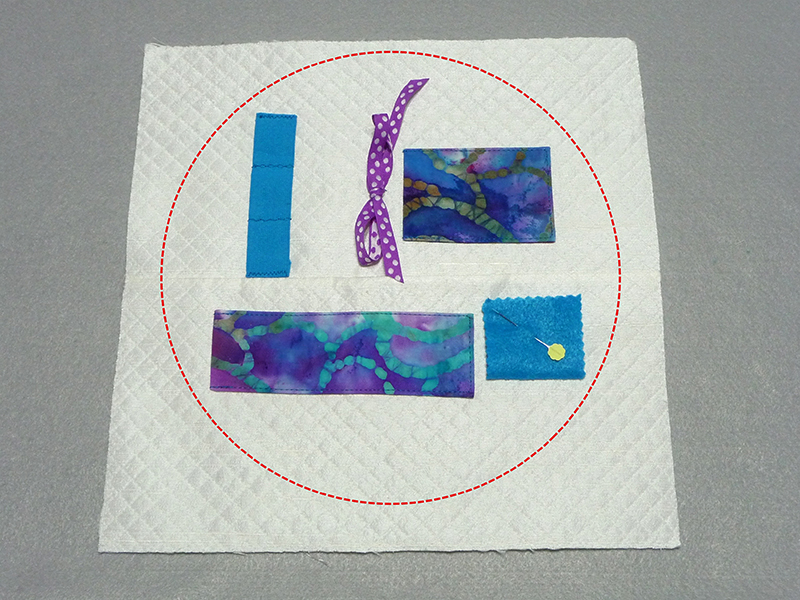 Figure #2[/caption]
- Attach circular attachment to the machine, using foot "N" for decorative stitching. See Figure #3.
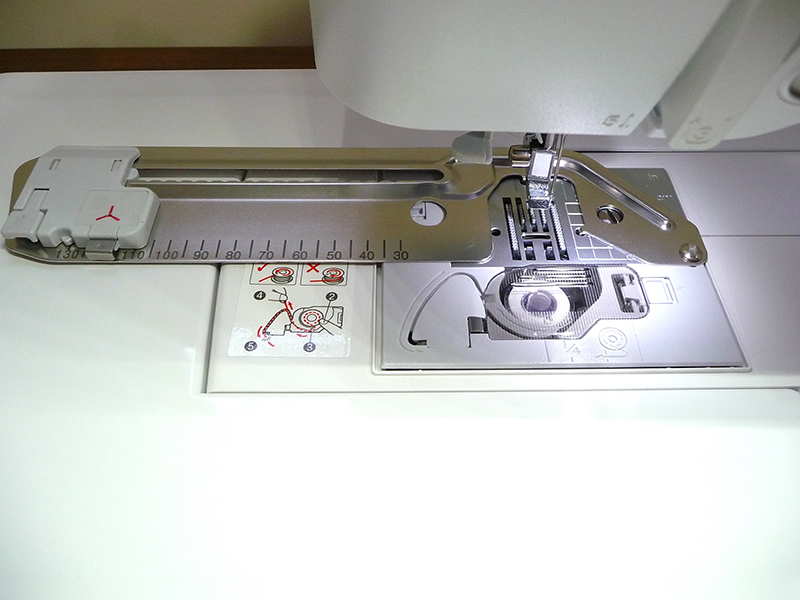 Figure #3[/caption]
- Create decorative outer piece by reading and following ASSEMBLY INSTRUCTIONS FOR BASIC ZIPPER CASE outlined in pattern instructions.
Basic steps are as follows:
- Select 12 ½" square for outer bag. Mark square with a small dot at the center and then mark the halfway point on the fabric for starting the circle. Layer a 12 ½" piece of tear away against the wrong side. Secure fabric to attachment with center pin. See Figure #4.
 Figure #4[/caption]
- Thread with first color of decorative thread. Use matching thread in the bobbin or use embroidery weight thread. We used white embroidery thread as the bobbin thread for all decorative stitching. Decide on the decorative stitches and alphabet you would like to use.
Tip: If using the attachment is new to you or you are using stitches that are unfamiliar you may want to practice on a well-stabilized scrap before you stitch on your actual project. Note that not all decorative stitches will match up in a perfect circle. You will want to begin and end at the half way mark. Since this bag folds in half you will only see one half of the bag at a time. Experiment with combinations of lettering to add to the bag. It's okay to stitch only partial circles leaving space between motifs and lettering as desired. You're the designer, you decide!
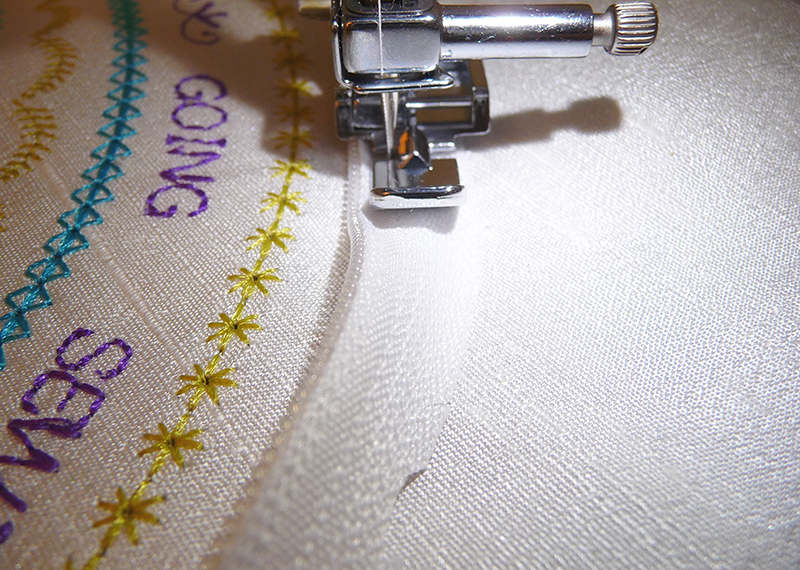
- Once fabric square is secured to attachment stitch various circles, sliding indicator to different positions to make multiple circles of various sizes. For this project you will want to stop at the 120 mark. You might want to move to different spaces to use one particular thread color before changing to another. See Sewing process in Figure #5a and #5b.
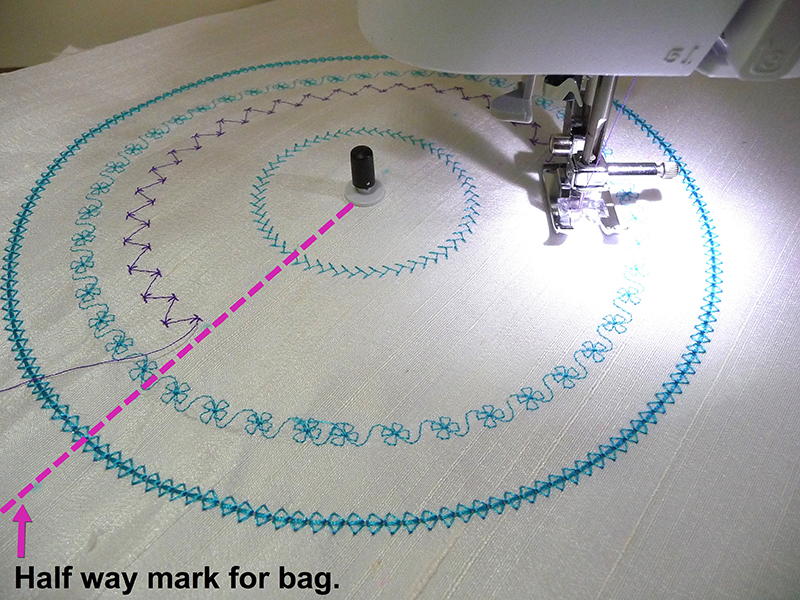 Figure #5a[/caption]
[caption id="attachment_13142" align="aligncenter" width="800"]
Figure #5a[/caption]
[caption id="attachment_13142" align="aligncenter" width="800"]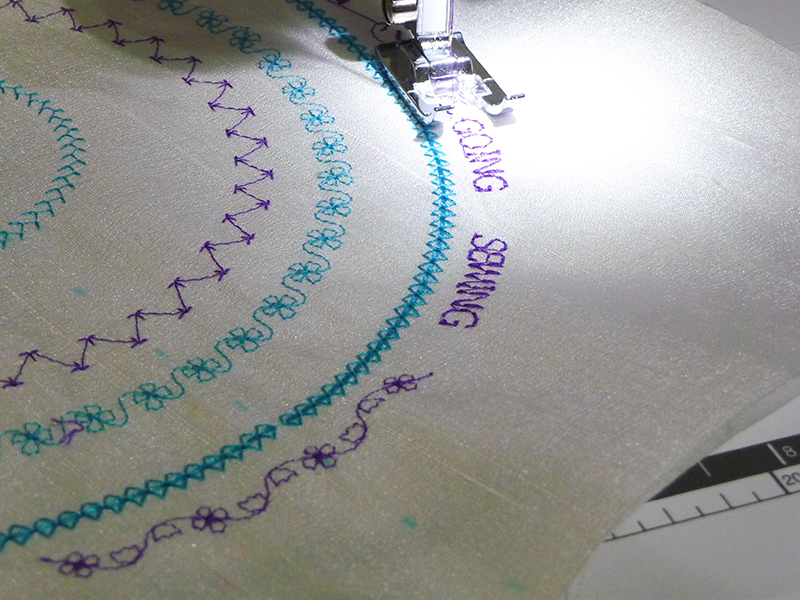 Figure #5b[/caption]
- Remove piece, and press. Prepare zipper by cutting to required length. See Figure #6.
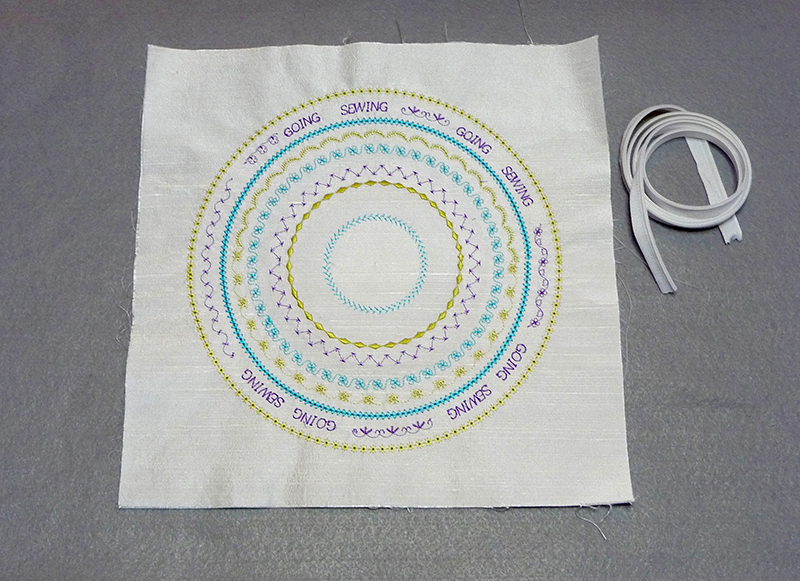 Figure #6[/caption]
Tip: Check to make sure your markings will not be heat set by pressing. You may need to erase and re-mark center point and half way mark.
- Move the setting on the circular attachment to the furthest setting. See Figure #7.
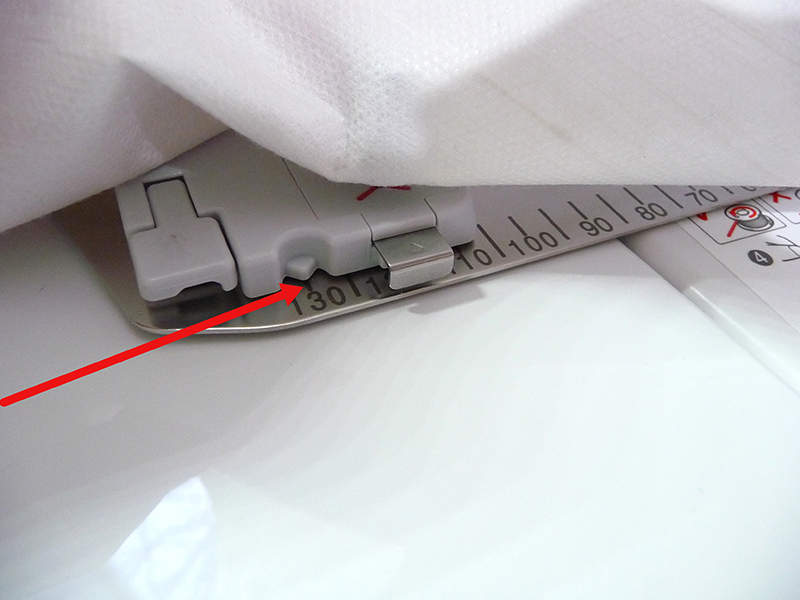 Figure #7[/caption]
- Read pattern instructions for preparing and sewing zipper. One very important step is to leave a small gap where zipper stitching begins and ends. Change to zipper foot and adjust needle position as needed so you can stitch approximately ¼-inch from zipper teeth. Attach zipper as instructed. See close up example of zipper stitching below:
- The zipper looks a little unusual now. See Figure #8.
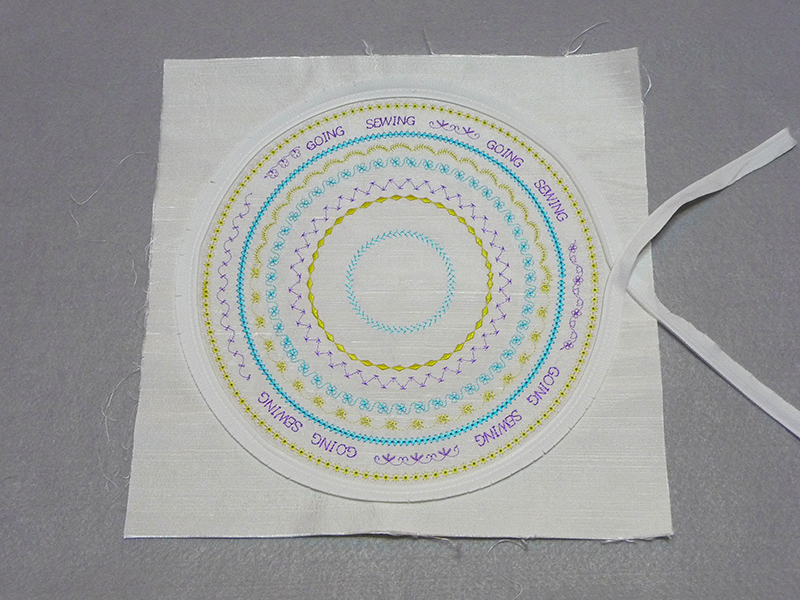 Figure #8[/caption]
- Note that the zipper is finished at completion when the zipper tab is attached and brings the two halves of the zipper together. Layer outer bag and lining pieces with right sides together as directed, having the outer bag piece on top and securing pieces to the attachment with pin inserted through center point of both layers. Start stitching so needle pierces previous stitches sewn for zipper, adjust needle position slightly if necessary. See Figure #9.
 Figure #9[/caption]
Note: Zipper stitching is enhanced with blue lines.
Tip: The thickness of the layers may require you to gently hold the pin in place with one hand while you guide the fabric through with the other. Make sure fabric layers flow smoothly through the machine.
- Complete bag following instructions to add zipper tab. Some of the excess zipper tape can be cut. The pattern doesn't suggest this but you'll see in this example that we added a hand-sewn bar tack for extra security just beyond the zipper tab. See Figure #10.
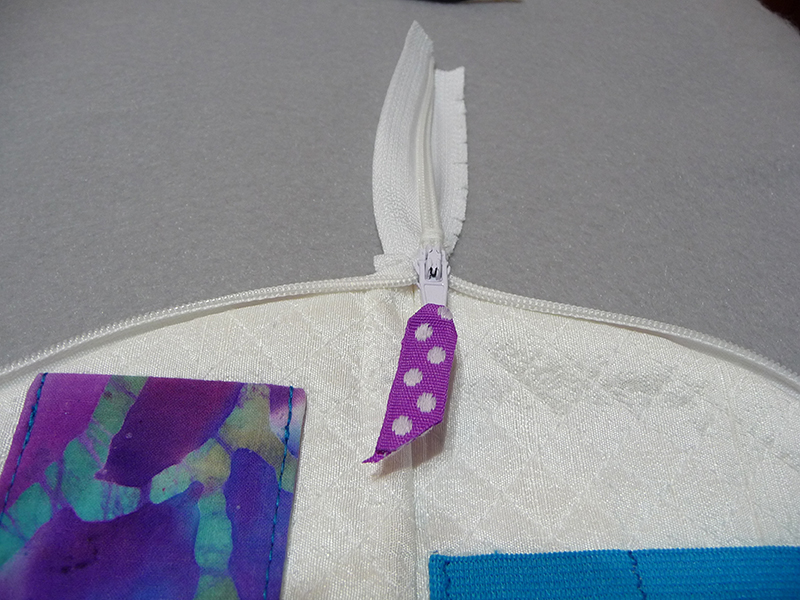 Figure #10[/caption]
- As a final step the excess tape is inserted into the small opening. See Figure #11a and #11b for an example of how this was done.
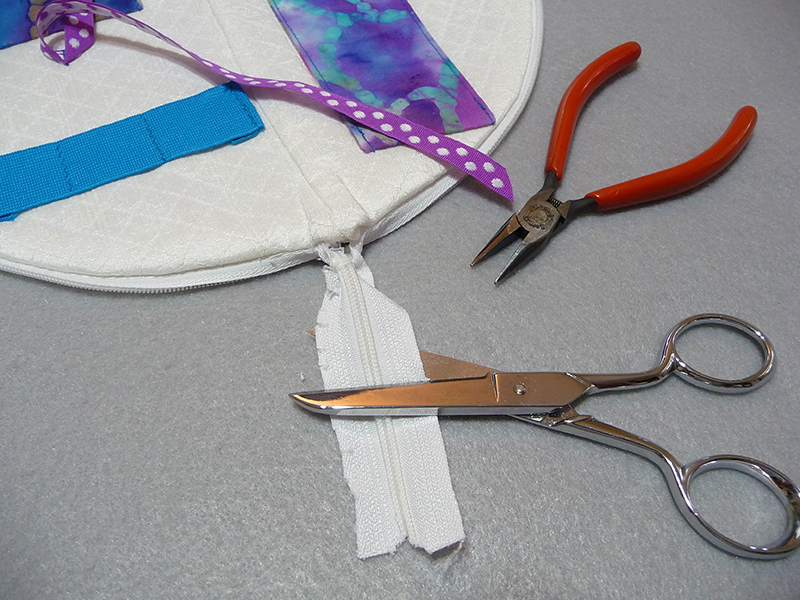 Figure #11a[/caption]
[caption id="attachment_13133" align="aligncenter" width="800"]
Figure #11a[/caption]
[caption id="attachment_13133" align="aligncenter" width="800"] Figure #11b[/caption]
You are finished! Admire your beautiful bag!
Figure #11b[/caption]
You are finished! Admire your beautiful bag!
Related Projects
Stay Connected
* Required fields