Foot of the Month: Lapped Zipper for a Stylish Skirt
Starting a new job, going back to school, or just looking to refresh your wardrobe? Why not spend a weekend sewing a stylish new skirt to wear? This is the perfect time of year to prepare for a change in the seasons with a new skirt in a classic style. To help you polish up your sewing skills this month, we are featuring the standard snap on zipper foot included with Brother machines. Follow the steps presented here to sew a foolproof lapped zipper and then use your new skills to sew a skirt like the one shown here. You’ll be ready for Monday or any other day of the week!
Materials and Supplies:
Brother Sewing Machinewith snap on zipper foot
- Straight Skirt Pattern with 5/8” seam allowance and an opening at the center back for a standard zipper. See Figure #1.
- Fabric and basic sewing notions as indicated on the pattern envelope.
- Standard polyester coil zipper 9-12 inches long to match skirt fabric.
- Two strips of very lightweight fusible interfacing, measuring ¾” wide X 9” long.
- Jeans needle size 14 for constructing denim skirt.
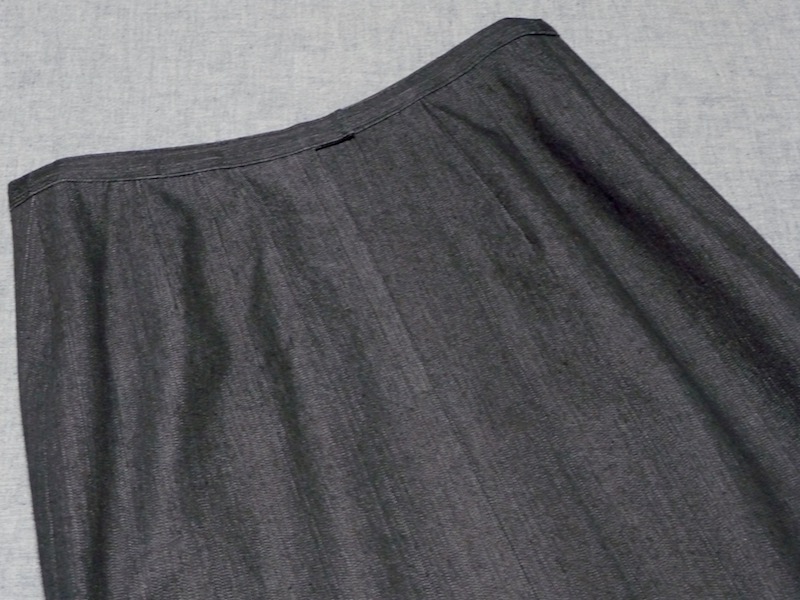
 Lapped Zipper on Finished Skirt[/caption]
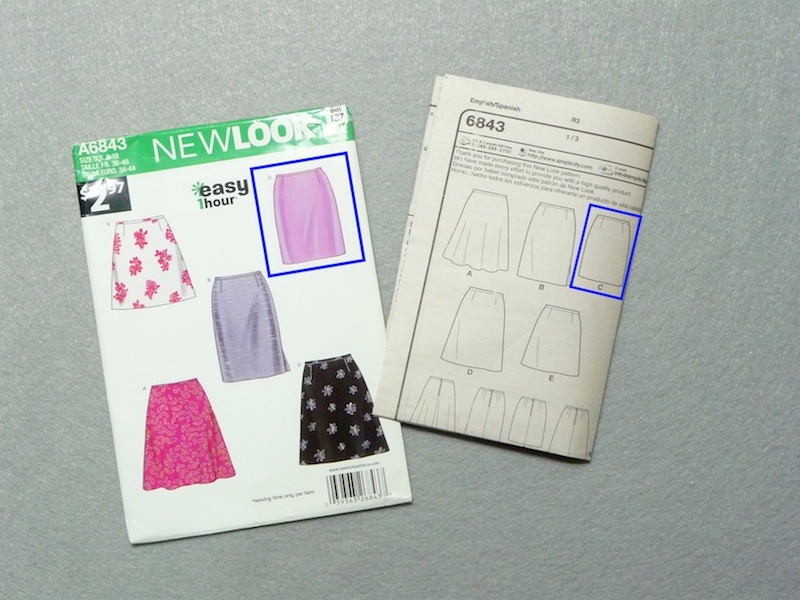
Lapped Zipper on Finished Skirt Basic straight skirt pattern used for this project: New Look 6843 View C
Disclaimer: Featured pattern New Look 6843 is a product of Simplicity Pattern Company Inc. Brother International Corporation makes no representations or warranties regarding such products.
[caption id="attachment_9059" align="aligncenter" width="800"] New Look 6843 View C[/caption]
Prepare for Zipper Insertion
- Cut skirt pieces as per pattern. Transfer all markings, including stopping point for center back zipper. Mark wrong side of skirt with low tack tape if it is difficult to determine the right and wrong sides. Sew back darts now if you wish.
- General information about the lapped zipper: Your pattern may call for a centered zipper application. You can easily substitute with this method, resulting in a more professional finish. On a women’s skirt, the lap of the zipper will be on the left side as you face the back of the skirt. There are, in fact, many different ways to install a traditional lapped style zipper. This method is easy if you follow one step at a time. It takes advantage of special grooves on the underside of the foot. Your Brother zipper foot is designed with these grooves to allow for stitching close to the teeth while keeping the foot from slipping out of position. A few initial steps will help ensure a zipper that has a neat and professional look. Follow steps below:
- Lightly press the zipper if it was folded in packaging.
- Begin by finishing the raw edges of the center back seam. A three-thread wide serger stitch is ideal but you can substitute one of the overcast stitches on your sewing machine. January’s FOTM Project has more on the Overcast foot “G”
included with many Brother sewing machines. - Starting at the hem, sew the center back seam with a regular foot and a standard straight stitch, stopping at the point marked for zipper insertion. Be sure to back stitch at the beginning and the end.
- Next, select a basting stitch. If you have a special long basting option select this stitch. See settings below:

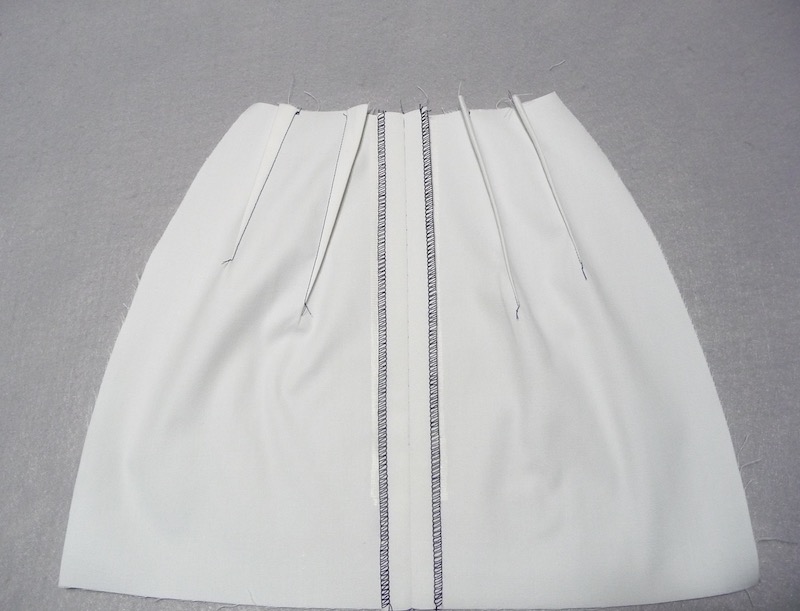
- Starting at the waistline, stitch the rest of the 5/8” seam, leaving at least a 3-inch tail of threads at the waist and continuing the seam a few stitches past your backstitching. Tie thread tails together at the top to keep basting secure. Press seam flat. To stabilize the zipper area, fuse a strip of interfacing to the wrong side of each back piece, having cut edge positioned close to the basting line and aligned with raw edge of the waistline. See Figure #2.
 Figure #2[/caption]
- If you used a standard basting stitch, snip the thread every two inches or so to make stitches easier to remove. Press seam open. See Figure #3.
 Figure #3[/caption]
Instructions for Inserting Zipper
- Select a center needle straight stitch. It is very important that you always begin with your needle in the center position whenever you use this zipper foot. Otherwise, you risk hitting the foot and breaking the needle. See Figure #4a.
 Figure #4a[/caption]
- Notice the grooves on the underside of the foot. See Figure #4b.
 Figure #4b[/caption]
Attach the zipper foot to the machine, snapping it onto the bar on the left side of the foot. See Figure #4c.
[caption id="attachment_9063" align="aligncenter" width="800"]
 Figure #4c[/caption]
- Lay the skirt flat, with the seam completely open, and both skirt pieces pushed toward the right hand side. Open the zipper all the way. Lay the zipper face down on the open seam. Pin zipper tape to the seam allowance, having metal stop on the zipper just below the basting and coils of the zipper just touching the basted seam. See Figure #5.
 Figure #5[/caption]
- Turn the skirt and position the coils under the groove on the underside of the foot, getting as close to the bottom of the zipper as you can. See Figure #6.
 Figure #6[/caption]
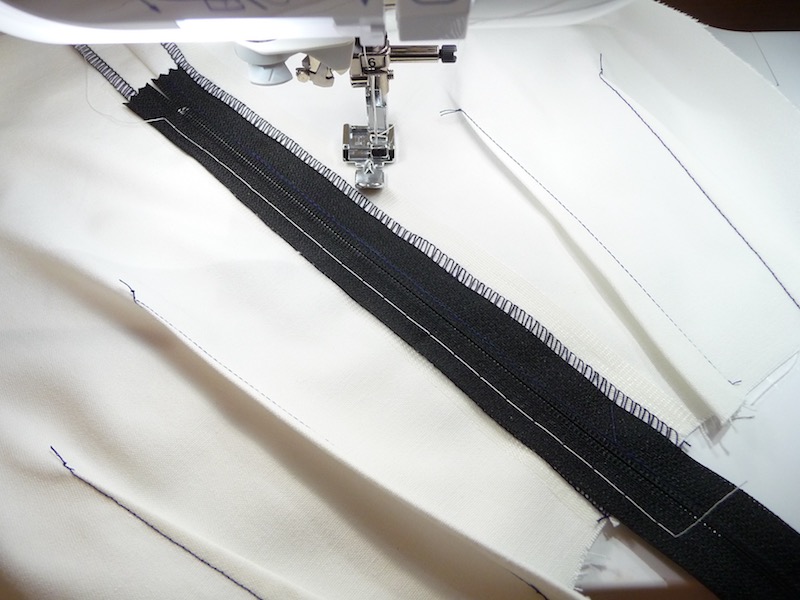
Sew the tape of the zipper to the single layer of seam allowance, starting at the bottom and finishing at the waist. There is no need to backstitch at either end. See Figure #7.
[caption id="attachment_9066" align="aligncenter" width="800"]
 Figure #7[/caption]
- Zip up the zipper and then flip it over so that the opposite side of the tape is facing up on the right hand-side. Be sure to keep both layers of the skirt to one side. Next, smooth the seam allowance away from the zipper teeth, exposing 1/8-inch of the seam allowance, finger pressing and forming a narrow fold to the left of the zipper coils. Now, pin the loose end of the tape in place near the zipper stop, smooth the fabric to maintain the narrow fold of fabric evenly from bottom to top. Release the foot and snap it on the bar on the right. Position the foot so you can stitch very close to the fold.

- Stitch from bottom to top, backstitching at each end and taking care to stitch slowly in the area of the zipper stop. Once again the groove on the underside of the foot will help you stitch smoothly over the teeth.
- Open up the skirt so both zipper and skirt back lays flat and smooth. A small pleat will form near the zipper stop at the bottom. With the wrong side facing you it’s time to stitch through all layers on the opposite side, the zipper tape, the seam allowance, and the garment. You can pin the layers together if you like but depending on your fabric it may not be necessary. See Figure #8.
 Figure #8[/caption]
- Select a basting stitch in the center needle position as you did before. Align foot so you can begin stitching just below the point of the zipper stop. See Figure #9.
 Figure #9[/caption]
Baste the zipper having the line of stitching form ¼-inch from the edge of the tape. Mark a line with chalk line if you wish or use the Sew Straight™ laser as a guideline for stitching if you have this option. There is no need to stitch across the bottom of the zipper at this point. We’ll do that in the next step. See Figure #10.
[caption id="attachment_9069" align="aligncenter" width="800"]
 Figure #10[/caption]
- To finish, flip the skirt piece so right side is facing up. Snap the foot onto the left side. Top-stitch the lapped side of the zipper approximately 3/8-inch from the seam, beginning just below the zipper stop, pivoting, and then stitching up to the waistline. Do not backstitch. Instead, pull beginning and ending threads to wrong side and tie the thread tails by hand when you are finished stitching.
- Carefully remove all basting. Press lightly using an up and down motion with the iron. See completed stitching below:
 Finish your skirt following the pattern directions for basic construction. Enjoy!
Please be sure to tag us when you post photos of your sewing journey on Facebook and Instagram at #StitchingSewcial and @BrotherSews so we can follow along with the fun!
-
Disclaimer:Featured pattern New Look 6843 is a product of Simplicity Pattern Company Inc. Brother International Corporation makes no representations or warranties regarding such products.


