Free Design: Embroidered Chair Cushion Cover
-Brother Sews Ambassador
Our free design of the month is a gorgeous maple leaf embroidered chair cushion cover. Stitched on common neutral duck cloth, this design becomes a focal point for a fall themed décor in your dining space. This embroidery project will help you spruce up your dining room chairs while adding rich fall colors to your home. Add optional decorative cording for an extra special touch. Are you ready? Let’s go sew!
Materials and Supplies:
 Figure #1[/caption]
Steps to Create Chair Cushion Cover
Introduction and ideas for this project: I designed this style of embroidered cushion cover to be easily removed for laundering or storage. Once you have a pattern made, you can easily make more of these for various holidays or seasonal changes. Consider using other designs from the Brother ibroidery.com design download center for other occasions. Please read through all instructions before beginning to thoroughly understand the options and process for creating the covers. Instructions are for creating one cushion. Repeat the process for each cushion you wish to make. Once the pattern is made and the embroidery is finished, these go together quickly. To save even more time consider making with pre-purchased cording or skip the cording all together.
Figure #1[/caption]
Steps to Create Chair Cushion Cover
Introduction and ideas for this project: I designed this style of embroidered cushion cover to be easily removed for laundering or storage. Once you have a pattern made, you can easily make more of these for various holidays or seasonal changes. Consider using other designs from the Brother ibroidery.com design download center for other occasions. Please read through all instructions before beginning to thoroughly understand the options and process for creating the covers. Instructions are for creating one cushion. Repeat the process for each cushion you wish to make. Once the pattern is made and the embroidery is finished, these go together quickly. To save even more time consider making with pre-purchased cording or skip the cording all together.
Basic steps for creating the cushion cover:
Once you have completed the front pattern, trace off another copy to create back pieces. Divide back pattern into thirds. Mark off the top third section. Add 2-inches above the two thirds line for an overlap on pattern A. Remaining section will serve as pattern B. See example of pattern pieces in Figure #2a with cutting lines for overlap pieces shown in red, and red arrows showing pattern sections. See Figure 2b for completed patterns. [caption id="attachment_26234" align="aligncenter" width="800"]
 Figure #2a[/caption]
[caption id="attachment_26235" align="aligncenter" width="800"]
 Figure #2b[/caption]
2. Use actual pattern pieces to determine yardage needed for each cushion cover. To cut oversized fabric for front piece, place pattern on fabric and trace pattern shape with removable Cut fabric adding at least 1-inch outside the pattern line. See Figure #3.
[caption id="attachment_26236" align="aligncenter" width="800"]
 Figure #3[/caption]
3. Transfer design to machine. Embroider motifs as desired along the edge of the cushion using your favorite method for placement. This is a dense design. Add tear-away stabilizer attached with adhesive spray for each hooping. Note that if you are stitching close to the edge you may need an oversized piece of stabilizer to make sure fabric is held tightly in the hoop.
Stitch leaves randomly on the fabric, making each cushion different or opt for a more precise look like I did. Tip: I marked off lines for the center of each motif and used templates printed with the Snowman marker created with PE Design 11 software for precise placement. I printed a template to stitch a mirror image copy of the design as well. To stitch each motif, I used low tack tape and taped the template to the fabric using the pattern as a guide, and then scanned the hoop to stitch each motif that matched my template. I started with the idea of stitching designs in the center of the front and one in each corner, and then decided to add designs along the side. See examples of my embroidery process in Figure #4a through Figure 4e.
[caption id="attachment_26237" align="aligncenter" width="800"]
 Figure #4a[/caption]
[caption id="attachment_26238" align="aligncenter" width="800"]
 Figure #4b[/caption]
[caption id="attachment_26239" align="aligncenter" width="800"]
 Figure #4c[/caption]
[caption id="attachment_26240" align="aligncenter" width="800"]
 Figure #4d[/caption]
[caption id="attachment_26241" align="aligncenter" width="800"]
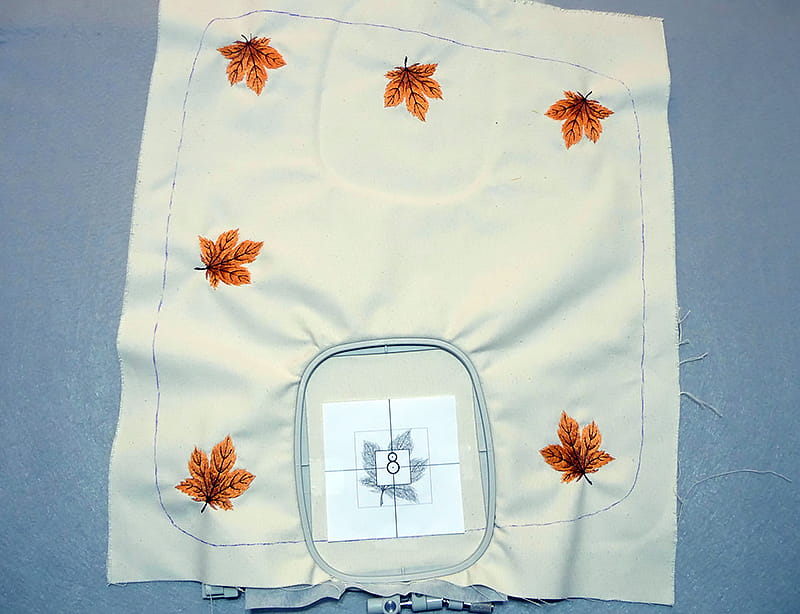 Figure #4e[/caption]
4. Remove excess stabilizer, press fabric, and cut embroidered cushion to size. 5. Make and add optional piping as follows: Measure for cording and add several extra inches. Cut bias tape the same length. Press tape open. Add strips of stabilizer to wrong side and sew a line of decorative satin stitches (stitch No. 13-06) along the center. Remove stabilizer, press, wrap around cording, and machine baste close to cord using adjustable zipper foot. Pin and then machine baste cording to front piece, overlapping cord at the center back and clipping corners to fit curves. See piping steps in Figure #5a through Figure 5e. [caption id="attachment_26242" align="aligncenter" width="800"]
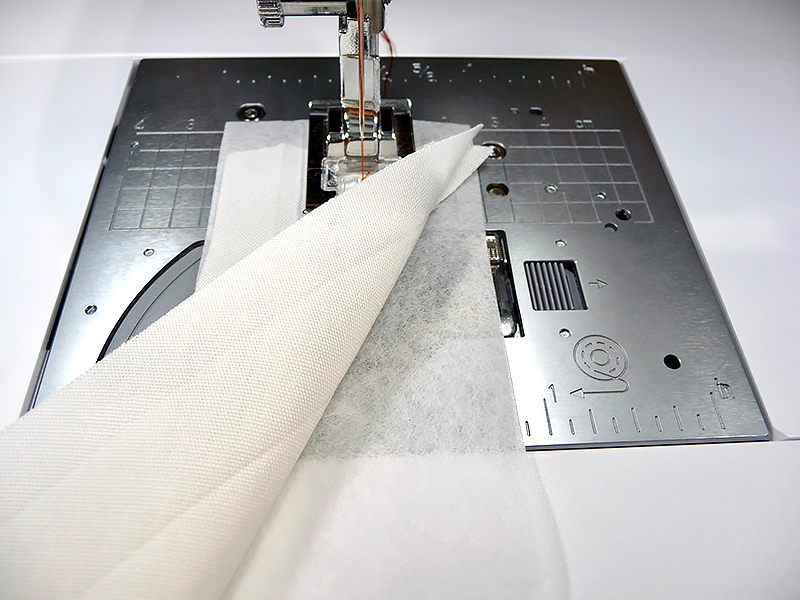 Figure #5a[/caption]
[caption id="attachment_26243" align="aligncenter" width="800"]
 Figure #5b[/caption]
[caption id="attachment_26244" align="aligncenter" width="800"]
 Figure #5c[/caption]
[caption id="attachment_26245" align="aligncenter" width="800"]
 Figure #5d[/caption]
[caption id="attachment_26246" align="aligncenter" width="800"]
 Figure #5e[/caption]
6. Clean finish straight edges of back pieces by sewing bias tape over raw edges. Note: Corded version of cushion shown in remaining steps. Overlap to fit front piece, having all raw edges even and cording sandwiched between the layers. See Figure 6a and Figure 6b.
Figure #5e[/caption]
6. Clean finish straight edges of back pieces by sewing bias tape over raw edges. Note: Corded version of cushion shown in remaining steps. Overlap to fit front piece, having all raw edges even and cording sandwiched between the layers. See Figure 6a and Figure 6b.
[caption id="attachment_26247" align="aligncenter" width="800"]
 Figure #6a[/caption]
[caption id="attachment_26248" align="aligncenter" width="800"]
 Figure #6b[/caption]
7. Sew back and front layers together using zipper foot, sewing close to cording. 8. Turn right side out and press. Cut foam using front pattern, cutting piece slightly smaller than front for easy insertion. Tip: Use a permanent marker to trace pattern on foam and then cut ½-inch inside the markings for foam that is slightly smaller than your outer cover. Insert foam through back opening. You are finished! Enjoy! See back of finished cushion below:

Options and ideas:
Our free design of the month is a gorgeous maple leaf embroidered chair cushion cover. Stitched on common neutral duck cloth, this design becomes a focal point for a fall themed décor in your dining space. This embroidery project will help you spruce up your dining room chairs while adding rich fall colors to your home. Add optional decorative cording for an extra special touch. Are you ready? Let’s go sew!
Materials and Supplies:
- Brother sewing and embroidery machine
. Note: Machine featured in this project is the Brother XP1 Luminaire. You can use any machine with a 4-inch hoop to complete this project. - Brother Embroidery Threads
and Bobbin Thread for embroidering. - SA5810
Brother Medium Weight Tear-Away Stabilizer - SA161
Brother Adjustable zipper and piping foot for optional cording. - Basic sewing notions including thread to match fabric for construction and a removable marker for marking fabric.
- Temporary adhesive spray designed specifically for embroidery.
- Embroidery needle size 11/75 for embroidery and a jeans needle size 14 for construction.
- Natural colored extra wide double fold bias or finishing overlap area on back pieces and for creating optional cording. Note finished folded tape measures ½-inch wide, with the bottom side slightly wider than the top.
- 3/16-inch cotton filler cord for optional cording.
- 1-inch deep densified polyester foam for stuffing cushion cover. Note: This type of foam insert is easy to cut with scissors and insert into the cover. You’ll find this foam in assorted sizes. Be sure to select a size that will closely fit your chair pattern. You’ll find more tips for cutting the foam included in the instructions.
- Natural colored cotton duck cloth fabric for front and back of each cushion cover: See instructions below for pattern and yardage requirements.
- Medium weight fusible interfacing for backing front cushion pieces. Note: I prefer weft insertion type interfacing for this type of project.
- Pattern tracing cloth or pattern paper for making cushion cover patterns.
- Brother Free Design of the Month, Free Design November
. See Figure #1 for size and color information used for stitching this design.
Figure #1[/caption]
Steps to Create Chair Cushion Cover
Introduction and ideas for this project: I designed this style of embroidered cushion cover to be easily removed for laundering or storage. Once you have a pattern made, you can easily make more of these for various holidays or seasonal changes. Consider using other designs from the Brother ibroidery.com design download center for other occasions. Please read through all instructions before beginning to thoroughly understand the options and process for creating the covers. Instructions are for creating one cushion. Repeat the process for each cushion you wish to make. Once the pattern is made and the embroidery is finished, these go together quickly. To save even more time consider making with pre-purchased cording or skip the cording all together.
Basic steps for creating the cushion cover:
- Make a pattern for the cushion and cut pattern pieces.
- Use pattern to cut oversized front piece, embroider motifs as desired, and trim to size with pattern.
- Create piping and add to cushion. Note: You can choose to create cushions without piping or purchase ready-made home décor piping for insertion.
- Clean finish back pieces and assemble cushion to finish.
Once you have completed the front pattern, trace off another copy to create back pieces. Divide back pattern into thirds. Mark off the top third section. Add 2-inches above the two thirds line for an overlap on pattern A. Remaining section will serve as pattern B. See example of pattern pieces in Figure #2a with cutting lines for overlap pieces shown in red, and red arrows showing pattern sections. See Figure 2b for completed patterns. [caption id="attachment_26234" align="aligncenter" width="800"]
Figure #2a[/caption]
[caption id="attachment_26235" align="aligncenter" width="800"]
Figure #2b[/caption]
2. Use actual pattern pieces to determine yardage needed for each cushion cover. To cut oversized fabric for front piece, place pattern on fabric and trace pattern shape with removable Cut fabric adding at least 1-inch outside the pattern line. See Figure #3.
[caption id="attachment_26236" align="aligncenter" width="800"]
Figure #3[/caption]
3. Transfer design to machine. Embroider motifs as desired along the edge of the cushion using your favorite method for placement. This is a dense design. Add tear-away stabilizer attached with adhesive spray for each hooping. Note that if you are stitching close to the edge you may need an oversized piece of stabilizer to make sure fabric is held tightly in the hoop.
Stitch leaves randomly on the fabric, making each cushion different or opt for a more precise look like I did. Tip: I marked off lines for the center of each motif and used templates printed with the Snowman marker created with PE Design 11 software for precise placement. I printed a template to stitch a mirror image copy of the design as well. To stitch each motif, I used low tack tape and taped the template to the fabric using the pattern as a guide, and then scanned the hoop to stitch each motif that matched my template. I started with the idea of stitching designs in the center of the front and one in each corner, and then decided to add designs along the side. See examples of my embroidery process in Figure #4a through Figure 4e.
[caption id="attachment_26237" align="aligncenter" width="800"]
Figure #4a[/caption]
[caption id="attachment_26238" align="aligncenter" width="800"]
Figure #4b[/caption]
[caption id="attachment_26239" align="aligncenter" width="800"]
Figure #4c[/caption]
[caption id="attachment_26240" align="aligncenter" width="800"]
Figure #4d[/caption]
[caption id="attachment_26241" align="aligncenter" width="800"]
Figure #4e[/caption]
4. Remove excess stabilizer, press fabric, and cut embroidered cushion to size. 5. Make and add optional piping as follows: Measure for cording and add several extra inches. Cut bias tape the same length. Press tape open. Add strips of stabilizer to wrong side and sew a line of decorative satin stitches (stitch No. 13-06) along the center. Remove stabilizer, press, wrap around cording, and machine baste close to cord using adjustable zipper foot. Pin and then machine baste cording to front piece, overlapping cord at the center back and clipping corners to fit curves. See piping steps in Figure #5a through Figure 5e. [caption id="attachment_26242" align="aligncenter" width="800"]
Figure #5a[/caption]
[caption id="attachment_26243" align="aligncenter" width="800"]
Figure #5b[/caption]
[caption id="attachment_26244" align="aligncenter" width="800"]
Figure #5c[/caption]
[caption id="attachment_26245" align="aligncenter" width="800"]
Figure #5d[/caption]
[caption id="attachment_26246" align="aligncenter" width="800"]
Figure #5e[/caption]
6. Clean finish straight edges of back pieces by sewing bias tape over raw edges. Note: Corded version of cushion shown in remaining steps. Overlap to fit front piece, having all raw edges even and cording sandwiched between the layers. See Figure 6a and Figure 6b.
[caption id="attachment_26247" align="aligncenter" width="800"]
Figure #6a[/caption]
[caption id="attachment_26248" align="aligncenter" width="800"]
Figure #6b[/caption]
7. Sew back and front layers together using zipper foot, sewing close to cording. 8. Turn right side out and press. Cut foam using front pattern, cutting piece slightly smaller than front for easy insertion. Tip: Use a permanent marker to trace pattern on foam and then cut ½-inch inside the markings for foam that is slightly smaller than your outer cover. Insert foam through back opening. You are finished! Enjoy! See back of finished cushion below:
Options and ideas:
- Use additional bias tape to make ties for securing cushion to chair legs, adding ties at the two corners along the back of the cushion.
- Purchase enough fabric to make covered cording using the self-same fabric as your cushions if desired.
- For sensational dining room décor, consider adding this design to table runners, placemats, coasters, and more!
Tags
Shop this Project
When inspiration strikes, Brother has you covered! The products in this stylish project are available for purchase so you can click, shop, and get to sewing!
Embroidery Sewing Machines
Related Projects
Stay Connected
* Required fields
Follow Us
- Product Support
- Product Support Assistant
- Terms of Sale
- Product-Registration
- Search Supplies/Accessories
- Ordering & Shipping Information
- Ordering & Account FAQs
- View Order Status
- Warranty & Extended Warranty Information
- Recall Information
- Return Policy
- Security Support Information(Opens in a new tab)
- Contact Brother
