Free Design: Embroidered Holiday Place Cards
Brother Sews Ambassador
Pretty snowflakes and a charming heart make up the Brother Free design this month. I used this design to embellish place cards for a holiday dinner table. These cards are meant to give your guests a warm welcome into your home!. Since the design had a rustic look, I chose to add a bit of hand-stitched silver trim along the top edge. Read through the instructions and see how I accomplished this technique.
You could just as easily use this design to make a custom greeting card for special friends and family. I can’t wait to show you the steps for making this unique card design. Are you ready? Let’s go sew!
Materials and Supplies:
 Figure #1a
 Figure #1b
Basic steps for creating each card:
1. Transfer design to machine. Hoop cut away stabilizer in 5-inch X 7-inch hoop. Tape 5-inch X 7-inch piece of felt in center of hoop. See Figure #2.
 Figure #2
2. Create a combination design by adding a name. Complete the design by adding a triple straight stitch rectangular frame from built in frame patterns. Note: Re-size frame to equal approximately 2 ½-inches high X 4 ¾-inches wide. See Example of combination design in Figure #3.
 Figure #3
3. Embroider combination design for each piece of felt. See Figure #4.
 Figure #4
4. Trim felt, leaving 1/8-inch beyond the frame. See Figure #5.
 Figure #5
5. Assemble supplies to finish cards. Center the first felt piece 3/4-inches from folded top edge of a card and secure with adhesive dots or glue. See Figure #6.
 Figure #6
6. Trim card so you have a ¾-inch margin on the bottom and side edges. 7. Set machine up for sewing, placing jeans or leather needle in the machine but no thread in the top and bottom. Check to see if your machine has an option in the set mode for turning OFF the thread sensor. See Figure #7. Tip: If your machine does not have this feature you likely get a warning when sewing without thread. Just ignore it and keep stitching.
 Figure #7
8. To make prominent holes select the triple straight stitch with a length of 3.5. See Figure #8a. Stitch across the top edge of the card to make holes for embellishment thread, beginning and ending stitches slightly in from the edge. See Figure #8b and Figure #8c.
 Figure #8a
 Figure #8b
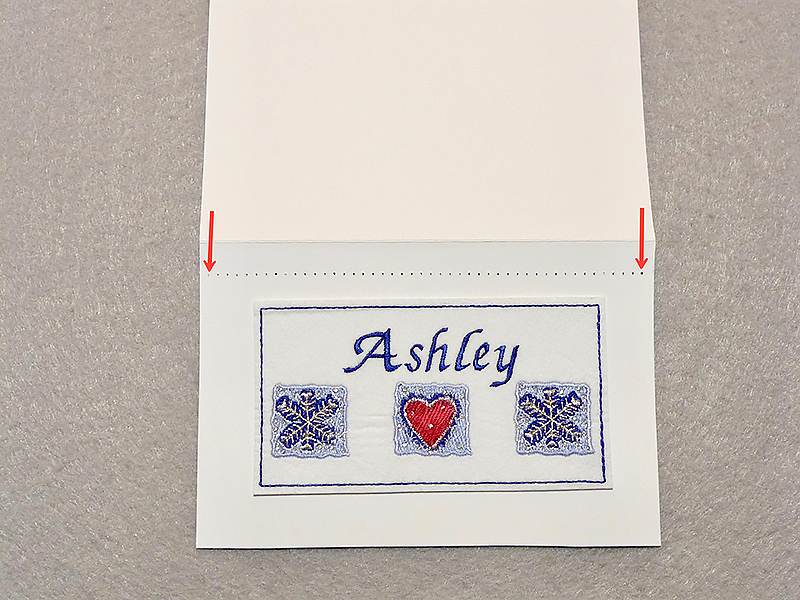 Figure #8c
9. Prepare to add embellishment thread to card as follows: Cut thread length in half and knot one end of each piece to keep thread from slipping out of the punched hole. Thread piece into tapestry needle. Beginning on the back side of the card at one end, push up through the hole, bringing the needle and thread to the top side, then cross over two holes, and push needle down to the back side. See Figure #9.
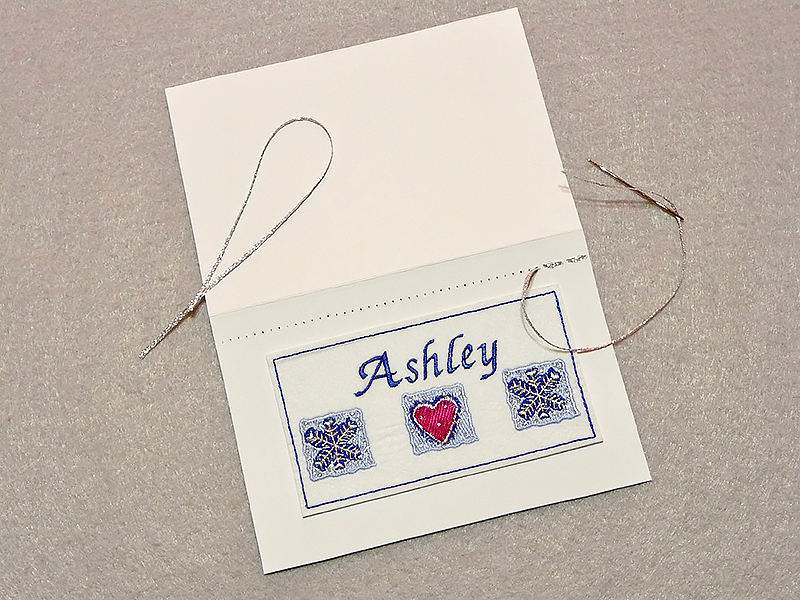 Figure #9
Continue until you reach the center point of the card, leaving the thread tail on the top side. Repeat the process, stitching from the opposite end. Tie the loose ends together in a bow and trim tails if necessary. You are finished! Enjoy!

Options and ideas:
CLICK HERE FOR PDF!
Pretty snowflakes and a charming heart make up the Brother Free design this month. I used this design to embellish place cards for a holiday dinner table. These cards are meant to give your guests a warm welcome into your home!. Since the design had a rustic look, I chose to add a bit of hand-stitched silver trim along the top edge. Read through the instructions and see how I accomplished this technique.
You could just as easily use this design to make a custom greeting card for special friends and family. I can’t wait to show you the steps for making this unique card design. Are you ready? Let’s go sew!
Materials and Supplies:
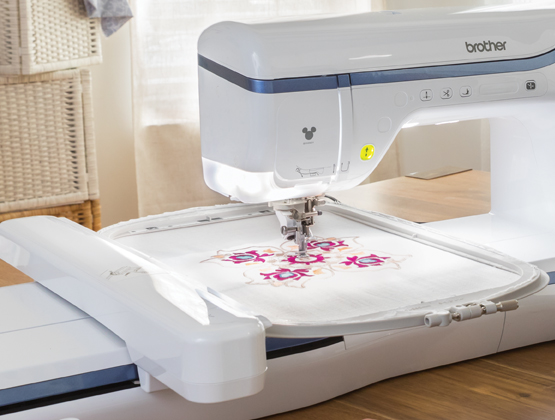
- Brother sewing and embroidery machine
. Note: Machine featured in this project is the Brother XP1 Luminaire
. You can use any machine with a 5 X 7-inch hoop to complete this project. - Brother Embroidery Threads
and Bobbin Thread for embroidering. Note: I used Brother MT997 Silver Metallic thread in place of white for the snowflakes. - SA5929
Brother Heavy Weight Cut-Away Stabilizer - Low tack tape to secure felt to stabilizer.
- Scissors or a rotary cutter and ruler to trim felt and cardstock.
- Clear, thin adhesive dots or glue stick made especially for crafting cards to attach felt piece to card stock.
- Stiff white felt, one piece measuring 7-inches wide X 5-inches long for each card. Note: You’ll find this type of felt sold in sheets in craft departments. You can substitute with standard craft felt stiffened with medium weight fusible interfacing on the wrong side.
- Blank white greeting cards measuring 7-inches wide X 5-inches long.
- Thick thread, soft 1/8-inch ribbon, or narrow cording for hand-stitched trim. Note: You’ll need one piece 20-inches long for each card. Embellishment thread should be thin and flexible enough to go through a small needle punched hole.
- Tapestry needle for threading embellishment thread through holes in cardstock.
- Size 18 Jeans needle or a size 18 leather needle for needle punching holes.
- Brother Free Design of the month: Free Design December
. See Figure #1a for size and original thread color information. See Figure #1b for modified colors.
Figure #1a
Figure #1b
Basic steps for creating each card:
- Embroider design with name on firm felt.
- Attach to blank card.
- Create needle punched holes and embellish with thread, soft ribbon, or cording.
1. Transfer design to machine. Hoop cut away stabilizer in 5-inch X 7-inch hoop. Tape 5-inch X 7-inch piece of felt in center of hoop. See Figure #2.
Figure #2
2. Create a combination design by adding a name. Complete the design by adding a triple straight stitch rectangular frame from built in frame patterns. Note: Re-size frame to equal approximately 2 ½-inches high X 4 ¾-inches wide. See Example of combination design in Figure #3.
Figure #3
3. Embroider combination design for each piece of felt. See Figure #4.
Figure #4
4. Trim felt, leaving 1/8-inch beyond the frame. See Figure #5.
Figure #5
5. Assemble supplies to finish cards. Center the first felt piece 3/4-inches from folded top edge of a card and secure with adhesive dots or glue. See Figure #6.
Figure #6
6. Trim card so you have a ¾-inch margin on the bottom and side edges. 7. Set machine up for sewing, placing jeans or leather needle in the machine but no thread in the top and bottom. Check to see if your machine has an option in the set mode for turning OFF the thread sensor. See Figure #7. Tip: If your machine does not have this feature you likely get a warning when sewing without thread. Just ignore it and keep stitching.
Figure #7
8. To make prominent holes select the triple straight stitch with a length of 3.5. See Figure #8a. Stitch across the top edge of the card to make holes for embellishment thread, beginning and ending stitches slightly in from the edge. See Figure #8b and Figure #8c.
Figure #8a
Figure #8b
Figure #8c
9. Prepare to add embellishment thread to card as follows: Cut thread length in half and knot one end of each piece to keep thread from slipping out of the punched hole. Thread piece into tapestry needle. Beginning on the back side of the card at one end, push up through the hole, bringing the needle and thread to the top side, then cross over two holes, and push needle down to the back side. See Figure #9.
Figure #9
Continue until you reach the center point of the card, leaving the thread tail on the top side. Repeat the process, stitching from the opposite end. Tie the loose ends together in a bow and trim tails if necessary. You are finished! Enjoy!
Options and ideas:
- Add a heartfelt message on the inside of the place card. Perhaps including a photo with a family memory or a statement of gratefulness for your beloved friend or family member.
- Use this same basic process to create a greeting card, centering the embroidered piece on the front of the card. Sew decorative stitches around the piece in place of the punched holes. Simply thread machine with decorative thread in the top and bobbin and use an old needle in the machine.
- Consider adding other trims or embellishments to decorate the card.
CLICK HERE FOR PDF!
Tags
Shop this Project
Have you ever seen a project (like this one) and said, 'I want to try that?' Well, Brother has you covered! The products in this fun project are available for purchase, so you can click, shop, and get to embroidery!
Embroidery Sewing Machines
Related Projects
Stay Connected
* Required fields
Follow Us
- Product Support
- Product Support Assistant
- Terms of Sale
- Product-Registration
- Search Supplies/Accessories
- Ordering & Shipping Information
- Ordering & Account FAQs
- View Order Status
- Warranty & Extended Warranty Information
- Recall Information
- Return Policy
- Security Support Information(Opens in a new tab)
- Contact Brother
