Free Design: Embroidered Redwork Tea Towel with Decorative Trim
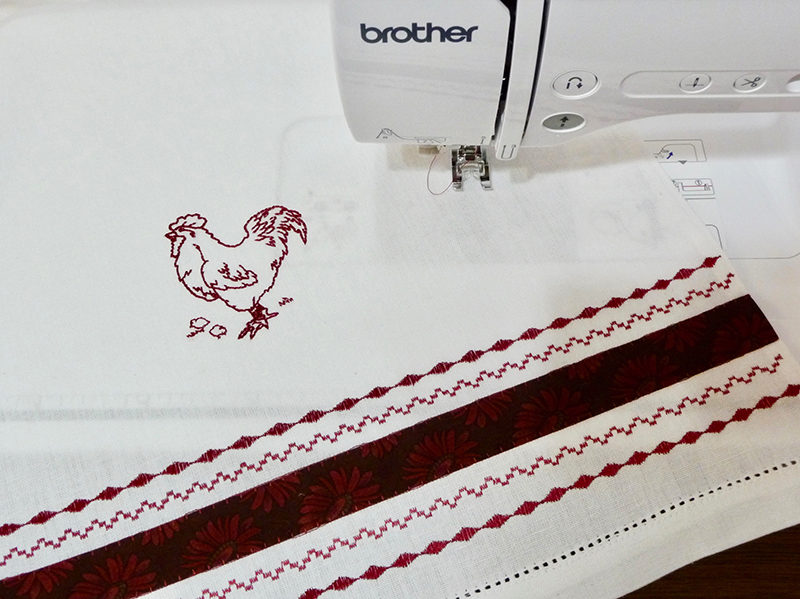
Craft your own “farmhouse chic” look and dress up your kitchen with this Redwork towel. In this project, you’ll see how to add decorative elongation stitches to the Brother Free Design of the Month, a classic Redwork rooster design.
Materials and Supplies:
- Brother Sewing and Embroidery Machine
with 4-inch hoop capability. - Brother Embroidery Thread, featured embroidery thread is Candy Apple Red, ETP 0020.
- Brother Bobbin Thread.
- SA5818,
heavy weight tear-away stabilizer for decorative stitching. - Presser foot “N” for decorative stitching, included with machine accessories.
- Blank Tea towel. Note: In this example towel measures 17-inches wide X 27-inches long.
- Spray starch, or liquid wash-out fabric stabilizer for stiffening towel fabric. You can also consider layering wash-away stabilizer with the towel when hooping.
- Basic sewing notions including pins and a removeable marker for fabric.
- One strip of cotton fabric measuring 2-inches wide X the width of the towel, plus one additional inch.
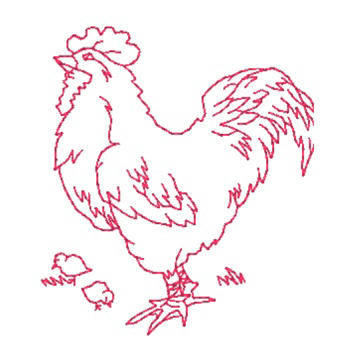
- Brother Free Design of the Month: Redwork Rooster.pes
See Figure #1.
Brother Free Design of the Month
[caption id="attachment_19040" align="aligncenter" width="355"]
 Redwork Rooster.pes [/caption]
- 2.87” Wide X 3.23” High
Steps to Create Decorative Tea Towel
- Set machine for embroidery and transfer free design to your machine. Starch and iron the towel or apply stiffener so you can embroider without added stabilizer. Embroider on towel, leaving room for decorative stitching below the design.
Note: In this example the design is centered 8-inches from the lower edge. The combination of the starched towel and the lightweight characteristics of this design produce a smooth finish without added stabilizer. See Figure #2a and #2b.
[caption id="attachment_19041" align="aligncenter" width="800"] Figure #2a[/caption]
[caption id="attachment_19042" align="aligncenter" width="800"]
 Figure #2b[/caption]
- Set up machine for standard sewing with thread to match your fabric strip. Fold under ½-inch along each long edge of strip, folding toward the center to form a strip finishing at 1-inch wide. Length of strip should cover the width of the towel with ½-inch for turning under at each short end. See Figure #3.
 Figure #3[/caption]
- Position strip on towel, leaving room for rows of decorative stitching. In this example, trim is positioned 3-inches from the lower edge. See Figure #4.
 Figure #4[/caption]
Pin trim in place. See Figure #5.
[caption id="attachment_19045" align="aligncenter" width="800"]
 Figure #5[/caption]
- Select an appliqué stitch and neatly sew trim to towel, turning under short raw edges at each end. See settings and example of stitch below:


- Attach the “N” foot. Thread machine with decorative thread in the top and bobbin. Place a strip of tear-away stabilizer under the towel, making sure strip completely covers area designated for decorative stitching. See Figure #6.
 Figure #6[/caption]
- Access the menu of elongation stitches. See below:

- Select the decorative stitch that mimics a checker board pattern. See example of stitch and settings below:


- Sew a row along edge of strip, using edge of the presser foot as a guide. See Figure #7.
 Repeat decorative pattern on the opposite side of the strip.
- Select the diamond shaped decorative stitch. Sew rows next to each of the previous decorative stitches. See settings below:

- Carefully tear away excess stabilizer and press towel.
Tip: When removing tear-away keep your thumb pressed on stitches and remove stabilizer with your opposite hand. This helps to keep stitches from distorting and makes it easier to pull out excess stabilizer. Don't be concerned with the small bits remaining under the stitches.
- You are finished! Stand back and admire your handiwork! See Figure #8 for a close-up of finished towel.


