Free Design: Embroidered Summer Handbag
Finished size of Purse: Approximately 11-inches wide X 9-inches high. Summer fashion is full of color and this month’s purse project is perfect for accessorizing your summer wardrobe. Our free design of the month, a simple floral line art design graces the front of the bag and this cinched style is easy to sew with minimal fabric requirements. Bet you’ll make it more than once!
Materials and Supplies:
- Brother
sewing and embroidery machine with 5 X 7-inch hoop capability. - Brother
Embroidery Thread, Bobbin Thread, and size 11 embroidery needle for embroidering. - Basic sewing notions including thread to match or blend with fabrics, a tool for turning narrow straps and drawstrings, and a bodkin or safety pin for inserting drawstrings.
- Brother Free Design of the Month. See Figure #1.
- Paper or pattern tracing cloth for creating pattern.
- Thin fusible craft fleece for backing outside pieces.
- Quilt weight cotton fabric for purse and lining.
Tip: Choose a fabric for the front that will showcase the design and a pretty print for lining. See Step #1 for fabric requirements.
[caption id="attachment_20232" align="aligncenter" width="497"]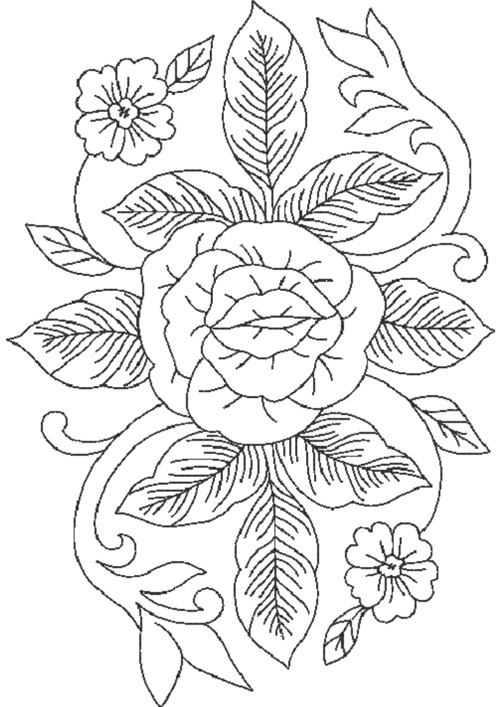 Figure #1[/caption]
Download: Brother Free Design of the Month:
Figure #1[/caption]
Download: Brother Free Design of the Month:Floral Artistry Rose.pes, 4.88” Wide X 7.05” High.
Note: Here is the direct link to the design on iBroidery.
Steps to Create Purse
- Create a custom pattern by drawing a rectangle measuring 15-inches wide X 13-inches long. Mark off and cut out 2 ½-inch squares at each bottom corner. Use pattern to cut main fabric pieces for purse as described in the pattern example below:
 Cut additional pieces for handles and drawstrings as follows:
- Cut two strips measuring 2 ½-inches wide X 18-inches long for purse handles.
- Cut two strips measuring 1 ½-inches wide X 36-inches long for drawstrings.
Tip:Tip: Piece shorter strips together if necessary, to achieve this length.
- Fuse fleece to wrong side of outside pieces. You’ll use one piece for the front and one for the back. See Figure #2.
 Figure #2[/caption]
- Set up machine for embroidery and transfer free design. Hoop front piece, having piece centered in the hoop. Embroider design. See Figure #3.
 Figure #3[/caption]
Note: Depending on your machine, design may stitch vertically or horizontally. Embroider both front and back if desired. Remove from hoop and press.
- Layer outside pieces with right sides together and raw edges matching. Measure down 1 ¼-inches from top edge and mark off a ¾-inch opening for drawstring. Sew side seams and bottom seam using a ½-inch seam allowance, backstitching at the beginning and end of openings. See marked openings and stitching lines in Figure #4.
 Figure #4[/caption]
- Press seams open. Working from the right side, topstitch around each drawstring opening to keep seam allowance flat. See example below:

- Repeat steps #4 and #5 for lining, sewing side seams and taking care to leave an opening at the bottom for turning purse right side out. See Figure #5.
 Figure #5[/caption]
- Next, you’ll need to box the bottom corners on all four pieces. Begin by pinning raw edges together, with side and bottom seams facing one another and then sew a ½-inch seam. See Figure #6a and #6b.
 Figure #6a[/caption]
[caption id="attachment_20240" align="aligncenter" width="800"]
Figure #6a[/caption]
[caption id="attachment_20240" align="aligncenter" width="800"] Figure #6b[/caption]
- Construct handles and create drawstrings as follows:
- For purse handles, fold strips with right sides together and long edges matching. Sew a ¼-inch seam, turn right side out, and press so that seam is positioned in the center. This will be the back side of the handle.
- For drawstring strips, hem each short edge by folding and pressing under ¾-inch, and then topstitch ½-inch from the right side. Next, place right sides together with long edges matching and sew strips using a ¼-inch seam. Turn right side out and press flat.
- Pin straps to front and back as shown below:

- Machine baste straps and remove pins. Place lining and purse right sides together and sew a ½-inch seam all along the top edge. See Figure #7.
 Figure #7[/caption]
- Turn purse right side out through bottom opening and close opening with small hand stitches. Press top edge to prepare for sewing drawstring casing. Form a casing for the drawstring with a line of stitching above and below side openings. See Figure #8a and #8b.
 Figure #8a[/caption]
[caption id="attachment_20243" align="aligncenter" width="800"]
Figure #8a[/caption]
[caption id="attachment_20243" align="aligncenter" width="800"] Figure #8b[/caption]
- You’re almost finished! Drawstrings are inserted at opposing ends, pulling from both sides to cinch the purse closed. Begin by inserting the first drawstring through one side, continuing all around the purse until it exits at the same hole. Insert the other drawstring through the opposite hole in the same manner as the first. Knot the ends together. See examples in the two photos below:

 You are finished! Be prepared for compliments! See closeup of purse front below:
 Options and ideas: Of course you can make this purse for any season by simply changing up your fabric selection. This purse makes a great gift too! Enjoy!

Related Projects
Stay Connected
* Required fields