Free Design: Embroidering Necklines on Knits
Machine Embroidery on a solid color knit top is a great way to turn plain into pretty! Embroidery near the neckline is especially attractive and this Brother Free Design of the Month design is ideal with it’s open and airy style of stitches. Preparation is the key to success and this project includes lots of tips for embroidering your knit top.
Materials and Supplies
Note: Design fits within a 4-inch hoop. The design combination shown in the sample features a combination design created to fit the 5” X 7” hoop.
- Brother Embroidery Thread
and Bobbin Thread - SA5931 Pacesetter® Medium Weight Fusible Cut-Away Stabilizer
- SA520 Brother Light Weight Water soluble Stabilizer
- SA530 Centering ruler for marking and alignment
- Brother Embellishment and Lettering software Program
- Plain knit top suitable for embroidering
- Wash out marking pen for marking fabric
- April 2017 Brother Free Design of the Month - Heirloom (4X4 Flower) Click Here to Download
Note: Software is optional but helpful for garment preview and printing templates as shown in this project example. This finished sample features options in the BES®4 Dream Edition™
software program. Additional programs share similar features. Click on the link below to review and compare features of various Brother software programs: Lettering and Monogramming Comparison Chart
software program. Additional programs share similar features. Click on the link below to review and compare features of various Brother software programs: Lettering and Monogramming Comparison Chart
Brother Free Design of the Month
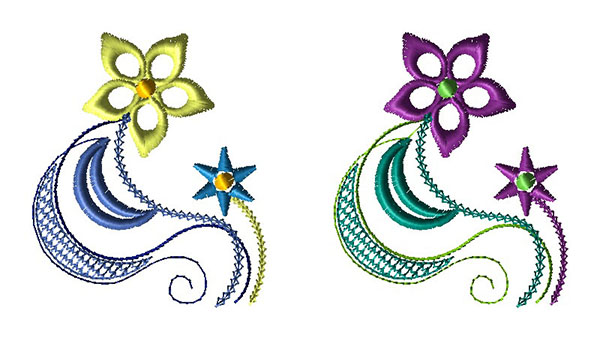
Original Design 5 Colors
Modified Design 3 Colors
Steps to Embroider Neckline
- Please read through all instructions and review the options presented here before beginning. Decide on a color scheme for your knit top. Borrowing ideas from a fabric print that you admire is often a good place to start. See Figure #1.
 Figure #1[/caption]
Tip: Feel free to minimize thread changes by using the same color in multiple places.
Follow these basic guidelines and tips for embroidering:
- Lightly fuse an oversized piece of cut-away stabilizer to wrong side, having it extend well beyond the neckline. When you hoop your top you can get close to the neck with part of the hoop extending beyond the fabric.
Tip: If knit is especially soft, fuse two stabilizer layers together and treat as one piece.
- Set the hoop screw for the proper depth of the fabric layers by doing a trial hooping of your top with the added stabilizer as follows: Loosen the hoop screw, hoop the top without regard for specific placement, and tighten the screw until it is snug. Remove fabric from hoop. Your hoop screw will now require little to no adjustment when you hoop for actual stitching. In addition, this helps prevent overstretching the fabric. When you hoop it for the actual embroidery process your fabric and stabilizer will be smooth on both top and bottom. See Figure #2A
and #2B.
 Figure #2A[/caption]
[caption id="attachment_6391" align="aligncenter" width="800"]
Figure #2A[/caption]
[caption id="attachment_6391" align="aligncenter" width="800"] Figure #2B[/caption]
- Use a printed template or measure and mark carefully for precise placement along a neckline. Mark dots where each center mark ends and then connect the dots to mark intersecting lines for precise center. See Figure #3.
 Figure #3[/caption]
- Turn the garment wrong side out when you hoop for actual stitching. Use fabric clips or ballpoint pins to gather up excess fabric and keep it from falling into the path of the stitching. Before embroidering always check to make sure fabric is not caught underneath the hoop. Watch the fabric as you stitch so excess fabric does not fall into stitching area.
- Add water-soluble stabilizer to the top before embroidering. Hoop it with fabric or tape it in place. See Figure #4.
 Figure #4[/caption]
- Consider your hoop size and software options when deciding on placement for your shirt. See Figures #5A-5C for a few different ideas.
 Figure #5A[/caption]
- Design combination from software using a 5” X 7” hoop and a printed template. Other designs are possible using one or more designs hooped one at a time in a 4” hoop.
 Figure #5B and #5C[/caption]
Two different options for marking and placement layout are presented here:
Figure #5B and #5C[/caption]
Two different options for marking and placement layout are presented here:
- Option #1 – Without software to print templates and create larger layouts you will need to mark the center of each design for stitching in the 4-inch hoop. You can measure and mark where you want the center of your design. You can also make a plain paper template 3 ¼” wide X 3 ¾” high to approximate the size of this design and more precisely mark the position.
Note: This template size does not have to be exact if you are not stitching designs side by side. Mark the center of the paper and place an arrow to indicate the top of the design. Use the paper to mark the center of the design for stitching on your top, rotating the design as desired, marking dots and then drawing lines to mark the exact center. Repeat the same rotation and measure carefully for spacing if you are creating a mirror image of the design. When hooping, be sure to line up the arrow with the top of the hoop and then line up the center markings using the gridded template that is included with each hoop. See example of steps below in Figures #6A-#6D.
[caption id="attachment_6408" align="aligncenter" width="800"]
 Figures #6A & #6B[/caption]
[caption id="attachment_6490" align="aligncenter" width="800"]
Figures #6A & #6B[/caption]
[caption id="attachment_6490" align="aligncenter" width="800"]
 Figure #6C & #6D[/caption]
Figures #6A & #6B[/caption]
[caption id="attachment_6490" align="aligncenter" width="800"] Figure #6C & #6D[/caption]
- Option #2 – Use software to arrange designs and then print a template with center marks to represent the exact size of the design. Matching centers, use this template for marking your neckline.
DID YOU KNOW? The BES®4 Dream Edition™ software program has a feature for previewing designs on various garment styles. You can select from the garment templates, and then change the size and the color to mimic your actual garment. Although the garment shape and size is approximate, it helps to give you a good idea of different layouts with actual designs.
- For option #2, open free design and then use the software features described below to help with your design layout by selecting options from the menu. Decide on placement and prepare your knit top with stabilizer for embroidering. The layout and number of designs for your top will depend on your garment style. Broader necklines and larger sizes allow for stitching more designs in the neckline area. For a neckline design on a soft knit garment a 5” X 7” inch hoop is a good average size. A combination design is featured in this example, with two face-to-face floral designs stitched in the center of the neckline. To create this featured design in the software, click on the drop down arrow below the hoop icon and choose the 5” X 7” hoop. See Figure #7.
 Figure #7[/caption]
- Select design and click on the rotation handle and rotate design 10 degrees to the left. See Figure #8.
 Figure #8[/caption]
- Next, copy and paste the selected design, and then use the flip Horizontal tool from the Arrange tab to mirror image the design. Select each design and move into place until designs are evenly aligned and fit within the hoop. See Figure #9.
 Figure #9[/caption]
- Choose a garment template, from Home tab and re-size so it is similar to your top. See Figure #10A.
 Figure #10A[/caption]
- Select the Garment Template, then click and drag moving it so the hoop is near the neckline. Remember that the Garment Template is only there as a visual guide. It does not represent the actual garment. See Figure #10B.
 Figure #10B[/caption]
- There are many options available within the software. This project uses just a few. Be sure to review the manual for more details. Change thread colors in the software if you choose. When you are satisfied with your design, click on the Hoop icon to de-select it. Use print option and print a template with center markings, using your desired printer options for full color or grey scale.

Note: Special transparency paper may be available for your printer but standard paper works well for single templates.
- Use the template to mark the fabric and hoop with center markings aligned with the grid. Save and transfer design to your machine. Before stitching make certain the design will stitch with top of design facing top of neckline. Don't skip this step. You don't want to embroider your design upside down! In this example the design is rotated to keep the bulk of the fabric to the left when hooping. See Figure #11A
through #11D.
 Figure #11A[/caption]
[caption id="attachment_6457" align="aligncenter" width="600"]
Figure #11A[/caption]
[caption id="attachment_6457" align="aligncenter" width="600"] Figure #11B[/caption]
[caption id="attachment_6454" align="aligncenter" width="600"]
Figure #11B[/caption]
[caption id="attachment_6454" align="aligncenter" width="600"] Figure #11C[/caption]
[caption id="attachment_6455" align="aligncenter" width="600"]
Figure #11C[/caption]
[caption id="attachment_6455" align="aligncenter" width="600"] Figure #11D[/caption]
- Remove markings from pen as per manufacturer’s instructions. Remove the added water-soluble stabilizer by tearing excess and then thoroughly laundering the shirt. Carefully trim excess cut-away from the back of the shirt, leaving a margin of approximately ½” all around outer edges. Press to thoroughly fuse the stabilizer in place.
Tip: Trimming stabilizer with pinking shears helps to keep the edges from showing through to the right side, particularly on soft knits.
You are finished! Enjoy!
Options and Ideas:
These instructions will work for a wide variety of Brother machines with a 4” X 4” or 5” X 7” hoop capability. Many Brother machine models have specialized built-in features for precise alignment of designs. Review your options and decide what works best for you.Related Projects
Stay Connected
* Required fields