Free Design: From Plain to Pretty! Embroidered Lace Trimmed Top
Add a little lace to a ready-made V-neck top and transform plain into pretty. All you need are a few simple supplies along with your Brother embroidery machine and our Free Design of the Month.
Materials and Supplies
- Brother
sewing and embroidery machine with 5 X 7-inch hoop capability. - Brother
Embroidery Thread, Bobbin Thread, and size 11 embroidery needle for embroidering. - Brother Free Design of the Month.
- SA540
Brother Water-Soluble fibrous stabilizer. - SA145
Brother Clear View foot - Plain V-Neck top
- Thin netting, known as tulle, 4 pieces measuring approximately 8-inches square for creating lace pieces. Note: You can match the netting to your top or match it to your thread color.
- Small sharp scissors for trimming lace pieces.
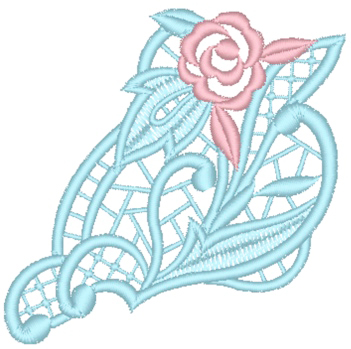
Brother Free Design of the Month:
- Lace_7_2019
- 3.60” Wide X 5.34” High
 Free Design of the Month[/caption]
Steps to Create Lace Trimmed Top
1. Gather your supplies. See Figure #1. [caption id="attachment_20771" align="aligncenter" width="800"]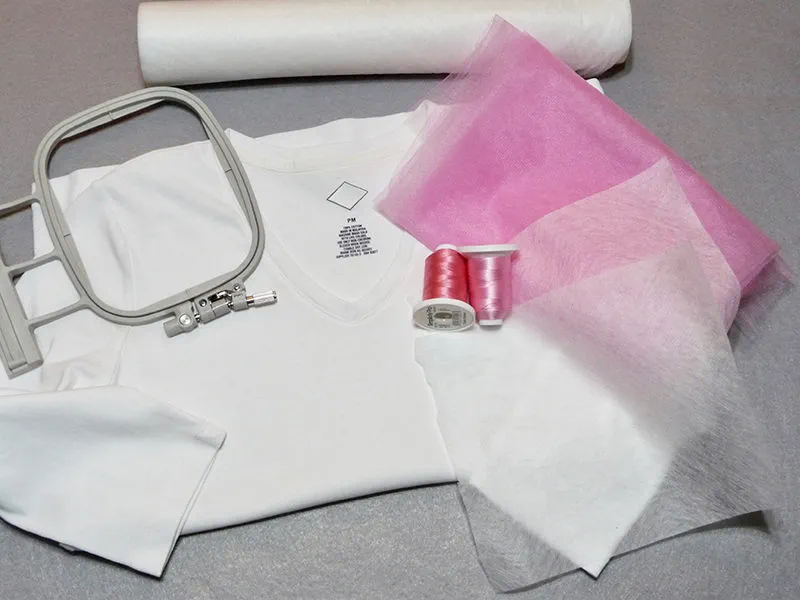 Figure #1[/caption]
2. Transfer design to your machine. Tightly hoop two pieces of tulle layered with a sheet of water-soluble stabilizer on the bottom. See Figure #2.
[caption id="attachment_20772" align="aligncenter" width="800"]
Figure #1[/caption]
2. Transfer design to your machine. Tightly hoop two pieces of tulle layered with a sheet of water-soluble stabilizer on the bottom. See Figure #2.
[caption id="attachment_20772" align="aligncenter" width="800"]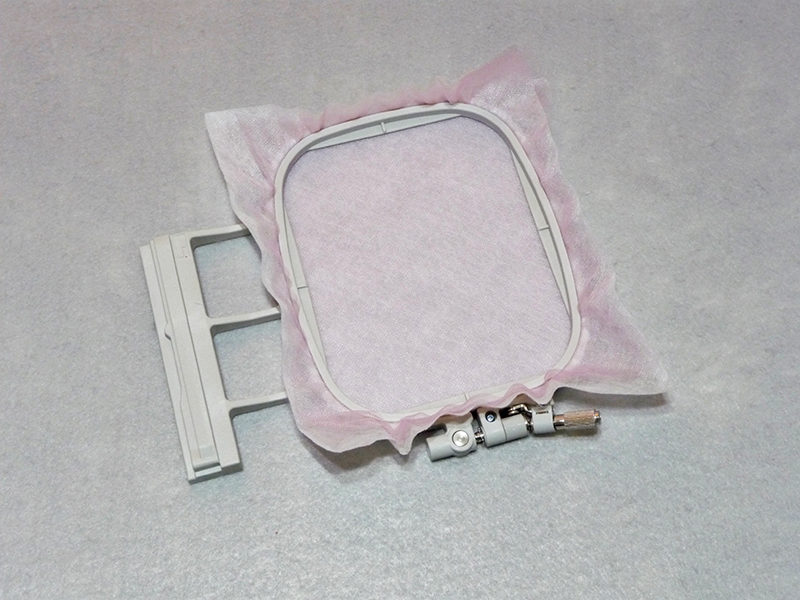 Figure #2[/caption]
3. Wind a bobbin for each color of embroidery thread you plan to use. Thread machine with first color in top and bobbin and embroider part one of the design. Change top and bobbin and embroider the second color. Your lace design will look pretty on both the right and wrong sides. See below:
[caption id="attachment_20781" align="aligncenter" width="800"]
Figure #2[/caption]
3. Wind a bobbin for each color of embroidery thread you plan to use. Thread machine with first color in top and bobbin and embroider part one of the design. Change top and bobbin and embroider the second color. Your lace design will look pretty on both the right and wrong sides. See below:
[caption id="attachment_20781" align="aligncenter" width="800"]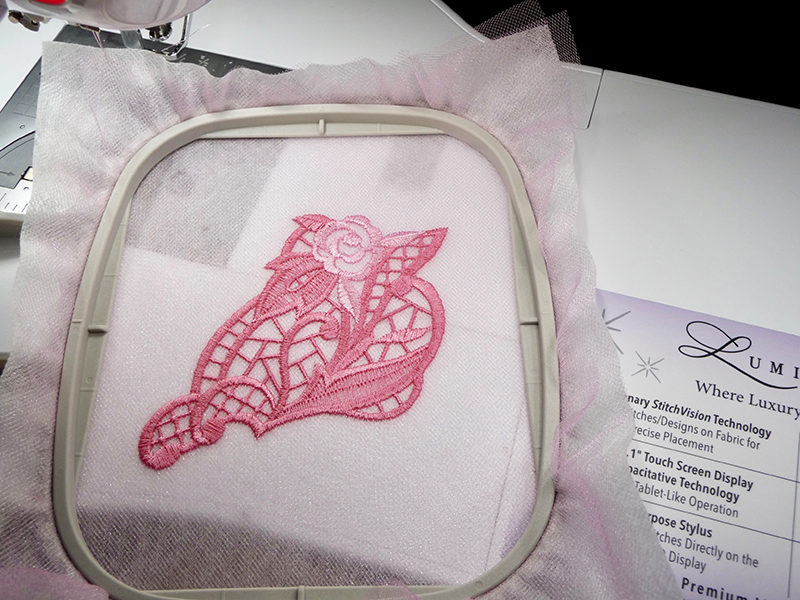 Right Side[/caption]
[caption id="attachment_20782" align="aligncenter" width="800"]
Right Side[/caption]
[caption id="attachment_20782" align="aligncenter" width="800"]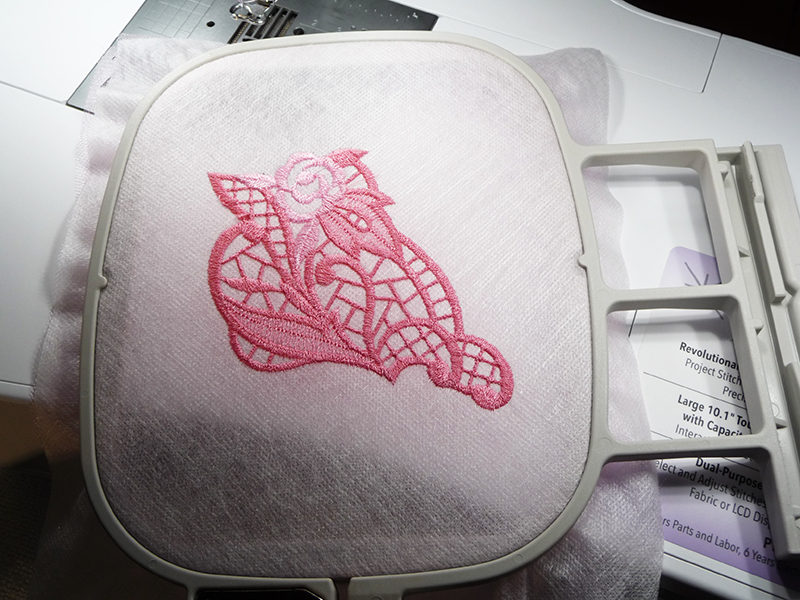 Wrong Side[/caption]
4. Mirror image the design and repeat the previous steps to make a second piece of lace for the neckline. See Figure #3.
[caption id="attachment_20773" align="aligncenter" width="800"]
Wrong Side[/caption]
4. Mirror image the design and repeat the previous steps to make a second piece of lace for the neckline. See Figure #3.
[caption id="attachment_20773" align="aligncenter" width="800"]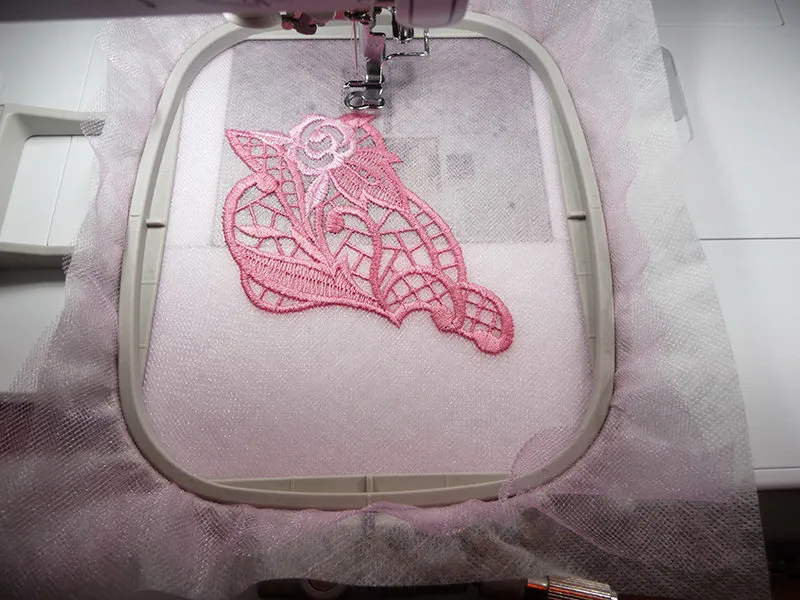 Figure #3[/caption]
5. Carefully trim away excess netting and stabilizer to prepare for sewing onto top. See Figure #4a and Figure #4b.
[caption id="attachment_20774" align="aligncenter" width="800"]
Figure #3[/caption]
5. Carefully trim away excess netting and stabilizer to prepare for sewing onto top. See Figure #4a and Figure #4b.
[caption id="attachment_20774" align="aligncenter" width="800"]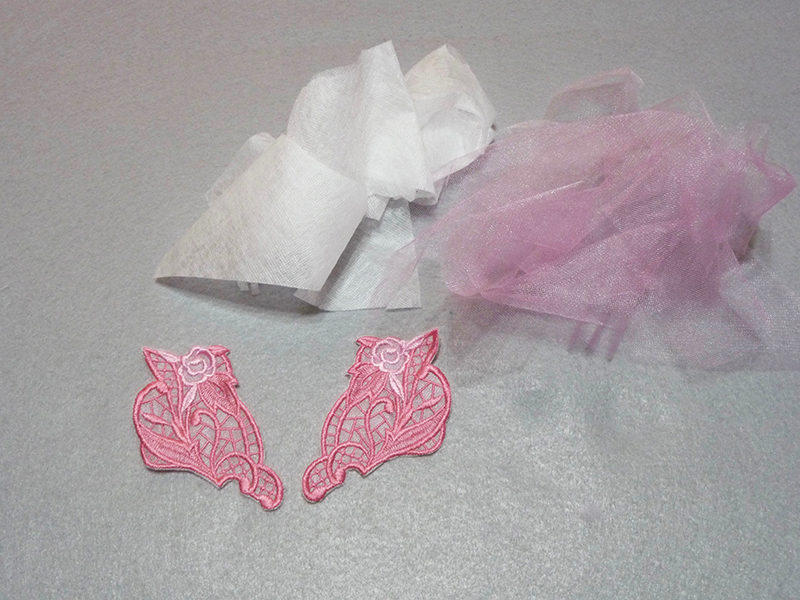 Figure #4a[/caption]
[caption id="attachment_20775" align="aligncenter" width="800"]
Figure #4a[/caption]
[caption id="attachment_20775" align="aligncenter" width="800"]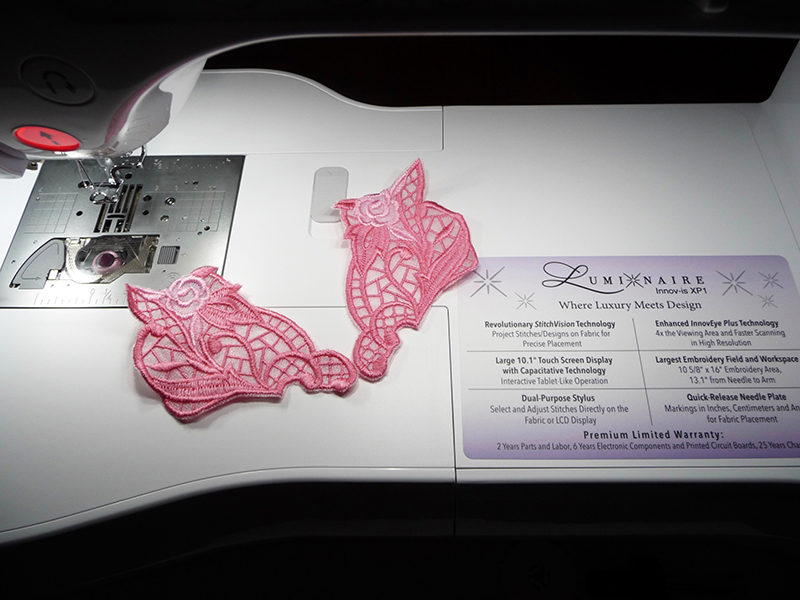 Figure #4b[/caption]
Tip: It’s better to leave a little excess netting than to run the risk of cutting too close to the finished stitches.
6. Wash out stabilizer according to package instructions. Let dry and then press flat using a press cloth.
7. Pin lace to front of shirt.
Tip: Slip a piece of cardboard inside the shirt to keep from pinning through all layers. See Figure #5.
[caption id="attachment_20776" align="aligncenter" width="800"]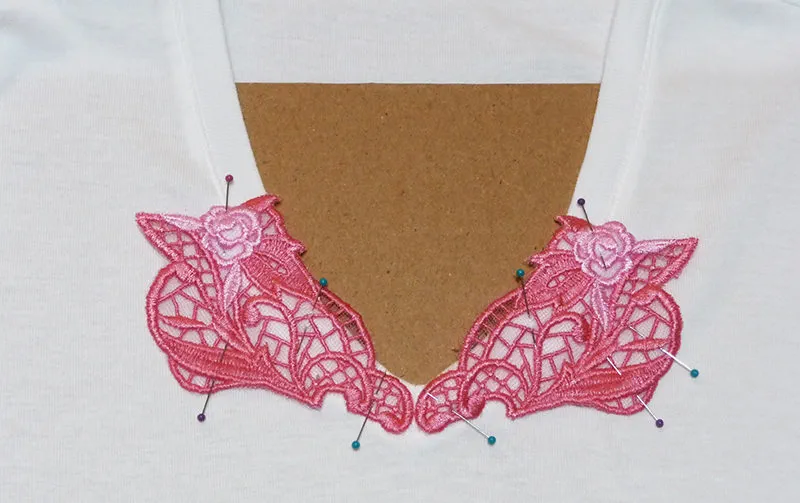 Figure #5[/caption]
8. Thread machine with thread that matches main color of lace. Secure lace to the top using a straight stitch set for a length of 2.0, stitching close to the satin stitches of the design so stitches blend in with the lace. See Figure #6a and Figure #6b.
[caption id="attachment_20777" align="aligncenter" width="800"]
Figure #5[/caption]
8. Thread machine with thread that matches main color of lace. Secure lace to the top using a straight stitch set for a length of 2.0, stitching close to the satin stitches of the design so stitches blend in with the lace. See Figure #6a and Figure #6b.
[caption id="attachment_20777" align="aligncenter" width="800"] Figure #6a[/caption]
[caption id="attachment_20778" align="aligncenter" width="800"]
Figure #6a[/caption]
[caption id="attachment_20778" align="aligncenter" width="800"]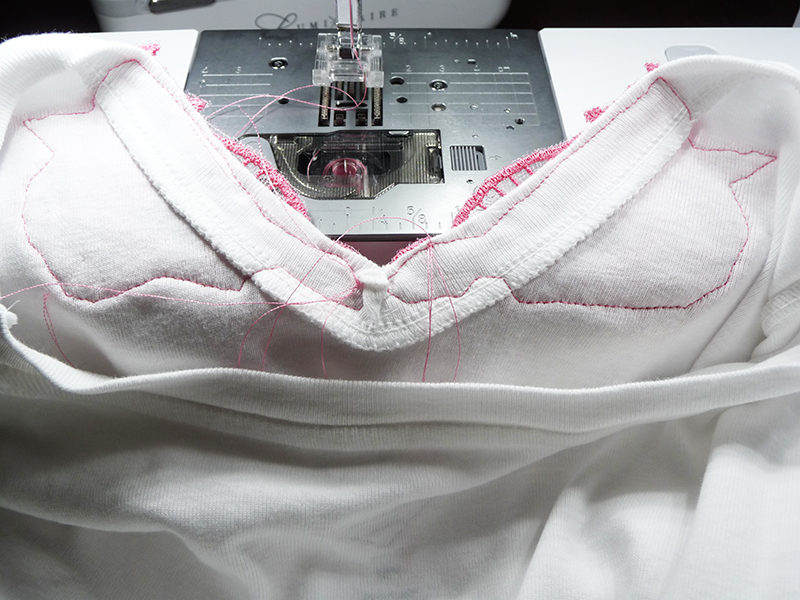 Figure #6b[/caption]
Tip: It’s a good idea to leave thread tails so you can tie the threads by hand instead of backstitching. Once you tie and trim the threads you can feed them under the fabric with a hand sewing needle for a neat finish. Your top is completed! See close-up of finished top below:

Options and Ideas:
- Choose tulle to match your top, and then stitch using one color of thread to match tulle for a tone on tone effect.
- Consider adding beads or hot fix stones to dress up your top even more!
- Attach this lace to other items. For a start, think about home décor, crafts, and even accessories such as purses.
- Explore coordinating lace pieces found on iBroidery.com.
You’ll find many lace designs that are made to link together for larger areas such as lapels and cuffs.
Related Projects
Stay Connected
* Required fields
Follow Us
- Product Support
- Product Support Assistant
- Terms of Sale
- Product-Registration
- Search Supplies/Accessories
- Ordering & Shipping Information
- Ordering & Account FAQs
- View Order Status
- Warranty & Extended Warranty Information
- Recall Information
- Return Policy
- Security Support Information(Opens in a new tab)
- Contact Brother
