Geometric Jewels Sampler Quilt Along Week 3

Hello! This is Wendy of The Weekend Quilter, and I’d like to welcome you all to the third week of the Geometric Jewels Sampler quilt along (QAL)! This week is all about half-square triangles (HSTs). More specifically we’ll be following the 8-at-a-time HST method.
Referring to the Geometric Jewels Sampler quilt pattern, we’re focusing on pages 6 and 7. The pattern is a FREE download from here, if you haven’t got yourself a copy yet.
In this blog post we will cover tips on how to trim half-square triangles accurately and fast!
This blog post is the third out of six blog posts for the Geometric Jewels Sampler QAL. Each week of the QAL duration (began February 27, 2024), there will be a new blog post every Tuesday based around the tasks that will need to be completed for the QAL. Some of the tips are geared towards the Geometric Jewels Sampler quilt pattern. But with that said, you can take the fundamentals from that and apply it to other future quilt projects. To receive updates about the new blog posts as well as weekly QAL tasks, be sure to sign up for the weekly newsletter here. They will be sent via. The Weekend Quilter and only for the 6 weeks of the QAL*.
For more information on what the QAL entails (schedule, tools and supplies, etc.) please check out a previous Geometric Jewels Sampler QAL blog post here . The QAL officially started on February 27, 2024. You’re more than welcome to join at any point and work at your own pace. You could also follow the same schedule as outlined in the first blog post with all the QAL info at a later date.
We’ll be keeping all our weekly tips, tricks and recommendations at the one location for reference here. So you may want to bookmark this one.
*By signing up for the Geometric Jewels Sampler QAL updates, you also agree to sign up to be on The Weekend Quilter and Brother International email newsletter list. We will not sell your email or spam you.
Supplies and Tools
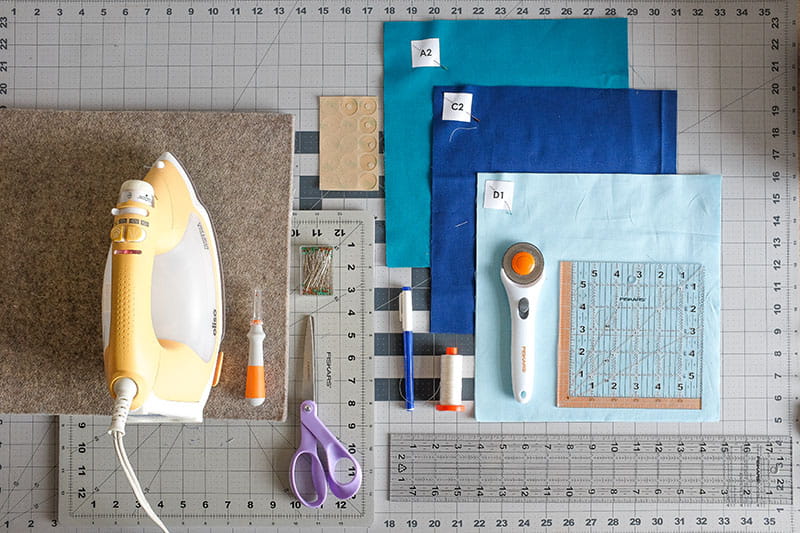
For this week’s task on making HST blocks, you will need the following:
- Download the Geometric Jewels Sampler quilt pattern for FREE from The Weekend Quilter’s website here.
- Basic sewing machine – the Brother Innov-ís BQ3100 from the Quilt Club Series was used in this tutorial
- Coordinating thread, 50wt cotton for piecing
- Corresponding fabric pieces for HST blocks – referring to the Geometric Jewels Sampler quilt pattern on page 3, you’ll need the following fabric pieces labelled as: A2, C2 and D1.
- Pins
- Fabric pen or pencil
- Fabric scissors
- Seam ripper
- Iron and ironing board or wool pressing mat
- Rotary cutter
- Quilting rulers – a long ruler and small or medium size ruler, at least 5in square in size and has a 45-degree angle guide for squaring up of the HST units.
- Cutting mat – preferably a rotating cutting mat. There will be an alternative tip if you don’t have one.
- Non-slip quilting ruler grips (optional)
Trimming HST Units
This week is all about HSTs. HSTs are one of the most commonly used shapes in quilting designs and has continued to make its way in the quilting world, from the very first quilts in history to modern-day designs. HSTs consist of two right-angled triangles joined on the longest sides to form a square
It’s not uncommon for quilt patterns to ask to trim (or square up) HSTs, for example at step 5, page 7 of the Geometric Jewels Sampler quilt pattern. Reason being is, as you’re sewing two pieces of fabric together to form HST units, fabrics can shift even though there might be pins to keep them in place. Seam allowances may slightly change based on the way and how fast the fabric is guided through the sewing machine. As a result of that, quilt patterns take into consideration room for error and space to trim the HST units to size. That way, when it comes to piecing all the units and blocks together, everything with line-up. Squaring up HSTs are an important step in quilt making and should not be discounted. Yes, it may take a little more time however all the hard work will be well worth it in the end. This following blog post will take you through how to accurately trim HST units and a couple of little tricks to speed up the process.
Tips on Accurately Trimming HSTs
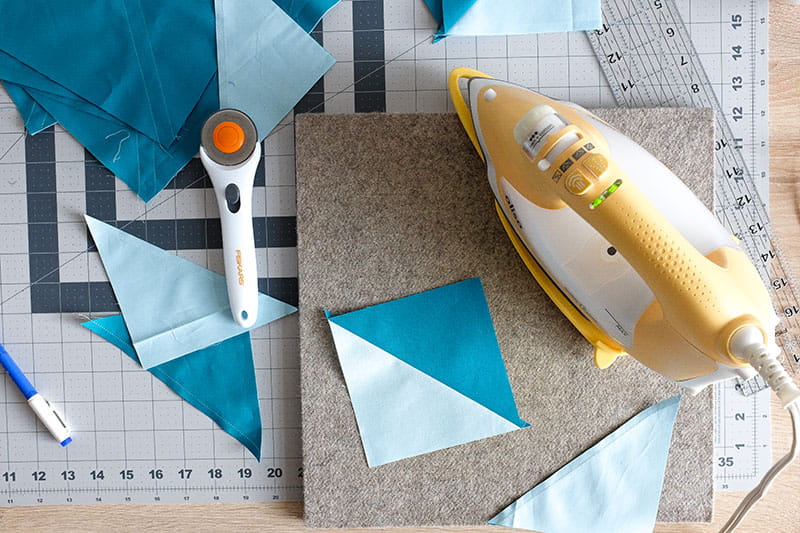
- Pressing matters – It is important to press before any trimming commences. This initial pressing is going to help the HST unit lay flat for accurate cutting. It doesn’t matter how you press it – open or to the one side. Just press.
And when it comes to pressing, don’t move the iron in a back-and-forth motion like you’d iron a shirt. That vigorous motion can distort the seam, especially when the HST units are sewn on the bias.
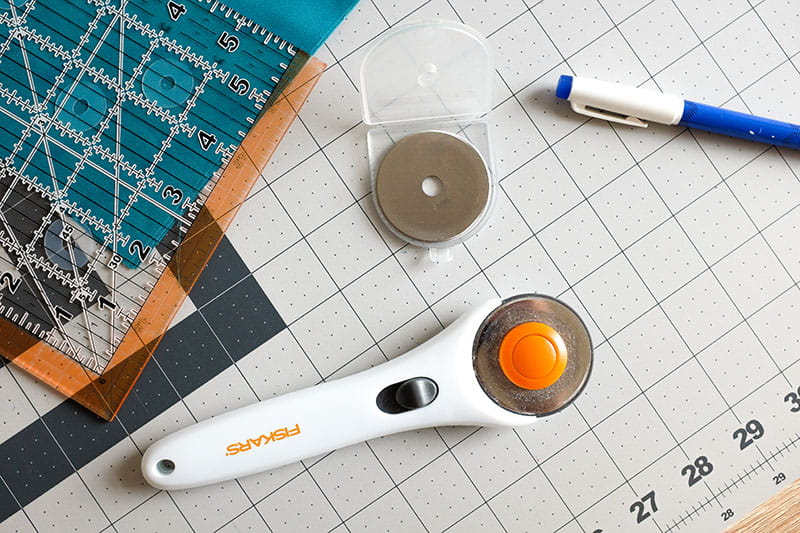
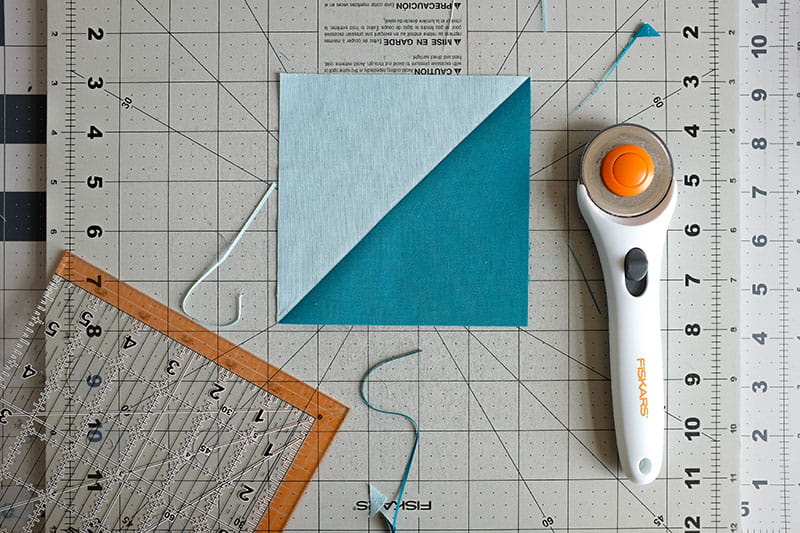
- Stay sharp – Having a sharp rotary cutter is another important component in accurate cutting and piecing. A sharp blade can help you speed through the trimming process. A good indicator of when a rotary cutter is in need of a replacement is when you’ll need to run the rotary cutter on the same spot more than once because it is skipping some of the fabric fibres.
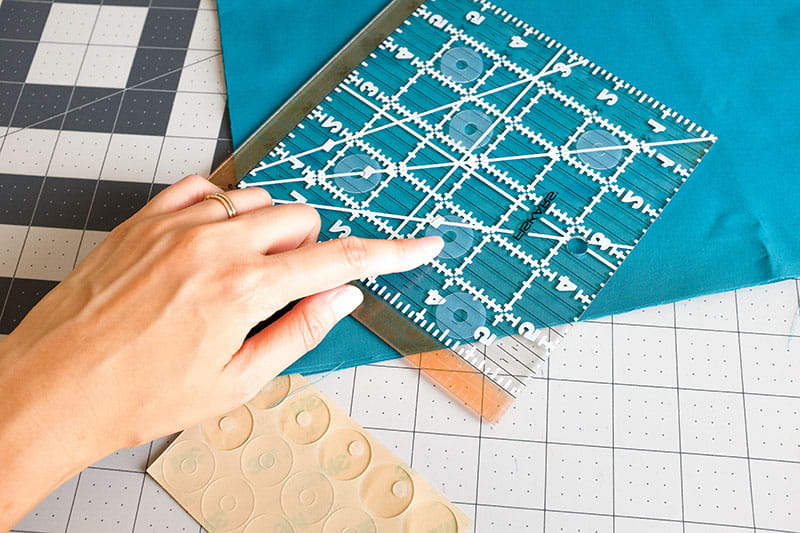
- Get a grip – A slippery tool may make inaccurate cutting and can throw the spanners in the works, especially if you don’t have enough fabric to fix any errors made while cutting. If you need some additional support and your rulers don’t have grips at the bottom, you could add adhesive non-slip quilting ruler grips at the bottom. They usually come in the form of transparent sticky dots with grips and you stick them at the bottom of the ruler. Depending on how grippy you would like your ruler to be you can add as many as needed.
- Measure twice, cut once – In addition to double checking the size of the trimmed HST as outlined in the quilt pattern, it is important to check that the ruler and required trimmed size of the HST sits within the HST unit and the 45-degree angle guide on the ruler is lined up with the diagonal seam that runs down the middle of the HST unit. The trimmed size as outlined in the quilt pattern takes into account ¼in seam allowance.
- A nice to have – A rotating cutting mat is not an essential, but it’s nice to have when you’re trimming (or squaring up) HSTs or units in general. By using a rotating cutting mat, it saves time and effort from having to reposition each HST (or unit) for trimming. I’ll be diving deep into more detail about how to use the rotating cutting mat to your advantage and speed the trimming process up in the next section
How-to and Quick Methods for Trimming HSTs
Trimming HSTs for a project can feel like a mundane task in the quilting process, especially when there are several of them to get through. But all the hard work and the time spent at this step is well worth it in the end. The following steps demonstrate how to trim HSTs and provide a couple of quick methods to speed this step up. I’ll be using the HST units from the Geometric Jewels Sampler quilt pattern as an example (step 5 on page 7):
I like to call this trimming method, two-by-two. It is most commonly used when trimming (or squaring up) HSTs and other square or regular shaped units. You remove two edges of a HST unit at a time until all sides of the HST unit are cleaned up. To do this:
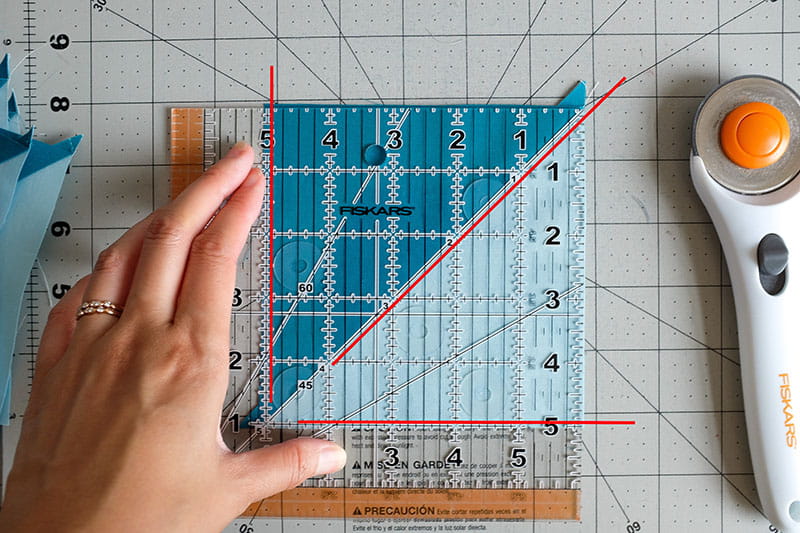
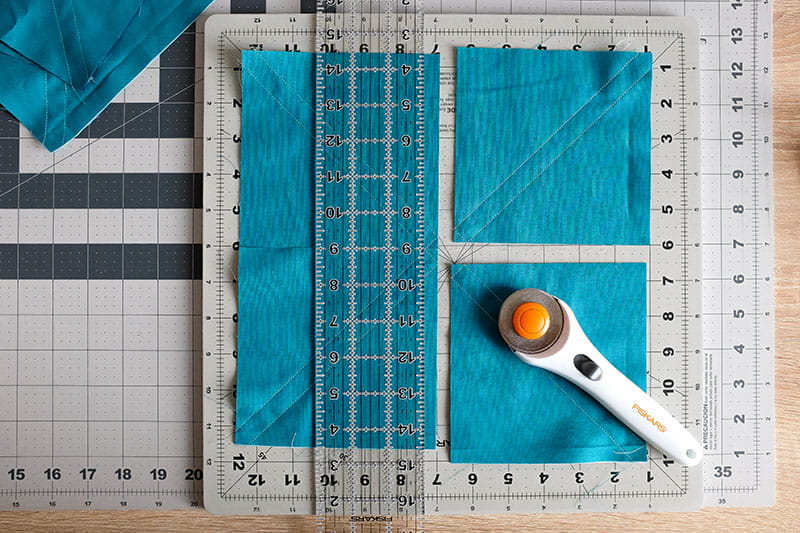
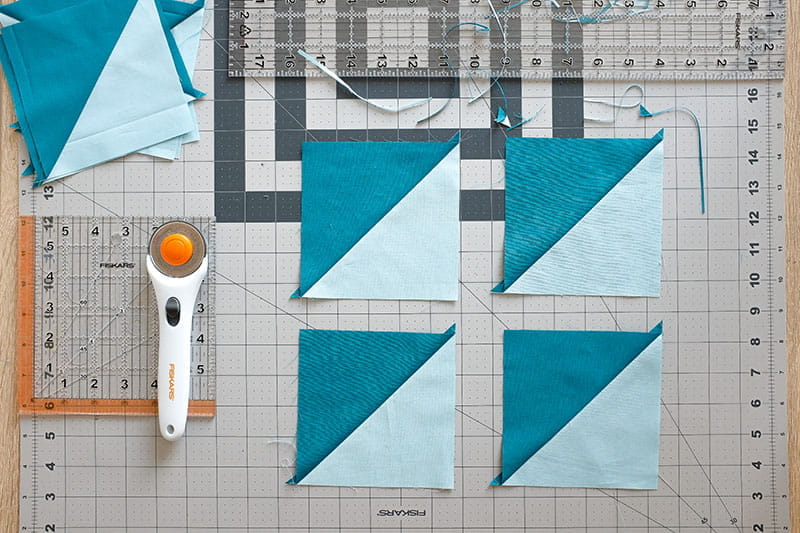
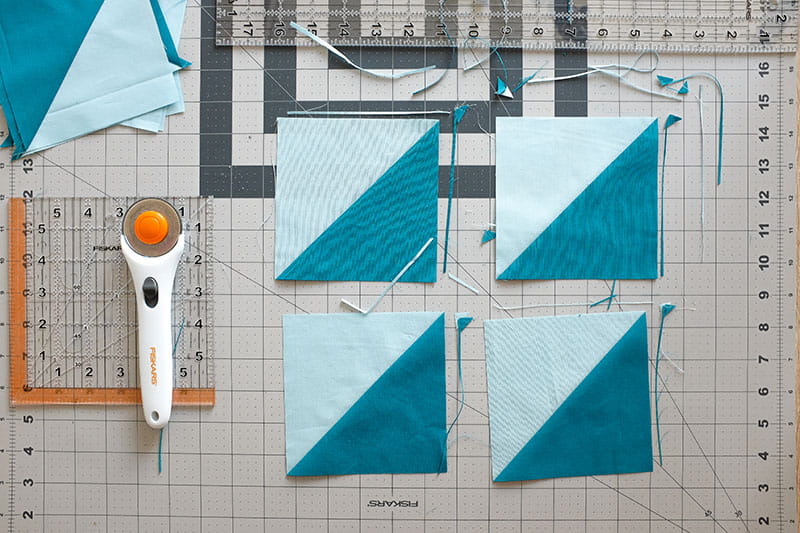
- Check the size of the trimmed HST as outlined in the quilt pattern. Using the Geometric Jewels Sampler quilt pattern as the example, the pattern calls for a 5in x 5in trimmed HST at step 5, page 7.
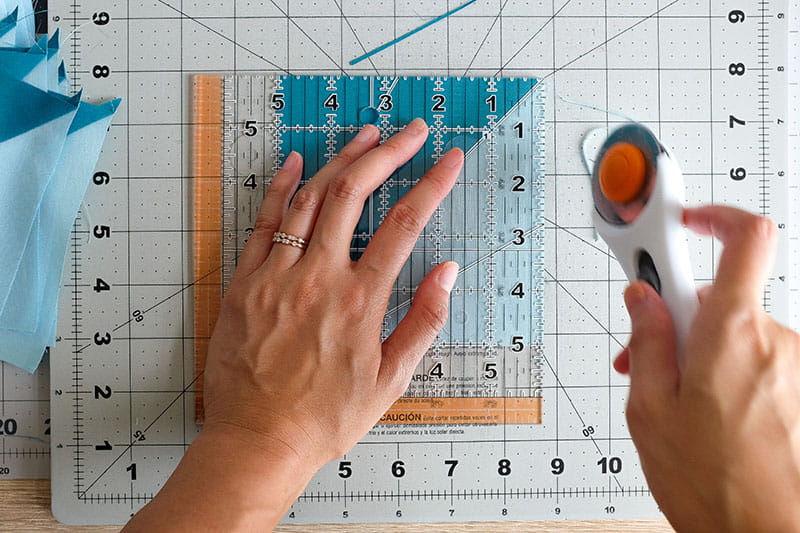
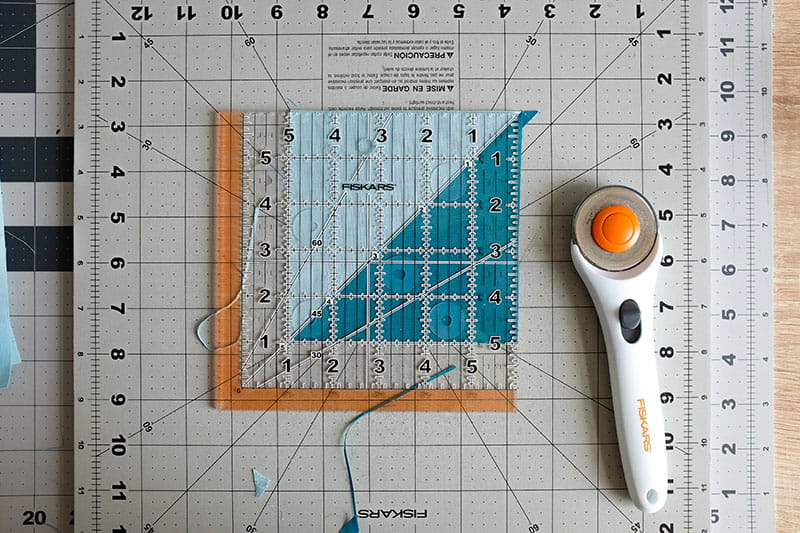
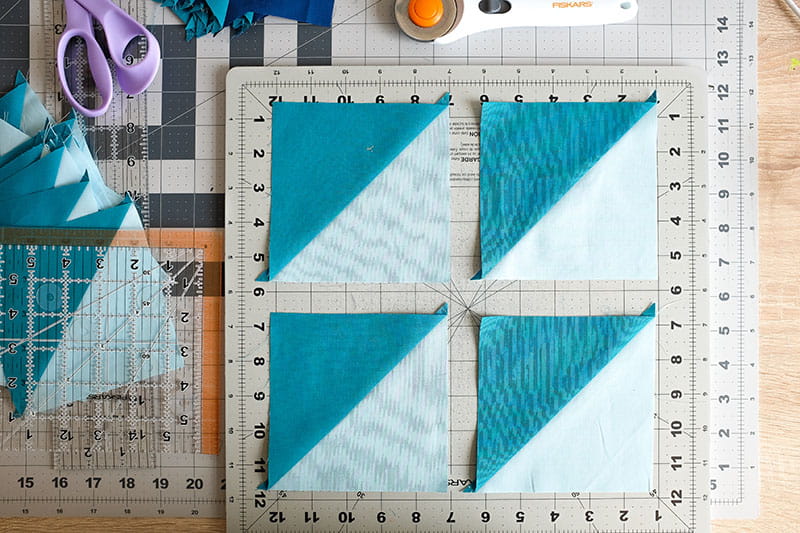
- With the right side of the pressed HST unit facing up and on the cutting mat. Place the quilting ruler on top of the HST unit, ensuring the ruler covers the required size of the HST, as well as the 45 degree-angle guide is matched up with the seam. It’s important to have these two variables ticked off before cutting. Otherwise, the seam that runs down the middle of the HST unit will not align with other seams and the points might be slightly off. Also, the trimmed HST unit might end up being too small because you have trimmed off too much fabric.
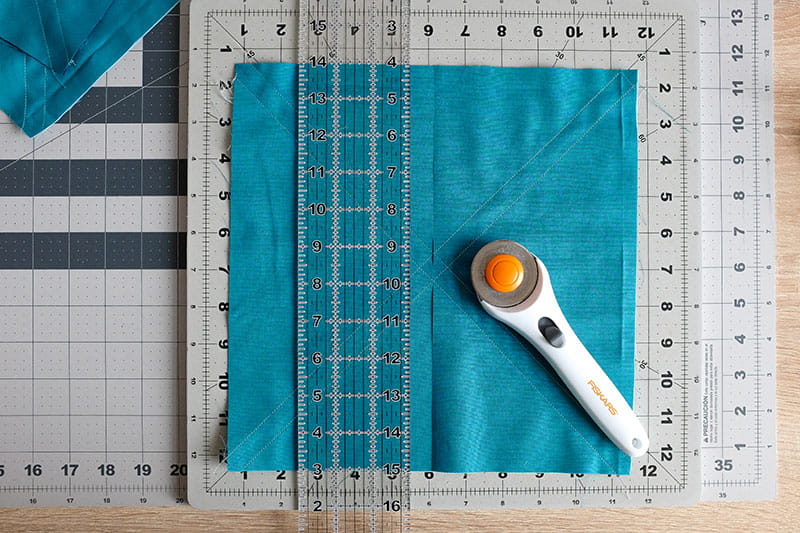
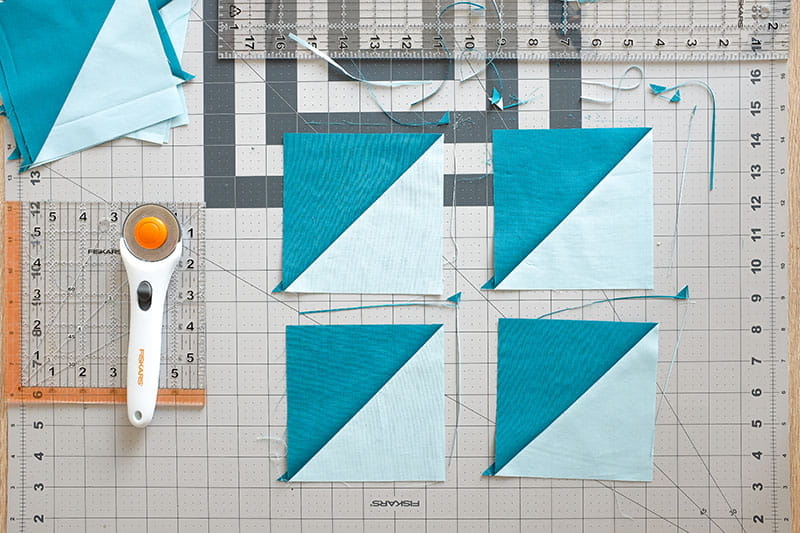
Once you have the ruler in place, apply pressure on the ruler with your non-dominant hand. With your dominant hand, cut the top and right edges with a rotary cutter. For my lefties out there, do the same thing but cut the top and left edges.
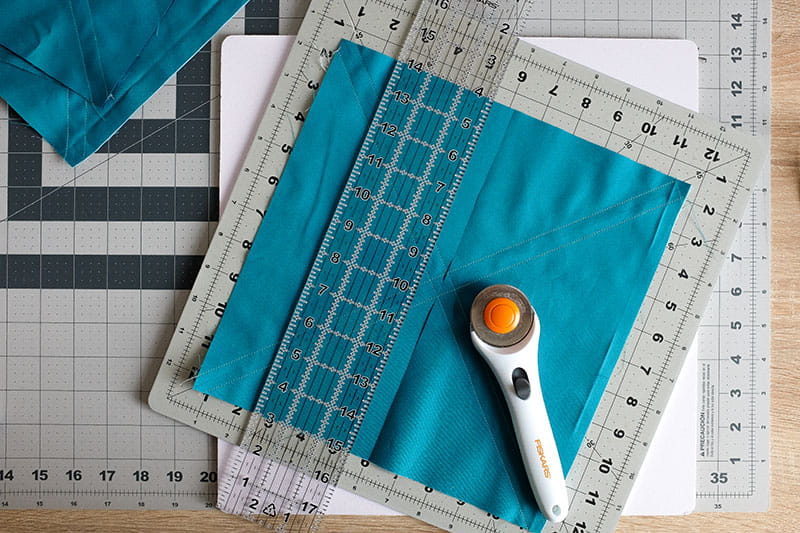
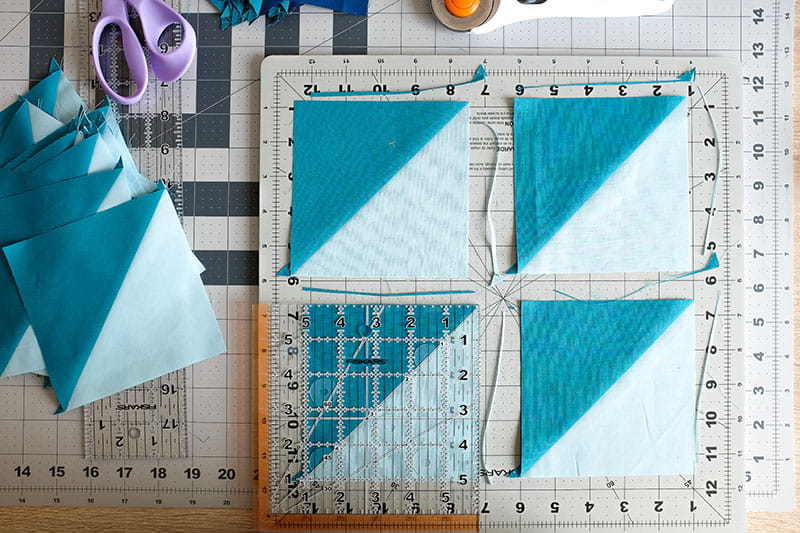
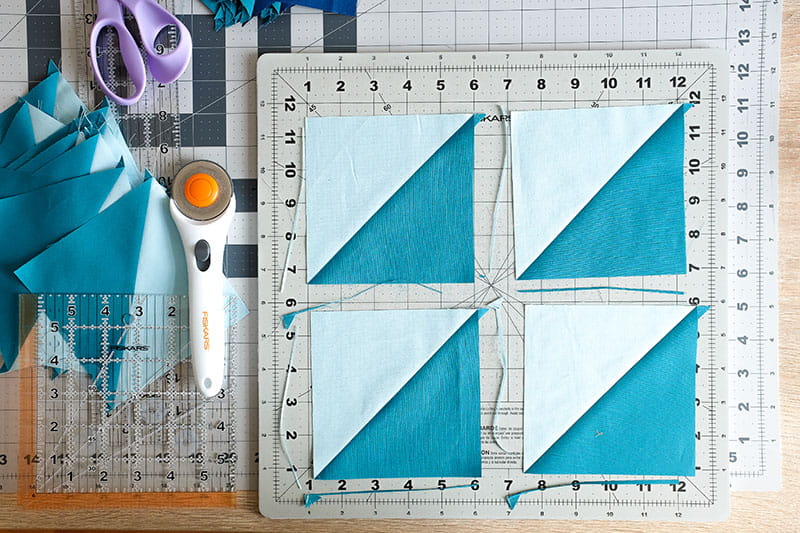
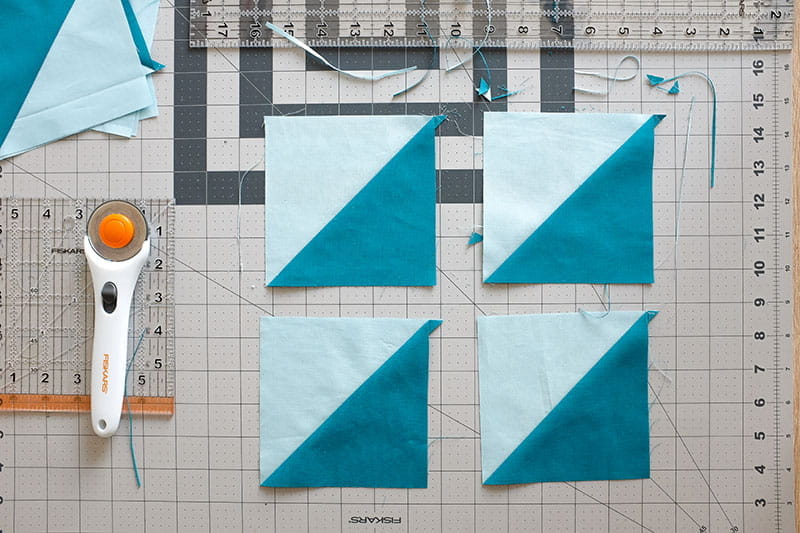
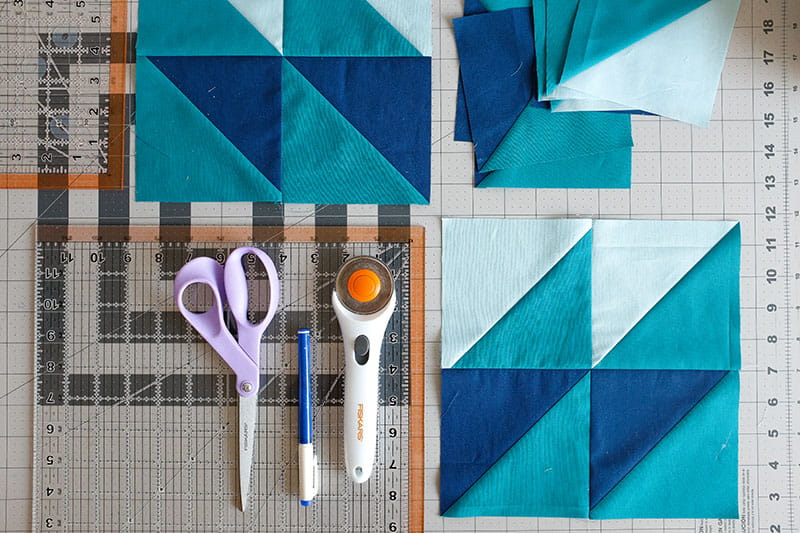
- Rotate the HST unit 180-degrees. Therefore, the untrimmed edges are on the top and right edges if you’re right-handed and vice versa if you’re left-handed. Then with a ruler, using the trimmed edges from the previous step as a guide, measure out the size of the square the pattern calls for (5in square in the Geometric Jewels Sampler pattern), and remove the remaining two edges.
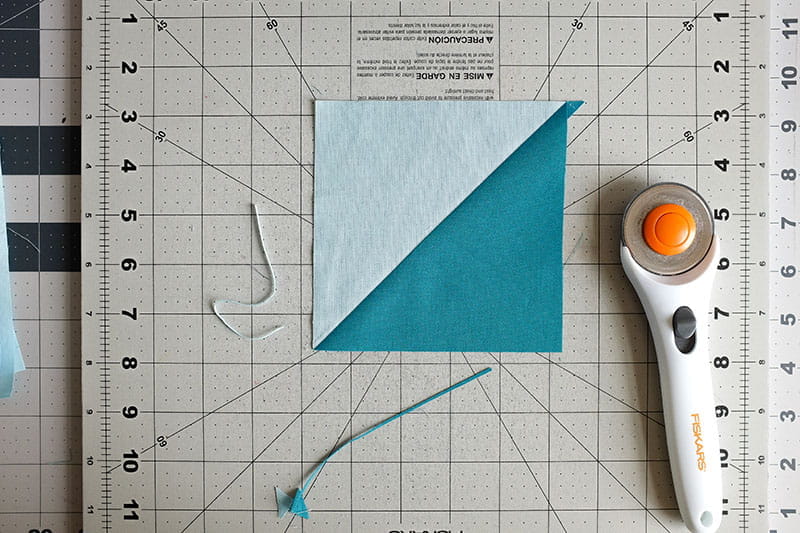
At this point of the trimming HST stage, having the 45-degree angle guide match up with the seam is not a massive concern, as that work has been done in the previous step.
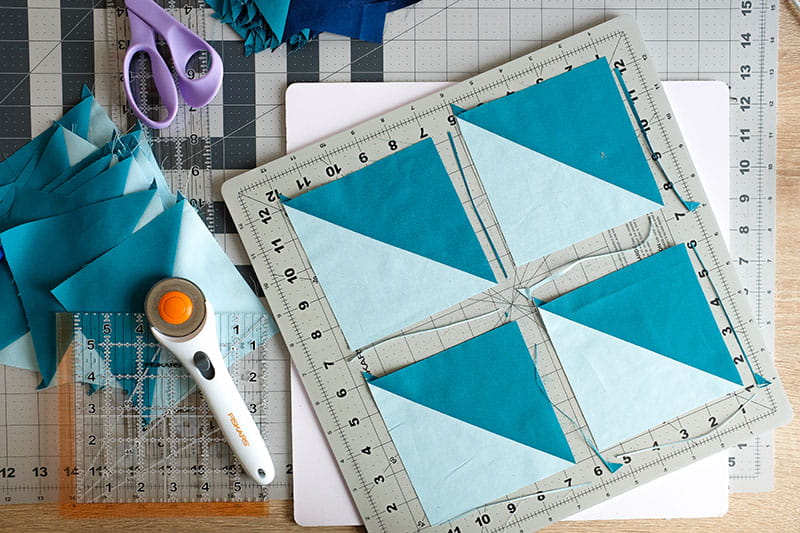
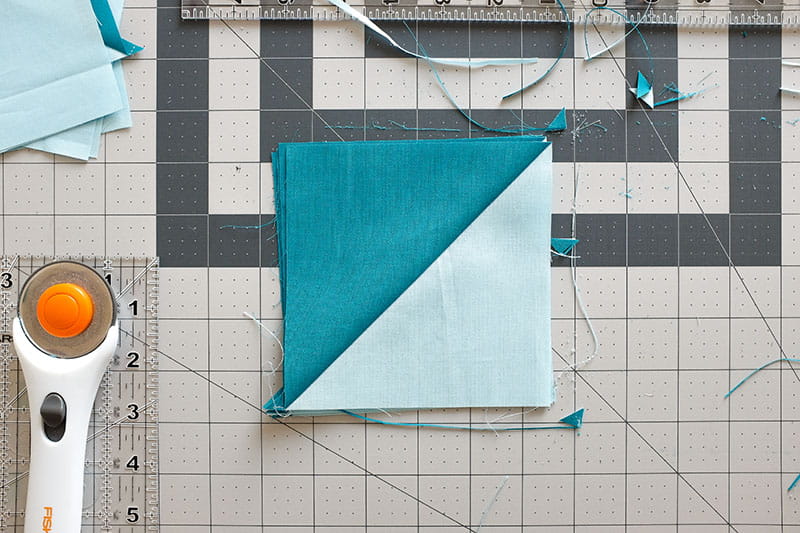
To speed up the two-by-two method, instead of repeating the last two steps as outlined above for each HST unit at a time, I like to trim the HSTs in batches. Meaning, I’d lay out a bunch of HSTs that would fit on my rotating cutting mat and in the same orientation, then trim off the first two edges, and then rotate all four HST units and cut the remaining edges at a time. Having a rotating cutting mat to trim the last two edges for each HST unit is convenient as you would not need to pick up and lay out each HST unit to reposition it for cutting. Each time you pick up a HST and lay it out again, it equals time and effort.
If you don’t have a rotating cutting mat, you could use a small cutting mat to trim your HST units and then when it comes to trimming the last two sides of the HST units, you could carefully rotate the cutting mat.
Another alternative to speed this method up without a rotating cutting mat is, layout a bunch of HST units on the cutting mat, then cut the first two sides on all of the HSTs. As you’re cutting, set the units as side in the same orientation. Keeping it in the same orientation is key to efficiency. That way, when it comes to trimming the remaining two edges, you can pick up the pile of half-trimmed HST units, rotate it all at once and remove the last two edges like you did with the first two edges.

Hope these little tips make trimming HST units more enjoyable and a big difference in the accuracy and efficiency in trimming HSTs units. Remember to not be afraid to try out both methods. That’s how you discover what you are more comfortable with and prefer. And who knows, you might discover another quick and accurate method, or speciality rulers to help speed this step!
Seeing your work brings us so much joy. Be sure to also share your works-in-progress on social media by tagging Wendy @The.WeekendQuilter and @BrotherSews and using the #GeometricJewelsSampler #BrotherSews hashtags.
Till next time, happy sewing!
Related Projects
Stay Connected
* Required fields