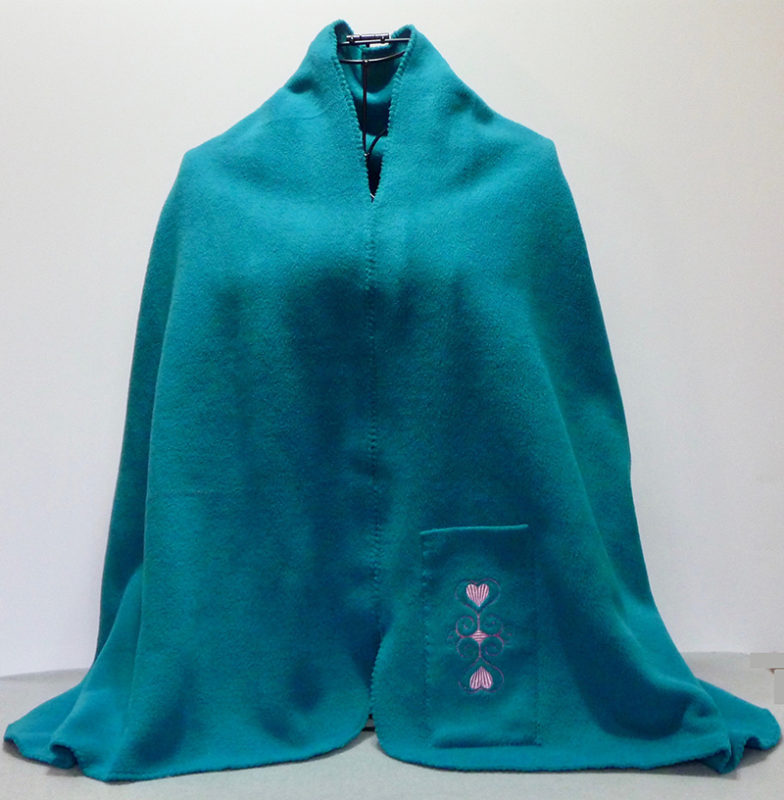
January Free Design: Cozy Wrap
Finished size of wrap is as follows:
- Small/Medium: 20-inches wide X 60 to 62-inches long.
- Large: 25-inches wide X 60 to 62-inches long.
Materials and Supplies
- Brother Sewing and Embroidery Machine with 4-inch hoop capability.
- SA5810
Brother medium weight tear-away stabilizer. - SA5931
Brother medium weight fusible cut-away stabilizer. - SA520
Brother lightweight water-soluble stabilizer. - SA147
Open Toe foot - Brother Free Design of the Month: Heirloom Hearts.pes
- Brother Embroidery threads
- Basic sewing notions including a press cloth, sewing thread to match fabric, embroidery needle for embroidering, and size 11 stretch needle for sewing.
- A rotary cutter, mat, and long ruler are recommended for cutting. As an alternative you can carefully measure and mark fabric, and then cut with dressmaker shears.
- Fabric for Wrap: ¾ yard of 60-62-inch wide polar type fleece for size small/medium. 7/8 yard of 60-62-inch wide polar type fleece for size large.
Tip: It’s a good idea to pre-wash the fleece before using it. Pre-washing reshapes the fabric and removes excess lint.
Brother Free Design of the Month:
- Heirloom Hearts.pes
- 3.78” Wide X 2.31” High

Steps to Create Cozy Wrap
- Prepare fabric as follows:
- Trim away all selvedge edges.
- For small/medium size cut one piece measuring 20-inches wide X 60 to 62-inches long for wrap, and one oversized piece measuring 4-inches wide X 8-inches long for pocket strip.
- For large size cut one piece measuring 25-inches wide X 60 to 62-inches long for wrap, and one oversized piece measuring 4-inches wide X 8-inches long for pocket strip.
- Round off the corners for easier edge finishing. See Figure #1.
Tip: A plate measuring approximately 8-inches in diameter makes a good template for rounding corners.
[caption id="attachment_18335" align="aligncenter" width="617"] Figure #1[/caption]
- Transfer free design to your machine. Cut an 8-inch square of tear-away and place pocket strip in center. Layer with water-soluble stabilizer on top and hoop with strip in center. Embroider design so it forms down the lengthwise center of the strip. See Figure #2.
 Figure #2[/caption]
- Carefully remove excess stabilizer and wash out water soluble. When piece is dry, cut to equal 4-inches wide X 7-inches long, with embroidery in center of strip. Fuse a piece of the cut-away stabilizer over backside of embroidery to keep stitches from scratching glasses. Note that fleece is very heat sensitive. Press lightly, using a press cloth to completely cover fabric.
- Pin pocket piece on right or left side, measuring so bottom of pocket is 2-inches from short edge, and side of pocket is 2-inches from long edge. See below:

Tip: Position the pocket on the left for a right-handed person and on the right for a left-handed person.
- Set machine for standard sewing. Sew sides and bottom edge to fleece using a medium zigzag stitch. See Figure #3a and #3b.
 Figure #3a[/caption]
[caption id="attachment_18338" align="aligncenter" width="800"]
 Figure #3b[/caption]
- To finish edges of fleece, replace standard foot with open toe foot and set machine for an open style overcast stitch, changing width to 7.0 and length to 4.0. See Figure #4.
 Figure #4[/caption]
Begin stitching in the center of one long edge, stitching from the right side and aligning raw edge with the inside toe of the presser foot. Stitch carefully and avoid stretching the fabric as you stitch. Overlap the stitches slightly when you reach the point where you started. See Figure #5.
[caption id="attachment_18340" align="aligncenter" width="800"]
 Figure #5[/caption]
This stitch makes a nice finish on both the right and wrong sides. See Figure #6.
[caption id="attachment_18341" align="aligncenter" width="800"]
 Figure #6[/caption]
You are finished! Enjoy!
Options and Ideas:
- Line entire pocket with lightweight fabric instead of fusing stabilizer to the backside.
- Purchase additional matching or contrasting fleece to make larger patch style pockets. You can embroider on each one and then stitch to the lower edge of both right and left sides of wrap.
- Consider using a three-thread wide stitch on the serger to finish edges of the wrap.
- If you would like to make a wrap that is longer, purchase additional fabric, cut two strips, and then sew the pieces together to create a seam at the center back.


