Margin Notes: Giving Your Quilting a Little Space
Sometimes you want your quilting motifs to touch or even overlap when you're creating an overall quilting pattern. But if you want to stitch an individual motif in each quilt block, a little space between designs is a plus; the visual separation gives the mind's eye a resting spot and indicates the boundary between one design and the next.
 Of course, you could accomplish that by marking placement lines on your quilt away from the block boundaries, but Dream Motion™ PRO
has a feature to include margins without any extra marking.
Set Your Space
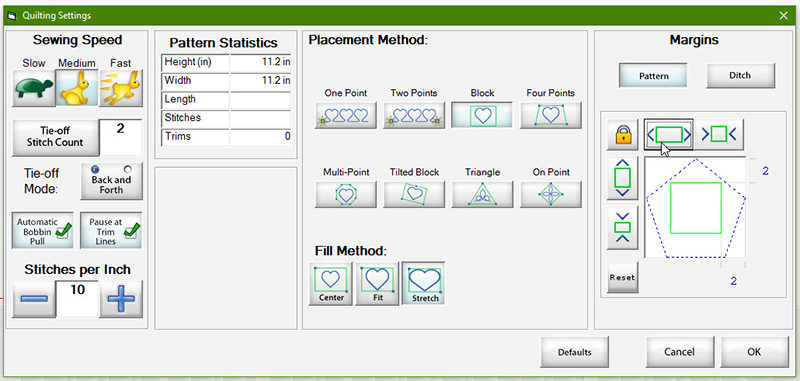
To follow along as I demonstrate the process for using margins, open Select & Sew in Dream Motion Pro and set the safe area within your frame. You can use simulation mode instead if you prefer. Next, select a design; I'm using "2.gpf" from the Blocks folder.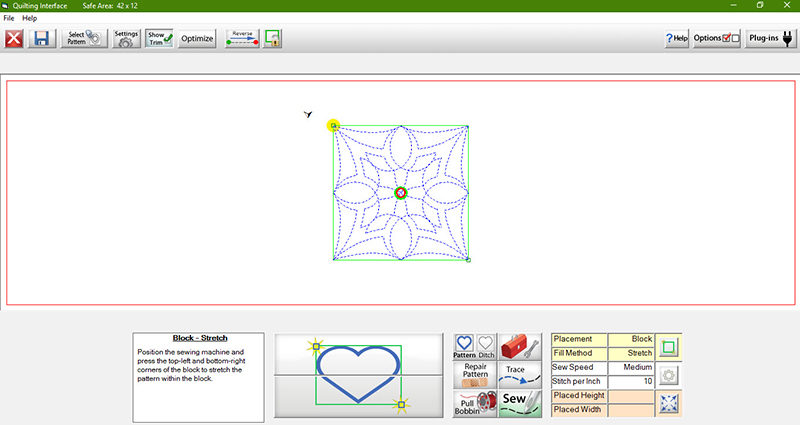 Click Settings in the toolbar at the top of the workspace. The Margins area is at the right end of the Settings box.
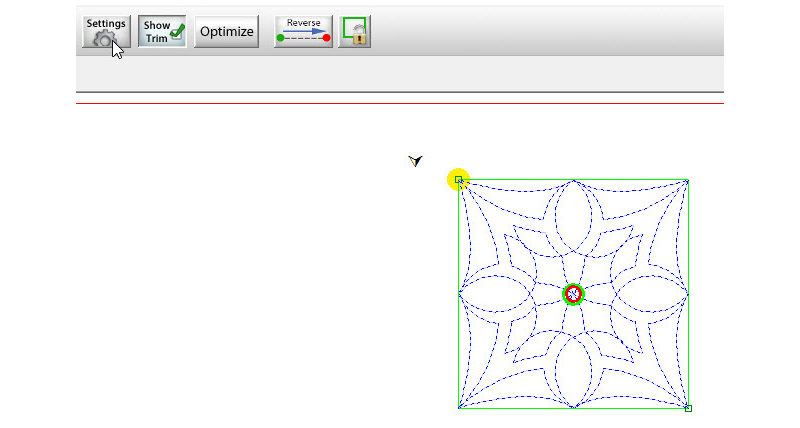 In the Margins area, you'll find buttons that allow you to increase and decrease the size of the margins around your design. The display will show the margins as numerical values, making it easy to keep up with your current settings.
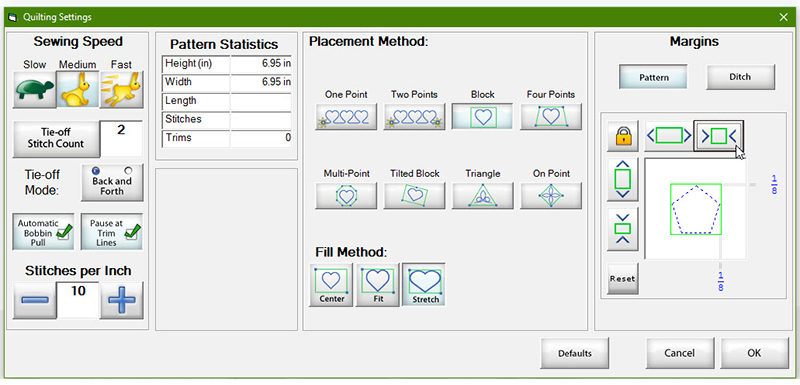 Remember that the distance between two quilted motifs on your project will be twice as much as the margin size you choose, because each design contributes a margin. For example, if the margin is set to allow 1/8" around each motif, there will be a total of 1/4" of space between two adjacent motifs.
For special applications, you can vary the margins by clicking the Lock icon. When the lock is open, you'll be able to set the side margins independently of the top and bottom margins, entering a different value for each.
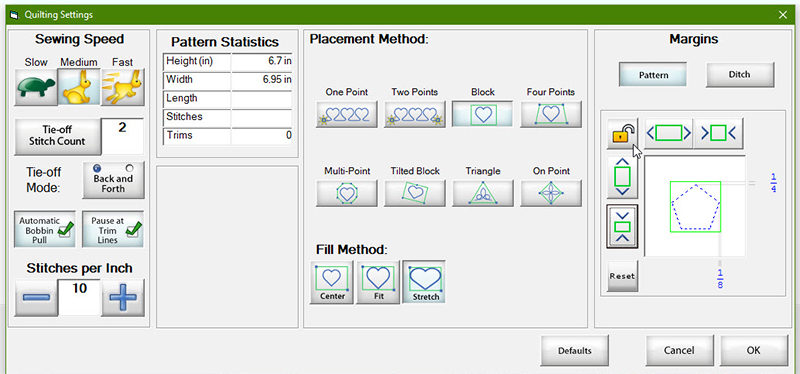 You can also create margins outside the block perimeter, resulting in motifs that are larger than the reference points you set. The maximum setting for margins is 2"; at that value, two adjacent motifs will overlap 4".
TIP: Choose 4-Point placement for stitching your pattern to ensure that the design is centered within the actual block seams.
Around the Block
 Another feature of the Margin settings is the Pattern/Ditch choice. Reset your margins by clicking the Reset icon and then click Ditch.
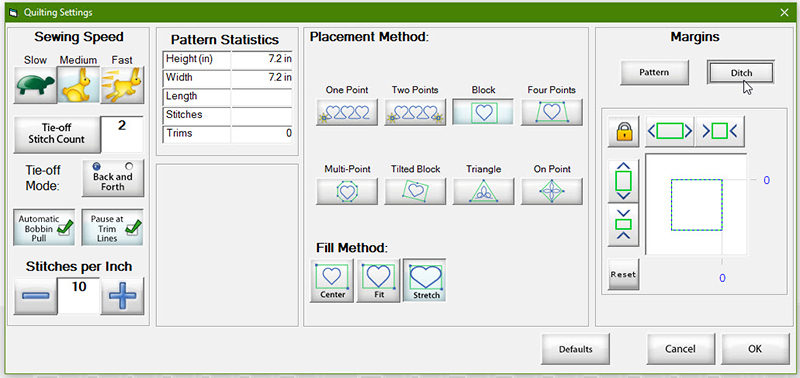 You'll notice that the display has removed the pentagon that represented the pattern and instead shows a dashed stitching line around the perimeter of the square. With the margin settings at zero, the machine will stitch in the ditch around the block, as determined by the placement points you set with the machine. Change the margin settings to move this perimeter stitching into or out of the block; the machine will stitch parallel to the block perimeter you've set.
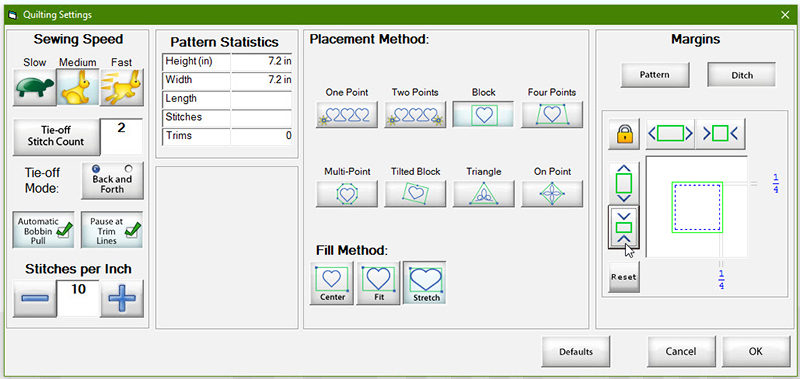 You can switch back and forth between the Pattern and the Ditch as you're stitching, by toggling the icon just below the image in the quilting workspace.
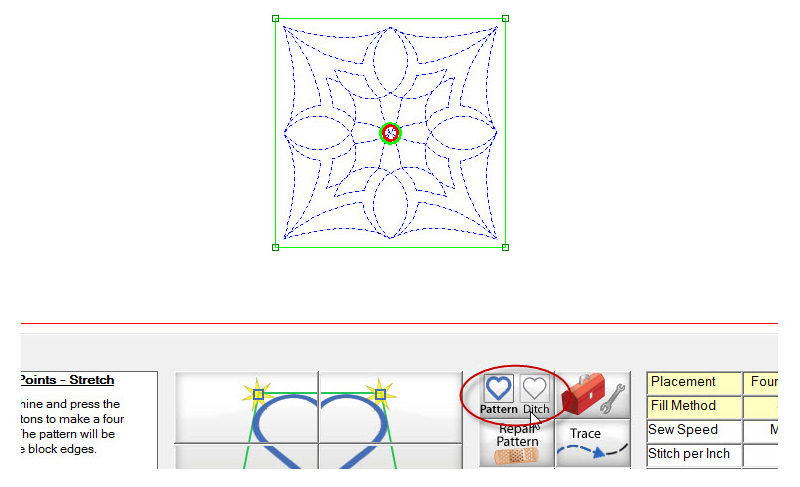 Always check the workspace image before you start to sew to double-check that your margins are correctly set and that you're sewing your choice of pattern or ditch.
How'd You Do That?
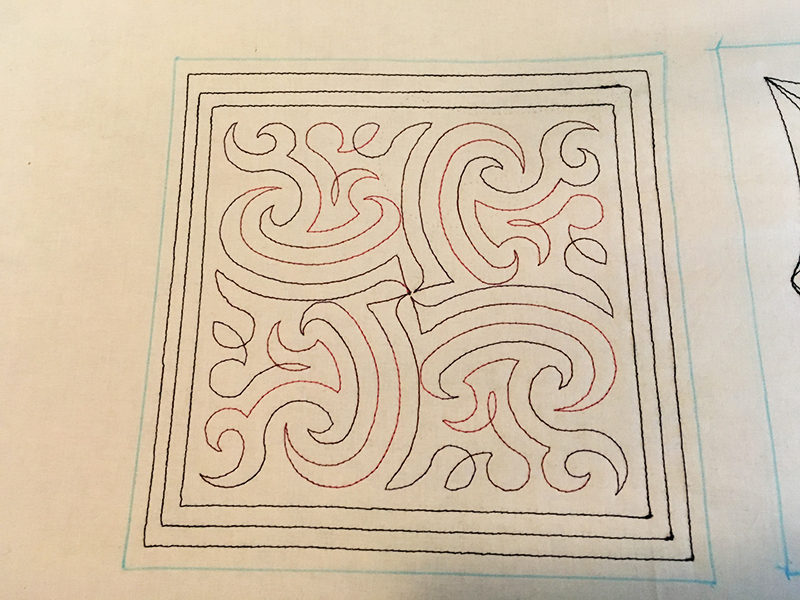
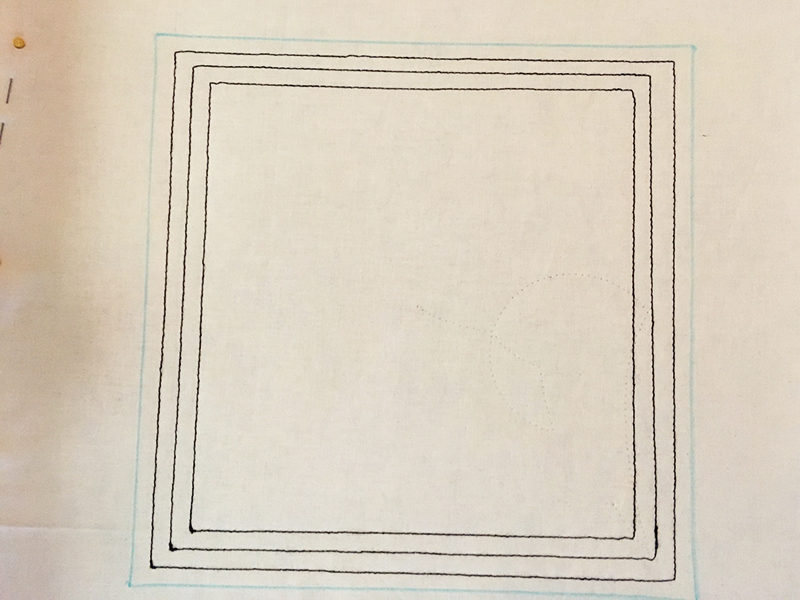
- Draw a block on your sample cloth. Choose a quilting pattern.
- Follow the instructions to set a margin 1/4" inside the block perimeter (the lines you drew). Use the corners of the drawn square for placing the motif. Set the machine for Ditch sewing and stitch the first ditch pattern.
- Leave the settings the same, but use the four corners of the stitched outline as your new placement marks. The machine will stitch another square inside the first. Repeat this step to sew a third square.
- Toggle the workspace icon to switch from Ditch to Pattern. Check to be sure the setting is still correct for a 1/4" margin inside the placement marks. Use the innermost square to place the design and stitch the quilting pattern; it will lie 1/4" inside the smallest square.
And There's More!
If you're covering an area with repeats of a single block design, you can also create margins between designs in PantoStacker™. To follow along, open PantoStacker™ and select "2.gpf" again. Set the workspace to show two patterns and two rows. Set the total width and height to 10" and the pattern height to 5".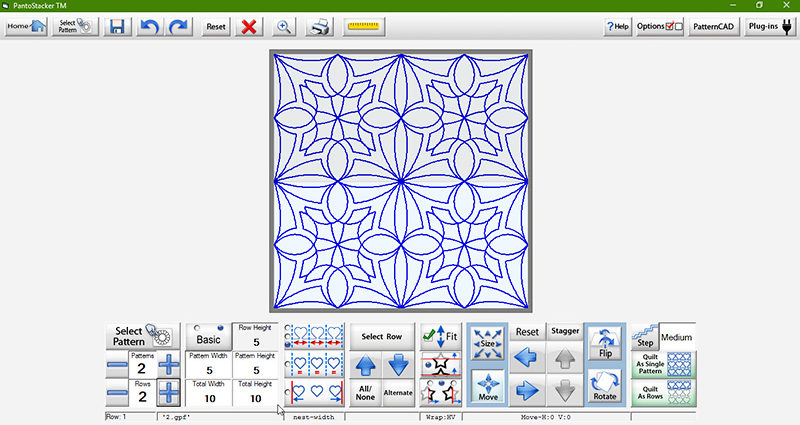 Select the second icon in the Spacing column, creating an equally spaced, centered arrangement.
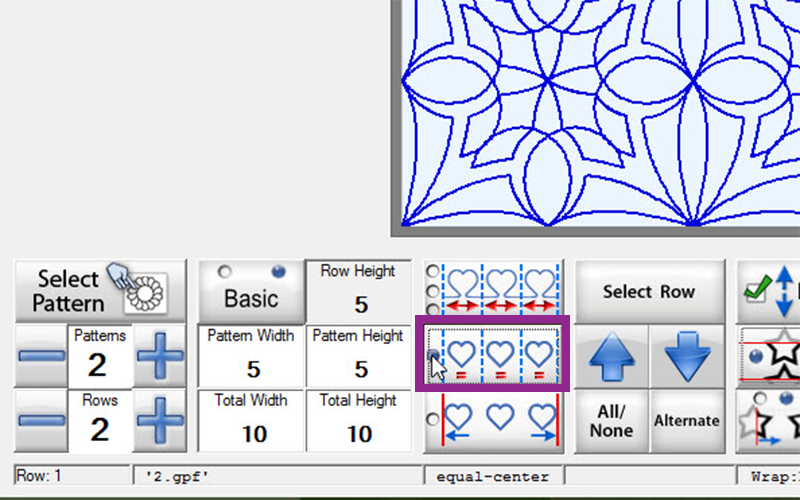 Change the pattern width and height settings to 4.75". Notice that the preview in the workspace shows motifs clinging to the top and bottom edges of the quilt area, not truly centered in the block spaces.
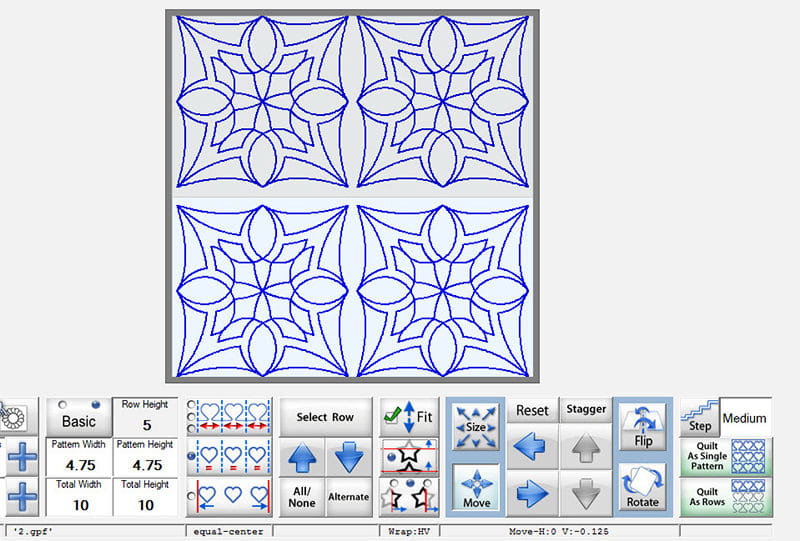 To center the motifs, click the Fit icon to remove the green arrow. Now you'll see four centered, equally spaced motifs. The spacing is the same as if you'd set 1/8" margin around each design, for a total of 1/4" between adjacent patterns.
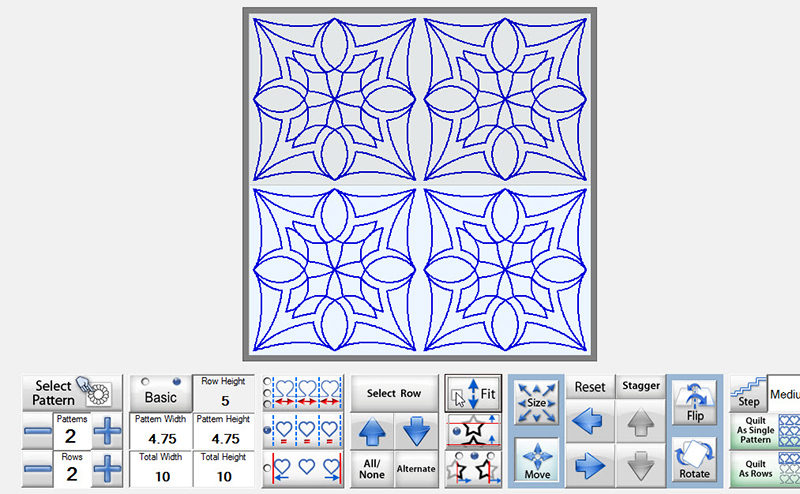
Note: With an arrangement of block patterns like these, you will always have trims between motifs, whether or not you're using margins. That's because the patterns in the Block folder are digitized to begin and end at their center points to maximize options for individual placement. If you're using repeats of block patterns, check the Optimize screen or take the pattern into the PatternCAD™ workspace to look for ways to move the start/stop points. You may be able to stitch repeats that touch as a continuous quilting pattern, or edit the pattern to create short trims between blocks that can be stitched rather than tied off and trimmed.
You can use combinations of these settings to create a variety of effects in your quilting, from simple echo stitching along seams to fanciful overlapping motifs. Experiment with the possibilities and see what you can create!


