How to Make a DIY Mini Floral Quilt
-Brother Sews Blogger
Spend your weekend stitching and assembling this mini floral quilt using your Brother Luminaire XP3, your ScanNCut DX SDX325, or ScanNCut DX SDX330D and My Connection. The results will be sure to Welcome Spring and add some fun floral decor to your home. You can add a hanger on the back to adorn a mini quilt holder or simply place it in the center of your table to welcome friends. Best of all, this makes a wonderful DIY gift for spring birthdays, celebrations, and much more. Are you ready to get quilting? Here’s how to make your very own floral quilt.
Supplies:
- Brother Luminaire XP3
- 10-5/8-inch x 16-inch hoop
- Embroidery foot “W”
- Standard foot “J”
- MuVit Digital Dual Feed Foot
- ScanNCut DX SDX325 OR ScanNCut DX SDX330D
- Fabric Mat
- Thin Fabric Auto Blade
- Spatula
- Brayer

Fabrics
- 16-inch x 16-inch cotton batting
- Three 5-inch x 5-inch squares of solid quilting cotton in different colors
- One 24-inch L x 18-inch W rectangle of white or cream tone on tone quilting cotton
To start, take 5/8-yard floral fabric and cut into the following pieces:
- One 16-inch x 16-inch square (backing)
- Two 1-1/4-inch L x 10-1/2-inch W strips (top and bottom borders)
- Two 12-inch L x 2-1/4-inch W strips (side borders)
- Two 2-inch by width of fabric strips (binding)
- One 3-inch L x 12-inch W strip (hanger)
Notions
- Two 24-inch L x 18-inch W pieces of Cut-Away Mesh Stabilizer
- 75/11 Embroidery Needles
- Pre-wound bobbin
- Embroidery threads to coordinate with your fabric
- Cotton thread for piecing
- Applique glue stick
- Pins or clips
- Scissors
- Rotary cutter, cutting mat, and quilting ruler
- Heavy starch for fabric prep
- 14-inch x 14-inch mini quilt display stand (optional)
Part One: Creating Applique with My Connection
1. On the Luminaire XP3 Home screen, select Embroidery.
2. Touch Category 1.
3. Scroll to the right and select sub-category 14.
4. Choose design 001 and touch Set.
5. Touch Edit.
6. Select Size.
7. Press and hold the Decrease Pattern Proportionally icon until the machine knocks at you (this is as small as the pattern can be made). The size used for this project is 9.43-inch x 9.48-inch.
8. Touch OK to close the Size menu.
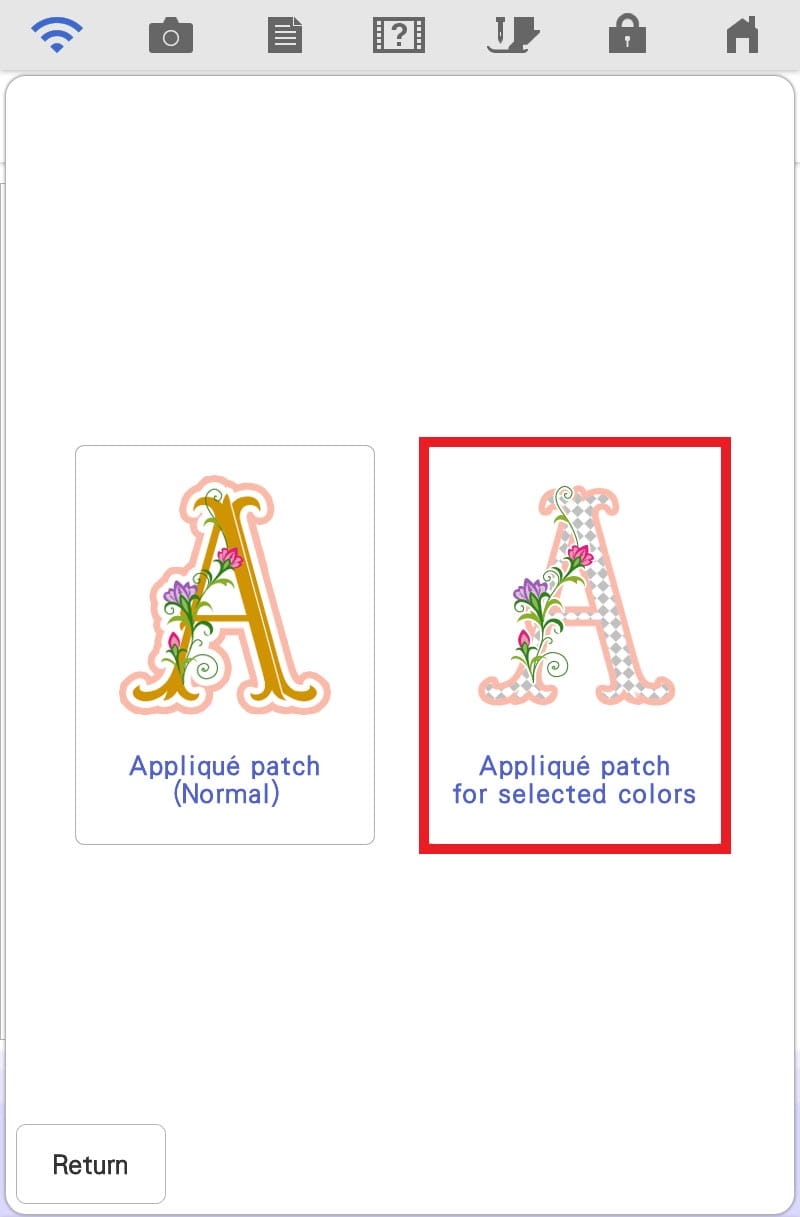
9. Select the Instant Applique Key.

10. Choose “Applique Patch for Selected Colors.”
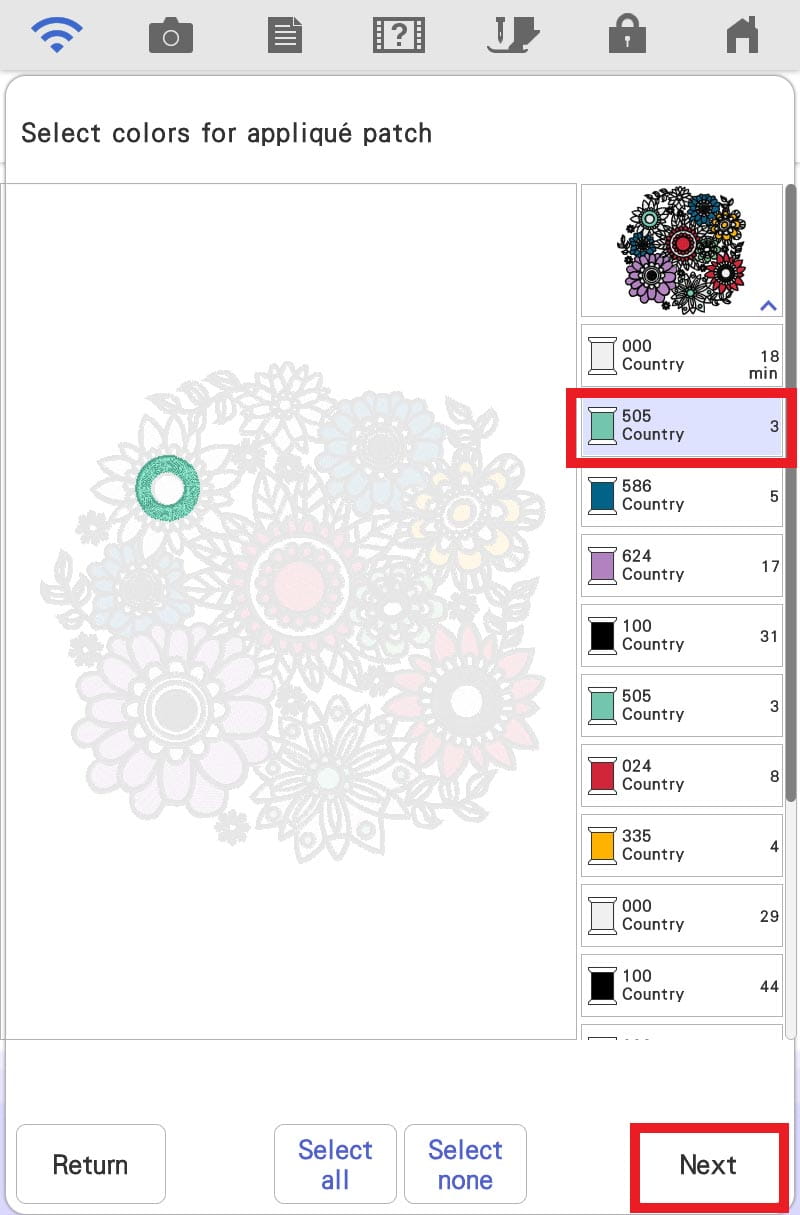
11. Touch the second color block (teal) and then press “Next.”
12. Leave Zigzag Stitch selected. Change the Stitch Width to 0.08-inch. Touch OK. Change the Density to 38.1 line/inch. Touch OK.
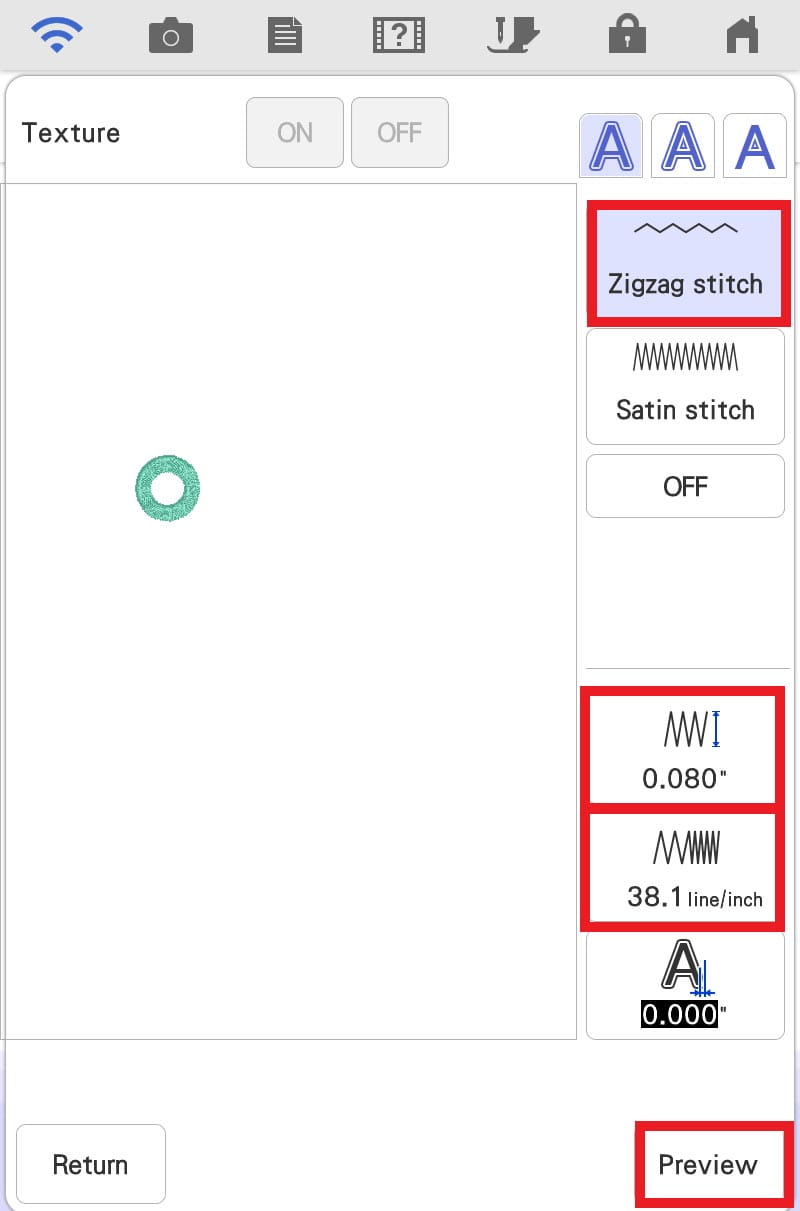
13. Touch Preview.
14. Choose Next.
15. Select the Instant Applique Key again.
16. Choose “Applique Patch for Selected Colors.
17. Touch the Floral Applique to expand the colored steps.
18. Touch the fourth color block (Purple) and press “Next.”
19. Leave Zigzag Stitch selected. Change the Stitch Width to 0.08-inch. Touch OK. Change the Density to 38.1 line/inch. Touch OK.
20. Touch Preview.
21. Choose Next.
22. A warning message will appear. This message is telling you it cannot display the first applique you created. Touch OK.
23. Touch OK.
24. Repeat steps 15-23 to create any additional patches that you desire. I did one additional patch from the second to the last color in the stitch order (Green).
25. Touch Memory.
26. Select the ScanNCut DX Transfer Key. A “Please Wait Awhile” message will appear.
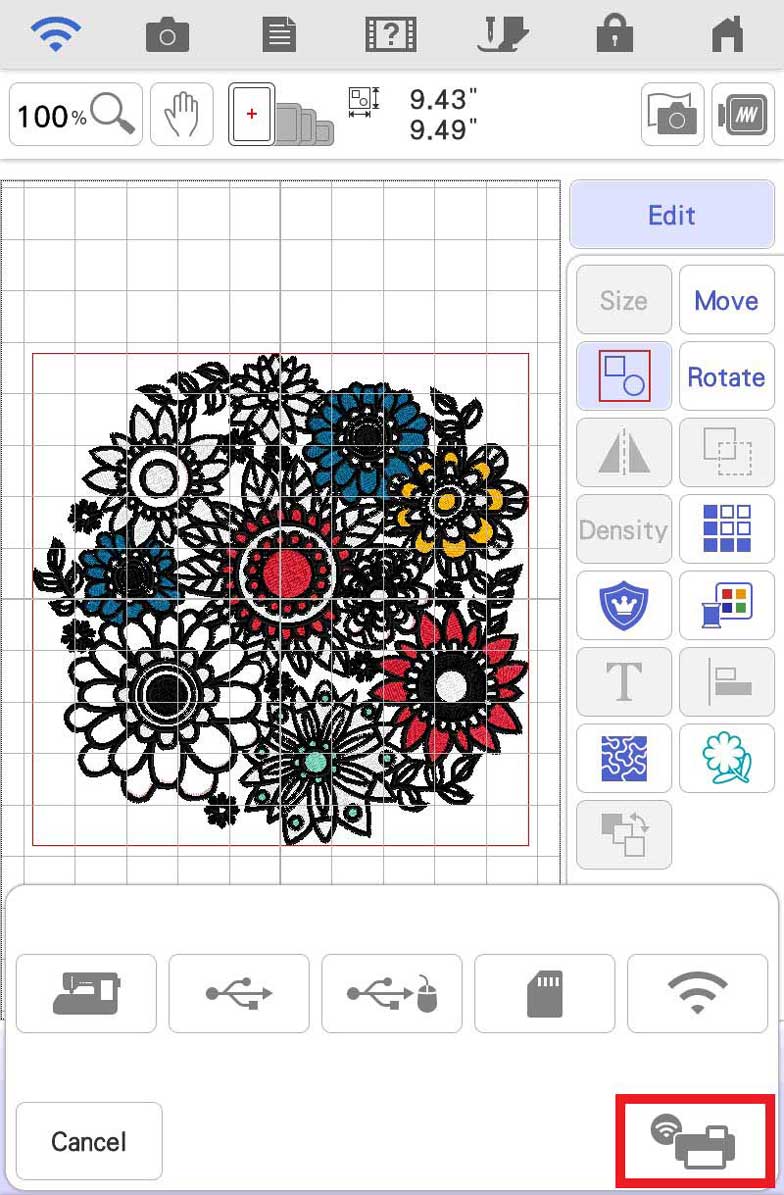
27. Click Transfer.
Part Two: Retrieving My Connection Files and Cutting Applique Pieces using ScanNCut SDX325/SDX330D
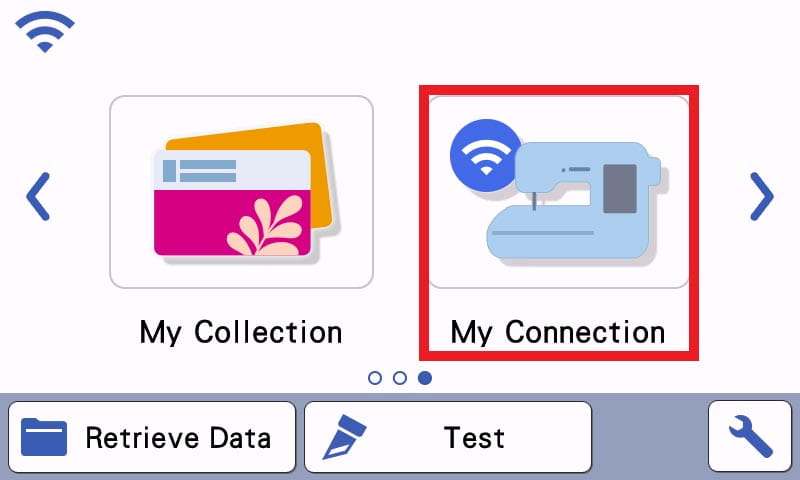
1. On the Home screen of the ScanNCut DX machine, touch the Left Arrow.
2. Select My Connection.
3. Touch “Retrieve”.
4. Choose “Wireless LAN Device” (the Sewing machine key).
5. When the transferred design appears, Touch the Applique Key.
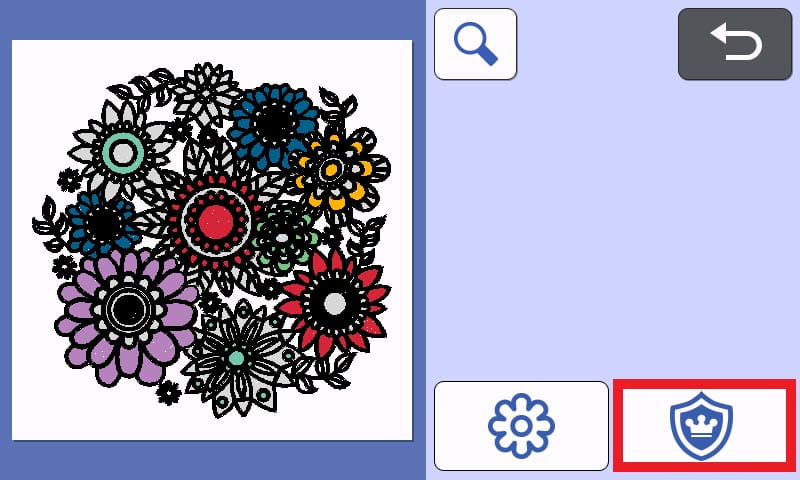
6. The next screen appears showing all three applique pieces.

7. Choose Piece A and Touch OK.
8. Touch Set. The ScanNCut DX places the piece on the mat.
9. Touch Add.
10. Select Piece B and Touch OK.
11. Touch Set. The second piece is added to the mat.
12. Add the last piece (or pieces if you did additional appliques) in the same manner.
13. Place the fabric pieces, prepped with heavy starch, onto the Fabric Mat.
14. Perform a background scan, then position the designs on top of the fabric pieces as desired. Proceed to cut your pieces.
Part Three: Sending ScanNCut DX FCM File to Luminaire XP3 via My Connection
1. On the Home screen of the ScanNCut DX machine, touch the Left Arrow.
2. Select My Connection.
3. Touch “Send.”
4. Select “Pattern.”
5. Touch Category 3.
6. Select Sub-Category 1 (Logo Designs).
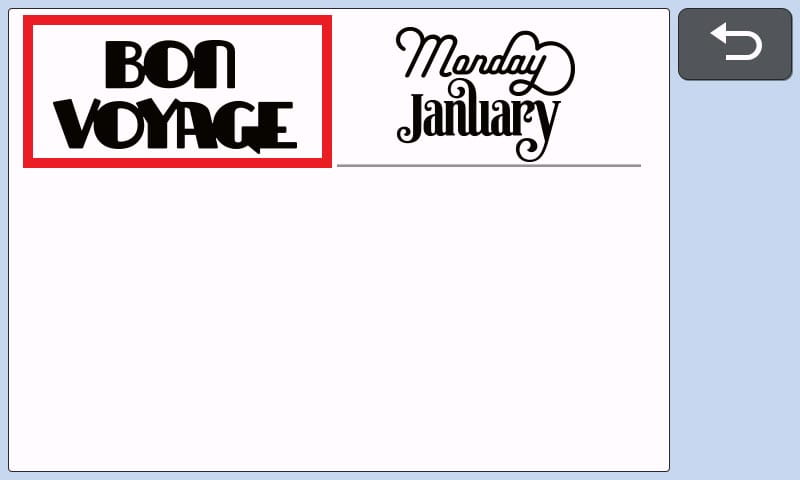
7. Scroll down and select Design LO-AW02 (Welcome).
8. Touch Set.
9. Select Transfer.
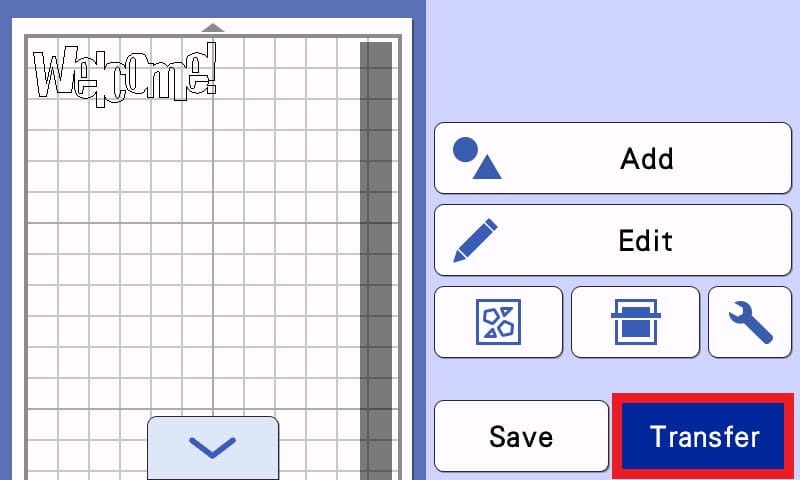
10. Touch OK when the message “There is data in Temporary Data Pocket. OK to update the data?” This is telling you that the flowers you sent from the Luminaire will no longer be available to retrieve.
11. A message will appear “Transferring…”
12. Touch OK when the message “Finished transferring to the Temporary Data Pocket….” appears.
Part Four: Turning ScanNCut DX FCM Design into Stitches using My Design Center.
1. Back at the Luminaire XP3 screen (where your design is still on the screen), select “Add.”
2. Touch “My Design Center.”
3. Touch the “Stamp” Icon.
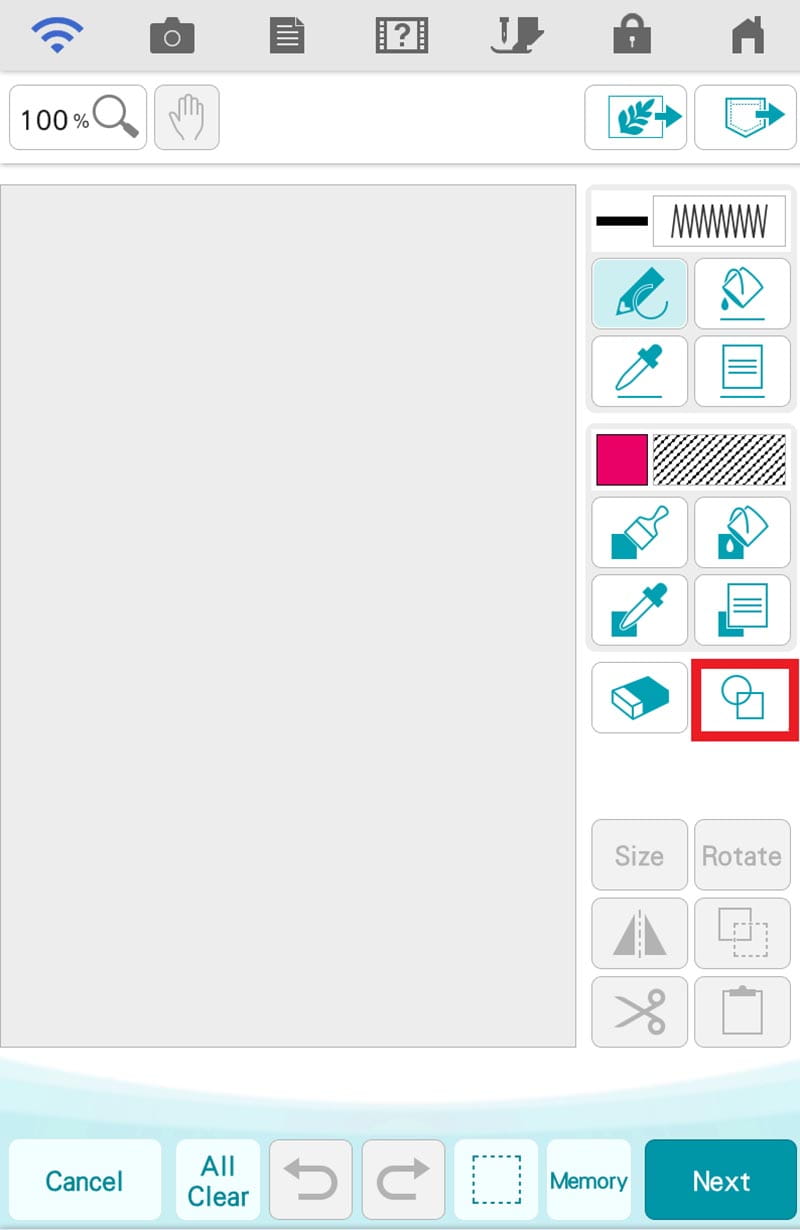
4. At the top of the screen Choose the Retrieve from ScanNCut DX Key.

5. A message will appear “Please wait…” The ScanNCut DX Welcome will appear as the first design on the screen and will be selected. (Hint: The last design sent will always appear first in the list.).

6. Touch OK.
7. Select Size to open the size menu.
8. Press and HOLD the Decrease Pattern Proportionally Icon until Welcome is approximately 1.90-inch x 5.25-inch. Touch OK.
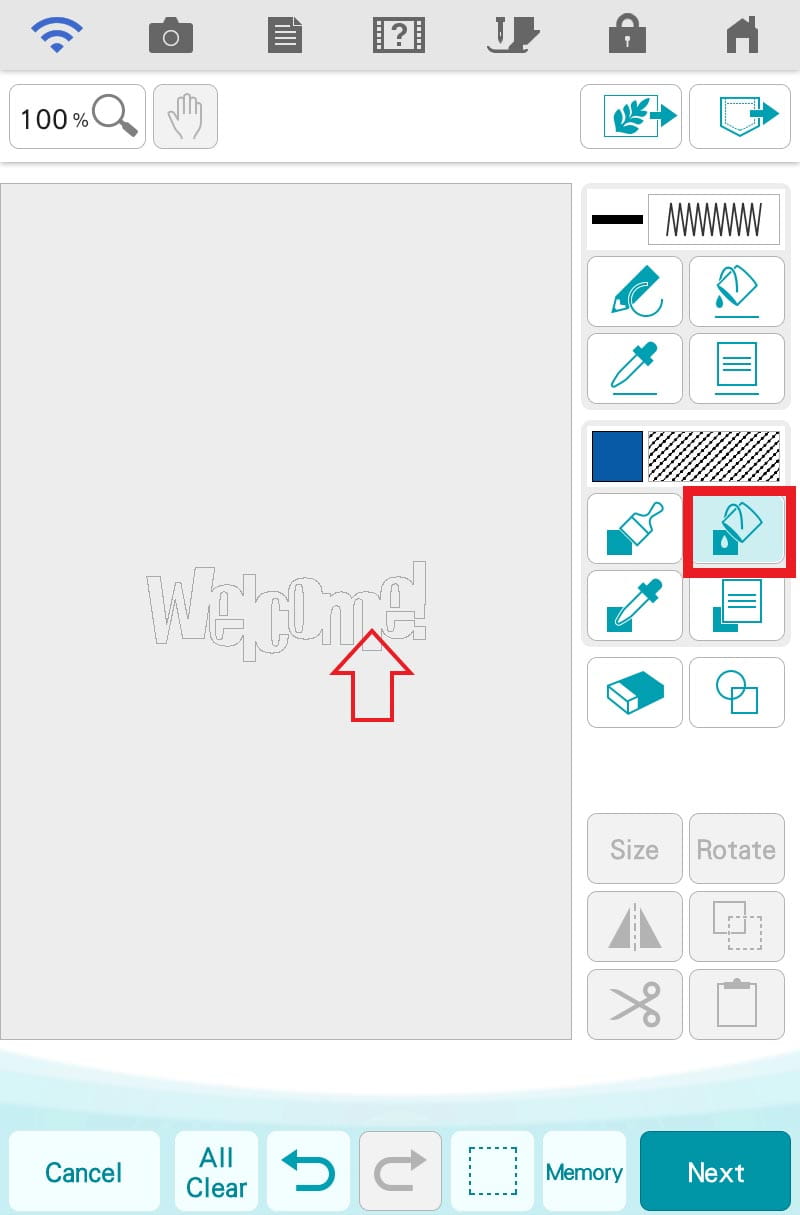
9. Touch the Region Properties Key.
10. Leave the stitch as a Fill Stitch and change the color to Blue. Touch OK.
11. Touch the Region Flood Fill key. Touch INSIDE the word Welcome apply the fill properties.
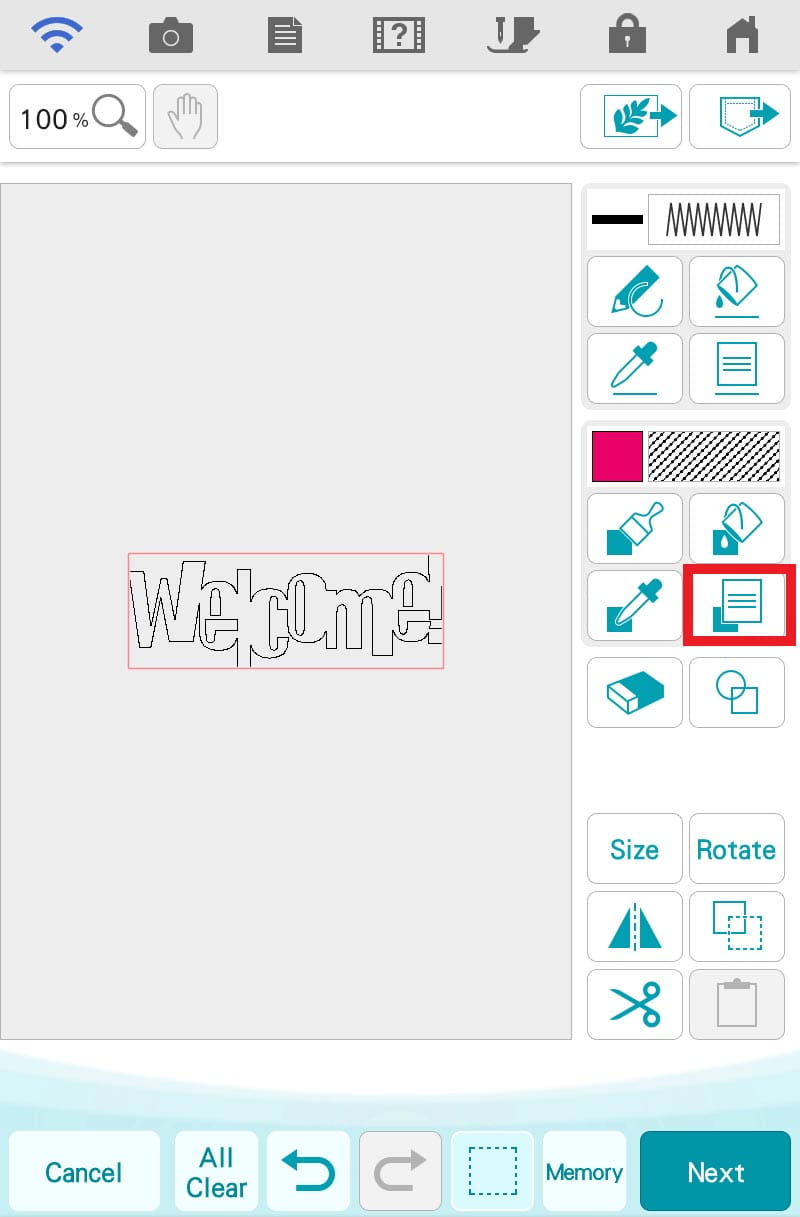
12. Select the Line Properties Key.
13. Choose a Triple Stitch and change the color to Black. Touch OK.
14. Touch the Line Flood Fill Icon.
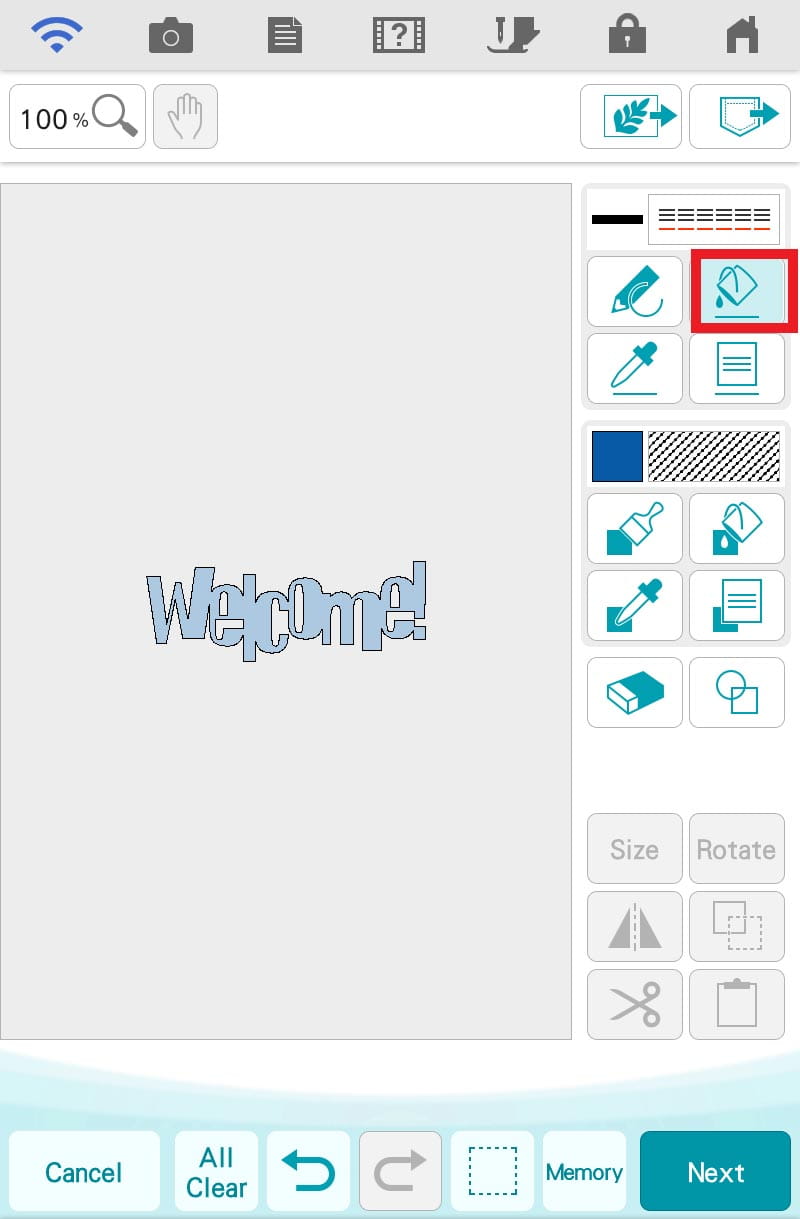
15. Touch the OUTSIDE LINE of the word Welcome AS WELL AS the inside of the two “Es” and the “O” to apply the selected line properties.
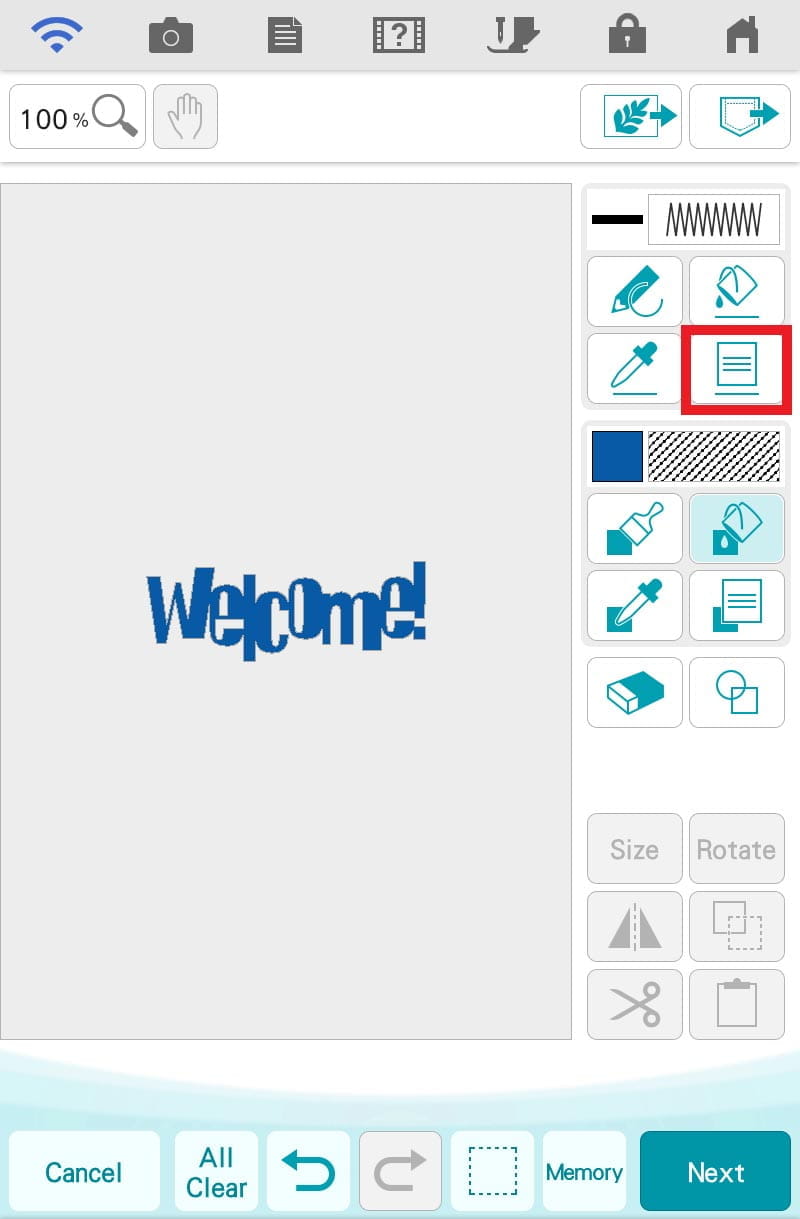
16. Touch Next.
17. Select the Under Sewing Menu.
18. Turn Under Sewing ON. Touch OK.
19. Touch Set.
20. Select OK in the Pop-Up screen to move the design to the Embroidery Edit screen.
21. The “Welcome” design will appear on your embroidery screen.
22. Open the EDIT menu.
23. Touch Move.
24. Using the arrow keys, move Welcome down under the floral design. Pay attention to the size at the top of the screen. The final embroidery size should be approximately 10.99-inch x 9.48-inch. Touch OK.
25. Select the Multiple Selection icon.

26. Touch Select All.
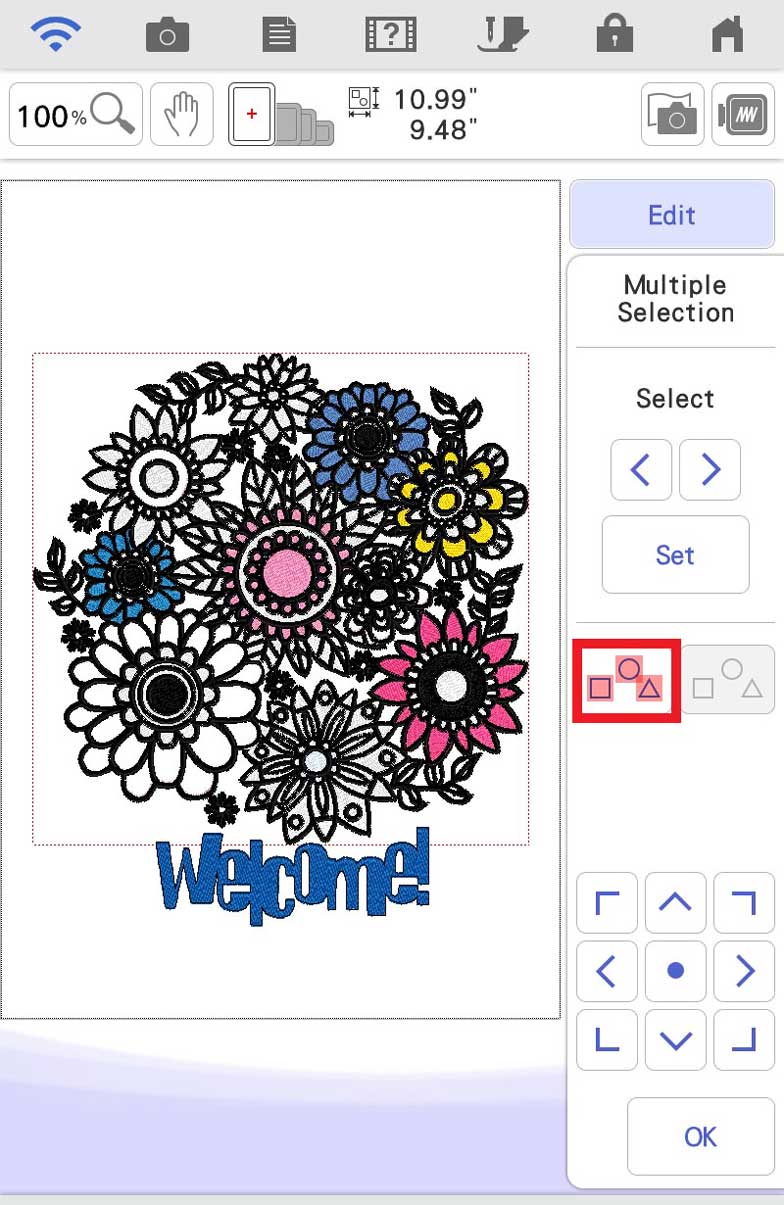
27. Center the whole Embroidery Design by touching the Center dot between the arrow keys.
28. Touch OK.
29. Touch Embroidery. The design is ready to stitch.
Part Five: Stitching Design
1. Hoop your stabilizer and white fabric in the 10-5/8-inch x 16-inch hoop and follow the machine steps to embroider the design.
Tips:
- The first 9 steps will be your placement stitches, tack down stitches and zig-zag applique for the three flowers.
- When placing the flower pieces down inside the placement line, apply a small amount of glue from a fabric glue stick to the back of the fabric. This will help to hold it in place during stitching.
- Carefully remove the completed design from the hoop. Trim the fabric to 12” tall x10-1/2” wide. Remove the excess stabilizer if desired.
Part Six: Assembly of Mini Quilt
- I turned this project into a mini quilt with borders and simple straight-line quilting.
- I added 1-1/4" top and bottom borders and 2-1/4” side borders.
After you have your border pieces attached, quilt the project in the manner you desire. I used the MuVit Digital Dual Feed with the Stitch in the Ditch attachment and sewed in the ditch. The Open Toe attachment was used to add accent quilting. You might choose a different method for quilting. You could even add decorative fill or automatic stippling around the embroidery with the Luminaire. Once quilting is complete, square up your project and bind with your favorite binding method. Add a sleeve to the back if you want to hang it on a mini quilt holder.
Whether you decide to transform this stitched design into an inviting outdoor pillow, or even a quilted table runner, the possibilities are truly boundless. Embrace your creative instincts to explore variations and personalized touches that reflect your unique style. Such versatility adds charm to any living space and allows you to experiment with different materials and embellishments to fit various themes or seasons.
Remember, the tools you use in the process are pivotal, and it's important to acknowledge that Fiskars Corporation supplies Quilt Mats, while Quilt Rulers are products of OLFA Corporation. Brother International Corporation does not provide any guarantees or endorsements for these products, ensuring that your project remains as unique and original as you are.

FAQs
Q: How do I bind the edges of the mini quilt?
A: Double-fold binding is the most popular method. The fabric is cut into 2½-inch strips, folded in half lengthwise, and then sewn onto the quilt’s edges. The folded edge is wrapped around the raw edge and stitched down, either by hand or machine, to create a neat, finished edge.
Q: How do I quilt the layers together?
A: Different methods can be used to quilt the layers together, including free motion stitching, straight-line quilting by machine, and hand stitching. You can also use specialty embroidery patterns to “quilt” in the hoop
Q: How do I make the floral pattern?
A: The floral pattern featured in this mini quilt is an embroidery design built into the Luminaire XP3 machine. If you do not have this machine, you can substitute the floral design of your choice.
Q: What size should my mini quilt be?
A: Mini quilts are typically 12” x 12” or smaller.
Tags
Shop this Project
No sewing machine? No problem! Any products mentioned in this project are available to buy here so you can stay stitching.
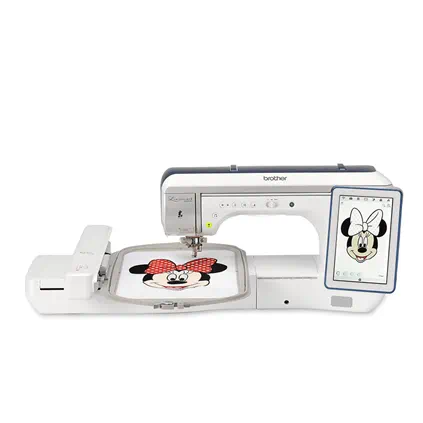
Luminaire 2 Innov-ís XP2
- Revolutionary StitchVision Technology
- Large 10 5/8" x 16" embroidery area
- Brother-Exclusive 'Quiltbroidery' Features
Related Projects
Stay Connected
* Required fields
Follow Us
- Product Support
- Product Support Assistant
- Terms of Sale
- Product-Registration
- Search Supplies/Accessories
- Ordering & Shipping Information
- Ordering & Account FAQs
- View Order Status
- Warranty & Extended Warranty Information
- Recall Information
- Return Policy
- Security Support Information(Opens in a new tab)
- Contact Brother
