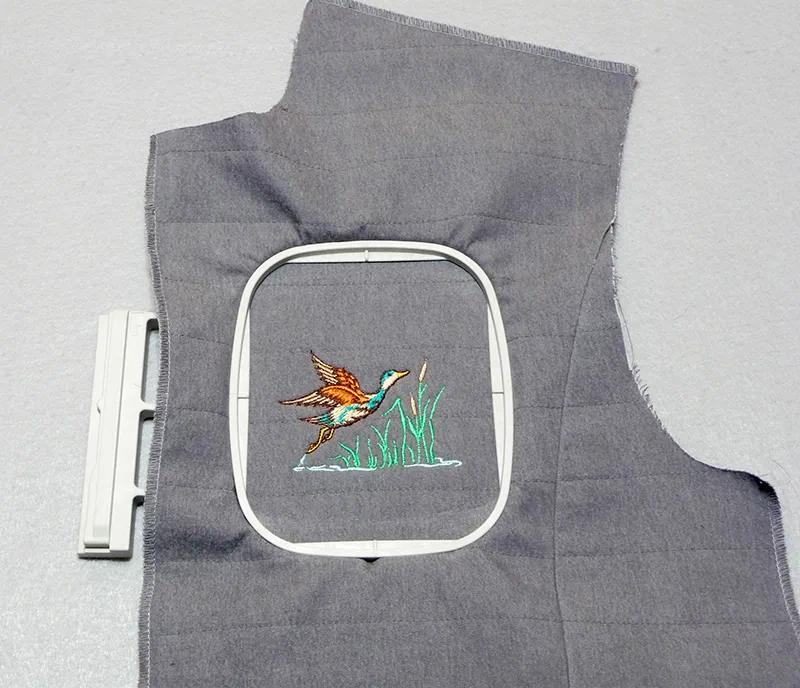
November Free Design: Embroidered Outdoor Vest
Outdoor activities abound this time of year and dressing for the weather is essential! Our featured embroidery design this month is a waterfowl motif that’s perfect for decorating outdoor apparel. Embroider the design on a men’s or boy’s vest constructed from scratch using a commercial pattern, or consider embellishing a ready-made garment with this design. In these instructions, you’ll learn about printing and using templates from BES software.
Materials and Supplies:
- Brother Sewing and Embroidery Machine
- Brother Free Design of the Month
- SA5810 Brother Medium Weight Tear-Away Stabilizer
- Brother embroidery thread and bobbin thread
- Brother BES4 Dream Edition Lettering, Customization, and Monogramming Software
Note: The BES4 program shown here includes the SABES4UG1 Power Pack Add-on.
Note: Please see our companion project this month for additional supplies for making a vest with a commercial pattern. Instructions for the vest include a pattern hack for sewing zippered front pockets plus many other tips and suggestions. Each vest is based on featured pattern shown below. Sample vests were made from lightweight grey denim, quilted with thin fleece and lined with flannel shirting fabric.
Vest pattern used for this project:
- Simplicity 1329 View A

-
Featured pattern is a product of Simplicity Pattern Company Inc., and Brother International Corporation makes no representations or warranties regarding such product.
Brother Free Design of the Month
Steps to Embroider Vest with Template for Placement
- Download the waterfowl design transfer to the machine. To embroider on a vest constructed from scratch, embroider the design on the left chest after quilting but before adding the lining.
- The following instructions show how to print a template using the BES4 software: Open the software. From the welcome screen you can click on the icon to Open a Design. See Figure #1.
 Figure #1[/caption]
- Locate and open downloaded design from the saved location on your computer. See Figure #2.
 Figure #2[/caption]
- You’ll see the design open up in the workspace. See Figure #3.
 Figure #3[/caption]
- To check the print settings click on the “b” icon and then slide the curser to Print and click on Print Preview. See Figure #4.
 Figure #4[/caption]
Below are the actual settings selected for this project:
- Click on Print and use desired print settings to print the template. You can print on regular computer paper or on special translucent or transparent medium for you specific printer. Consider printing with grey scale option on regular paper for an economical option. It’s helpful to highlight the crosshairs of the template, mark an arrow to indicate the top of the design and trim the template just outside the design area. See Figure #5.
 Figure #5[/caption]
- Prepare to embroider design by taping template to desired location on left chest of vest. Tips for placement of design: The general position for aligning the center of this design on the left chest of the vest is as follows:
- Men’s vest: 7 to 9-inches from the shoulder and 3 to 5-inches from the center front.
- Boys’ vest: 5 to 7-inches from shoulder and centered between placket and side seam, or 3 to 4-inches from the center front.
- To ensure perfect placement you will want to try the garment on the person who will wear it – loosely pin or tape the template and adjust as needed. Stand back about five feet and trust your eye for the best judgment of the position. Having a life size template of the design results in the most accurate positioning since it’s the next best thing to the actual stitch out. See Figure #6.
 Figure #6[/caption]
- Prepare for hooping by placing the template grid into the inner ring of the hoop. Position over paper template, matching the center lines. See Figure #7.
 Figure #7[/caption]
- Slip outer ring into position under the vest and then insert the inner ring inside. Tighten up the hoop screw as necessary. See Figure #8.
 Figure #8[/caption]
- When you take the hoop to the machine the center starting point for the needle should point to the center of the template. Remove the template grid and the paper template. Slip a piece of tear away under the hoop and embroider the design. See Figure #9.
 Figure #9[/caption]
- Remove excess stabilizer and construct the rest of the vest referring to the pattern instructions.


