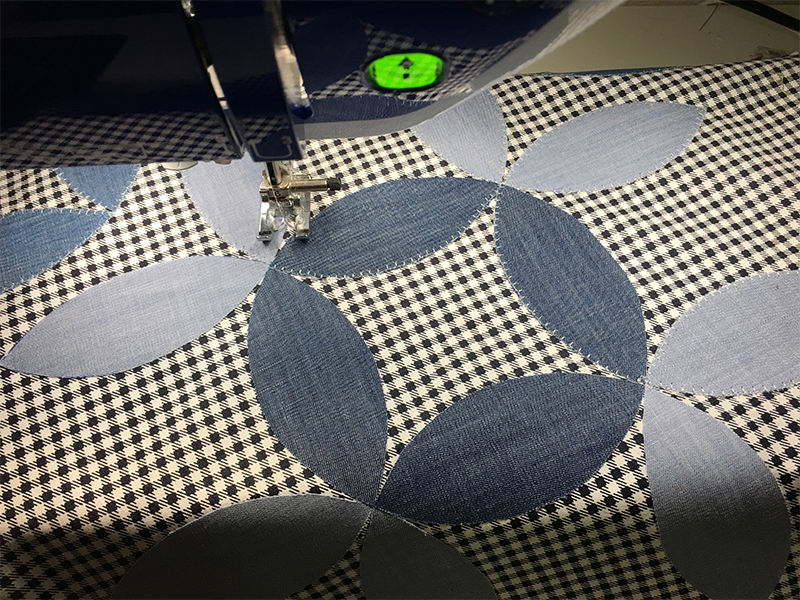
Orange Peel Goodness: Machine Appliqué
I’ll totally admit it… Sometimes I see ideas floating around the interweb and, hmmm I just don’t think that’s for me. One such idea was the orange peel. I’m just not into hand appliqué or folding the fabric over and all that jazz, it all seemed like a lot of fuss for something that I didn’t think would fit into my aesthetic. And then, like being hit on the head with a ton of bricks, the right fabric combination made its way into my sewing room and the orange peel was the only thing I could think about. So, this post will chronicle my journey into Orange Peel Goodness.
Machine Used
DreamWeaver® XE VM6200D(Opens in a new tab)(AKA Felicia)
Materials and Supplies
- 3” Orange Peel Template
- 18”x18” square of background fabric
- 3 different colors of fabric for orange peels
- Double sided fusible appliqué sheets
- Thread for machine appliqué
- Erasable pen for marking
- Fabric scissors
Let's Get Down to Orange Peely Goodness
For this project, I knew that I wanted minimal work. Like this didn’t need to be one of those fussy projects even though it involved different methods. So I chose raw-edge orange peels using the quilting appliqué stitch on Felicia to get the orange peels down. But wait wait - You went TOO FAST. (That’s me talking to myself.) So here’s the breakdown of how I got from A to Z. To prepare the orange peels, I fused the three denims that I chose to a fusible appliqué sheet, traced the orange peel onto the back of the sheet and cut them out with scissors. For the design I chose, I needed four dark blues and eight of the medium and light blues.


Editor's Note: This is a great place to use the ScanNCut or ScanNCut2
! Here is a great video on how to cut out fabric for appliques with the ScanNCut
using the Iron-On Fabric Applique Contact Sheet
.
Next, I needed to create a grid on my background fabric with an erasable pen (accentuated in Illustrator in the image). I determined the size of the squares in the grid by placing the orange peel on the 45 degree diagonal of my quilting ruler. As you can see from the picture, it’s a 2 7/8” square, so use this technique if you decide if you use a different size.
! Here is a great video on how to cut out fabric for appliques with the ScanNCut
using the Iron-On Fabric Applique Contact Sheet
.

 Since the lines created by the erasable pen will disappear after you iron, I started by ironing (and fusing) the outside orange peels and worked inward until I got the final pattern.


 Next, I found the quilted appliqué stitch, stitch number Q-12 on Felicia, and followed the edge of the orange peels until they were all secured.

 And this is as far as I’ll take you in this post. From here, I quilted over the panel and made a pillow, but the sky’s the limit with Orange Peel Goodness. For more information on constructing a pillow, pop on over to Heather Jone's post where she makes an Improv Log Cabin Pillow Cover.
As always, if you have any questions or tips of your own, feel free to share them in the comments. I’d love to see photos of your Orange Peel Goodness, so be sure to share on Facebook and Instagram, tagging us at #StitchingSewcial and @MisterDomestic and @BrotherSews. Stay awesome, Mathew


