Milan AC-JV Zero Waste Origami Bag
-Brother Sews Blogger
Zero waste patterns are becoming popular as more practical and stylish options are made available to sewists. Milan AC-JV is a zero waste pattern company dedicated to providing minimal waste design to the masses and educating people on the benefits of using less. The company operates under the Open Source License CC By-SA meaning they provide their patterns for free to be used by the public in order to spread the word about zero waste design. That being said, they do accept contributions when purchasing the pattern so if you would like to make this pattern and contribute to sustainability and those who are trying to make it more accessible please don’t hesitate!
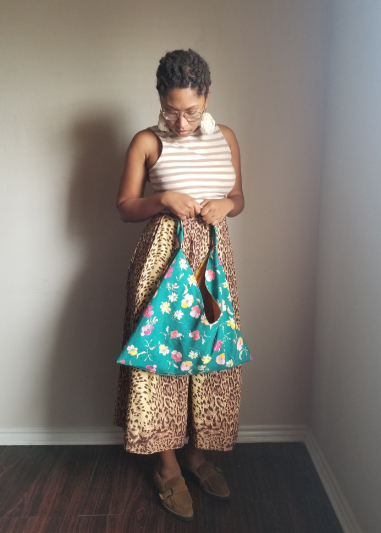
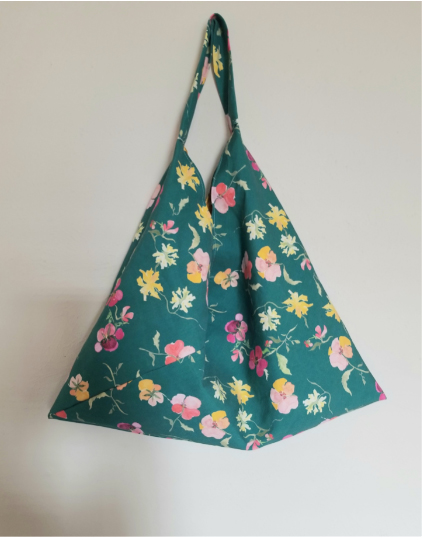
The pattern we’ll be making today is the Origami Bag which is the perfect bag, to me, for grocery shopping, a day at the beach or just running errands. This pattern does come with a printable template, but for sustainability purposes and ease I will be doing the recommended tracing of the pattern directly onto the fabric using chalk. To do this, simply reference the measurements and trace after downloading the pattern using their free open source code noted on the website, or after making your contribution.
WHAT YOU WILL NEED
-Milan AC-JV Origami Bag Template *Helpful Tip: Make sure to use the free code as mentioned on the website when downloading the template or provide a contribution of your choosing to support their cause.
-2 x 48in x 14.5in remnants of fabric (one for the main body of the bag and one for the lining) *for this tutorial I am using a linen cotton canvas for the body and a lightweight linen for the lining)
-Tailors chalk or an air erasable/water soluble pen for marking your fabric
-Point Turner
-Pins
-Safety pin
-Iron
-Brother Sewing machine, matching thread and scissors [I used my Brother SE625]
LETS GET STARTED (seam allowances in this tutorial are all ⅜” unless otherwise stated)
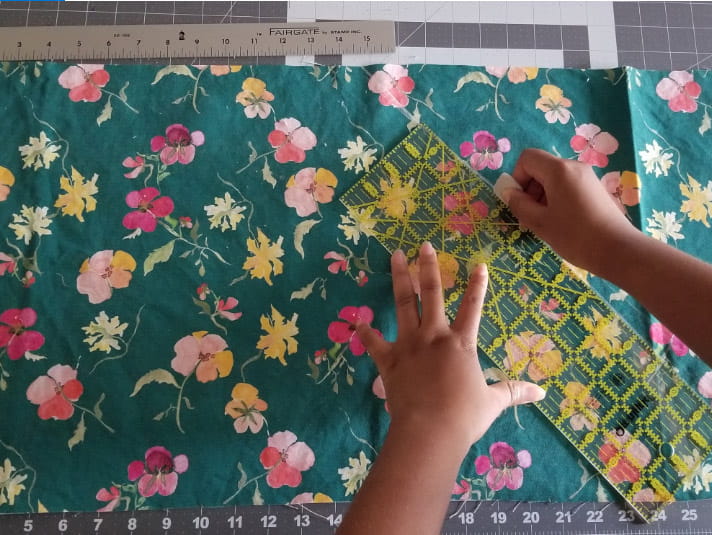
1. Using chalk or a marking tool, draw the pattern pieces directly onto your fabric using the pattern template provided on the pattern website.

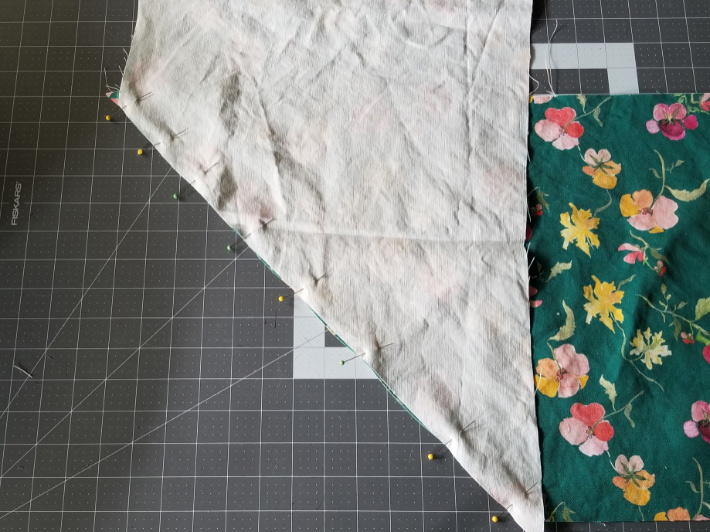
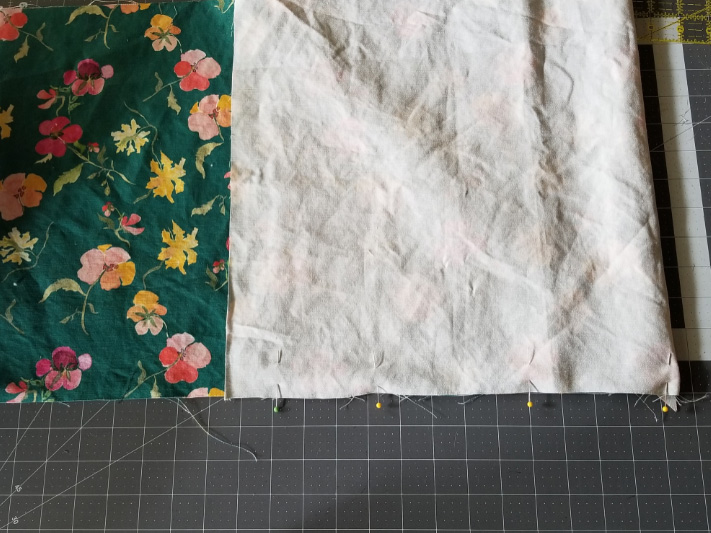
2. To assemble the main body of the bag, with the right sides together place the main body pieces perpendicular along the diagonal. To accommodate for the spacing of the pieces leave ⅜" of spacing at each end. Using a ⅜" seam allowance sew along the diagonal edge.
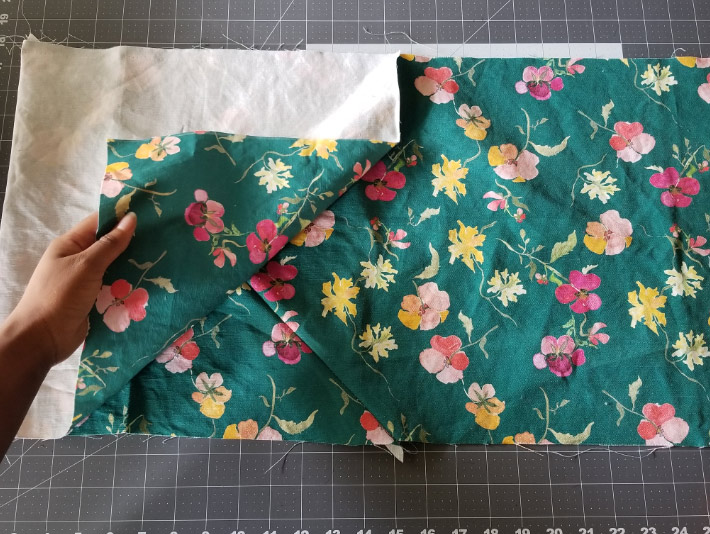
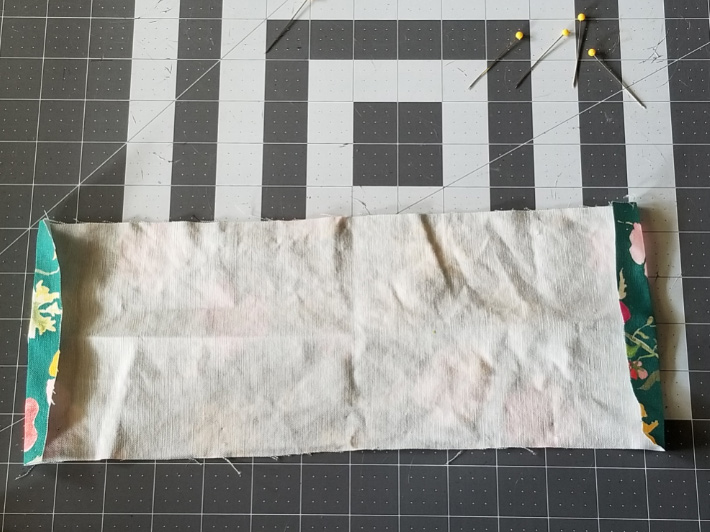
3. With the right side of your fabric facing up, Turn your fabric so that the shorter side of the diagonal seam is on your right and the longer side on your left. Take the right side of the bag body's and fold it ⅓ of the length of the body upward..
4. Pin and sew the bottom seam (the edge that meets the diagonal seam), leaving a small gap at the opening of the bag (about ⅜")
5. Turn the body of the bag so that the seam just sewn is now on your top left. Move the flap out of the way and bring the right side edge of the bag ⅓ of the way up the the main body. Repeat step 5.
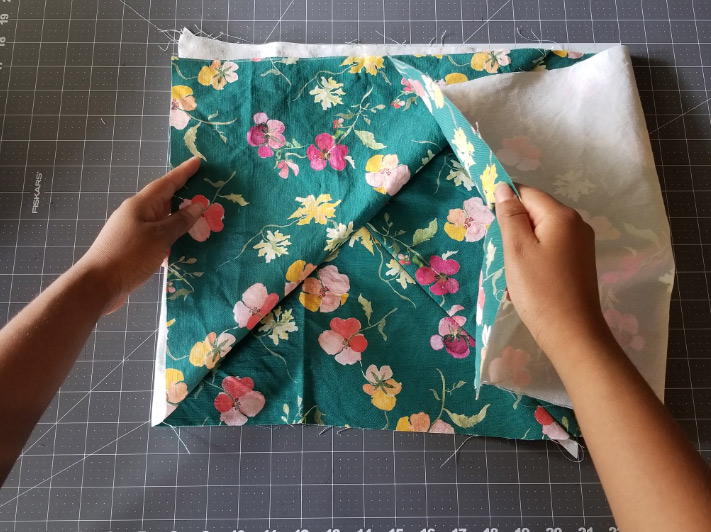
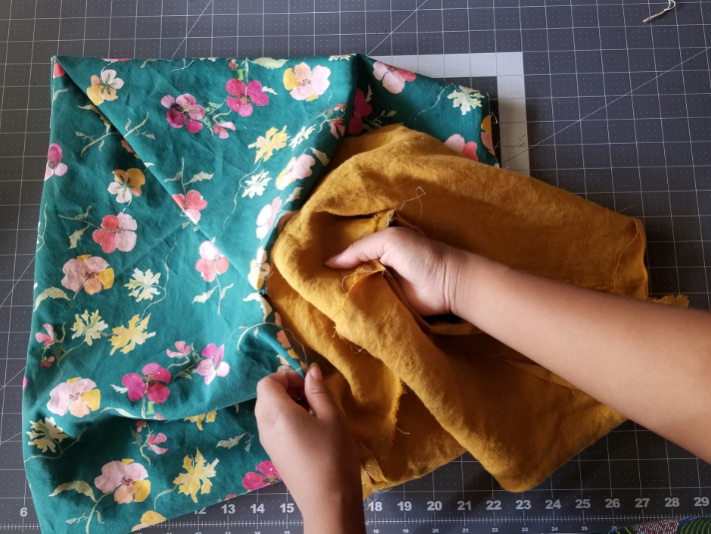
6. Repeat steps 3-6 for the lining fabric

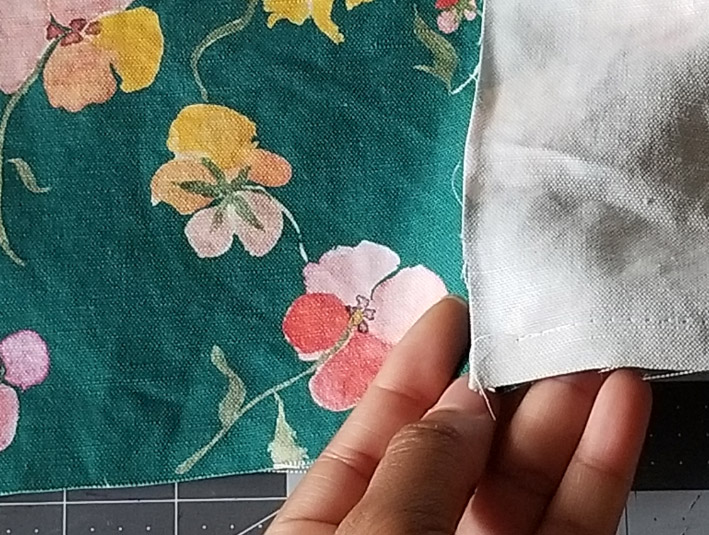
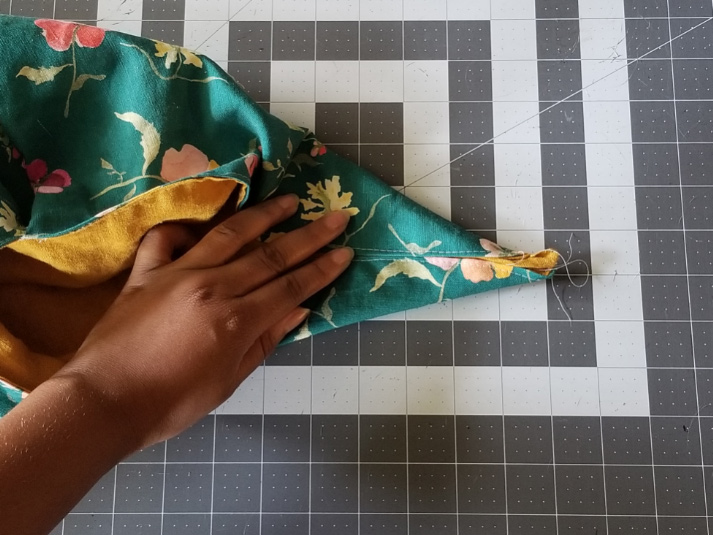
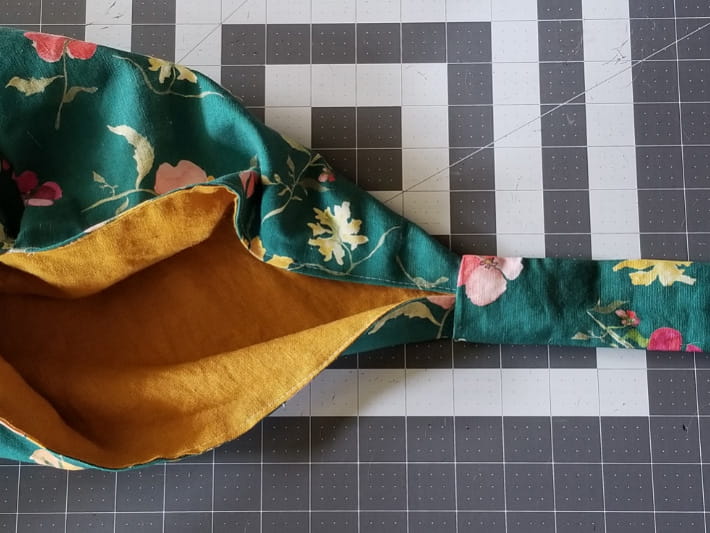
7. Use a point turner to push out the corners of the bag neatly. Press open all seams
8. Fold the edges of the bag and lining toward the wrong side of the bag along the seam allowance and press in place.
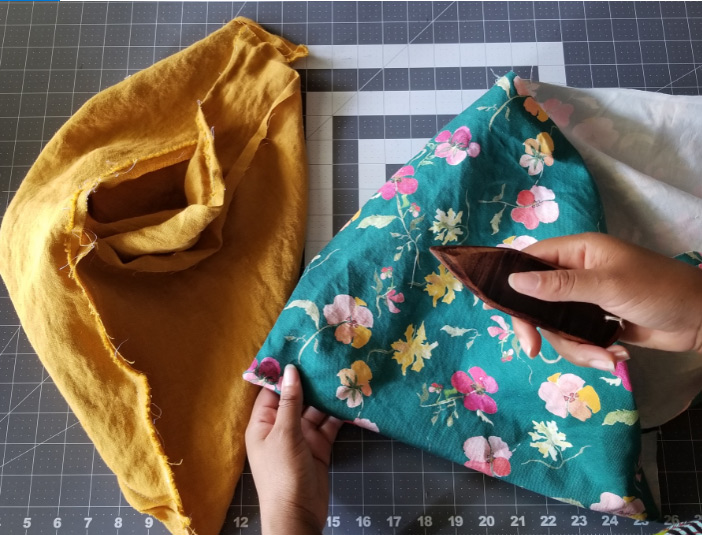
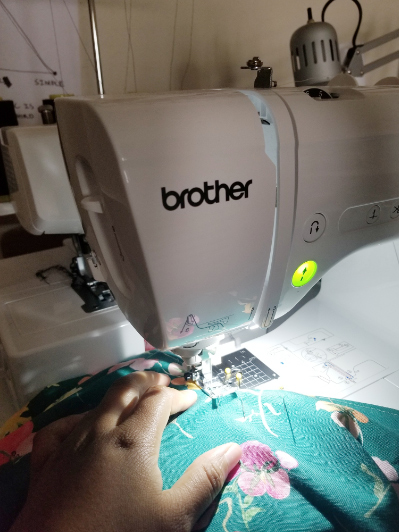
9. Turn the main body of the bag right side out, making sure the lining is wrong side out. With wrong sides together insert the lining into the main body of the bag and match up the folded edges, pinning in place. Edgestitch around the outside edges of the bag.


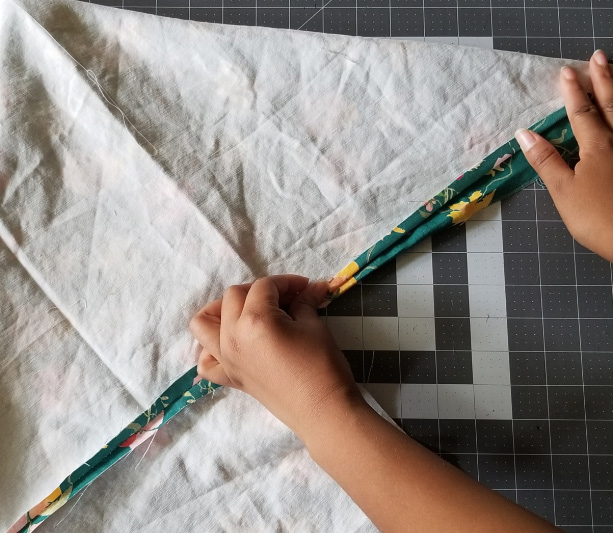
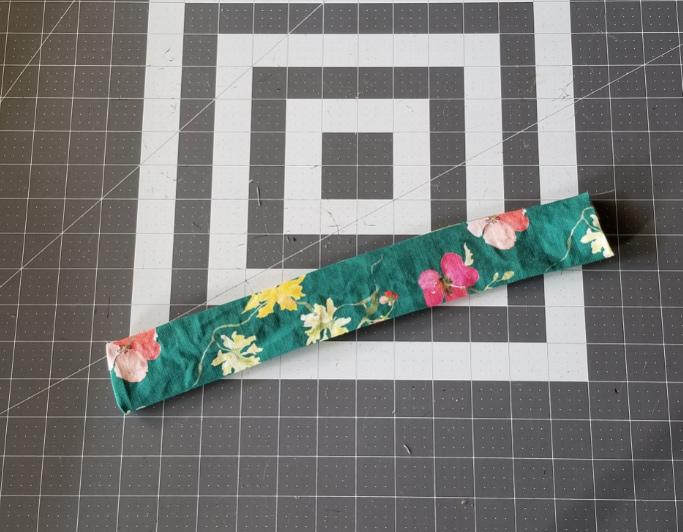
10. STRAP/HANDLE: With the fabric wrong side up fold the short outside edges of the handle inward ⅜” and press/fingerpress.
11. Fold the handle in half lengthwise making sure the folded edges are aligned nicely. Pin and sew using a ⅜” seam allowance.
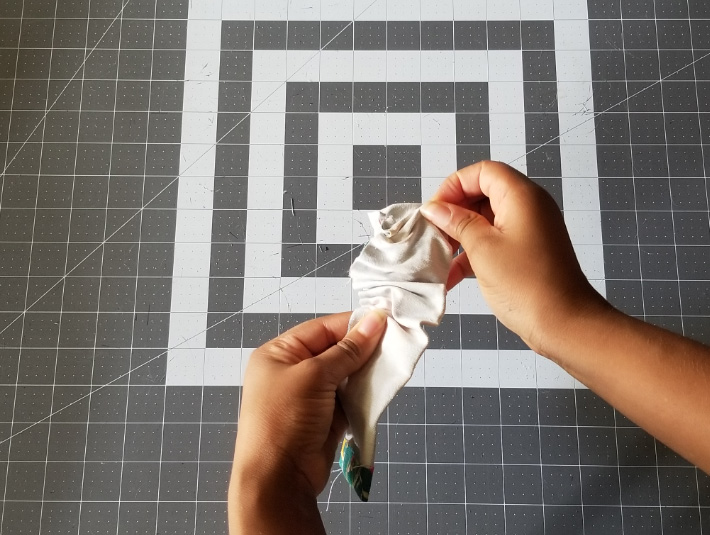
12. Turn the handle inside out by attaching a safety pin to one end and then pushing it through to the other end of the tube making sure to slide the fabric as you turn the tube.
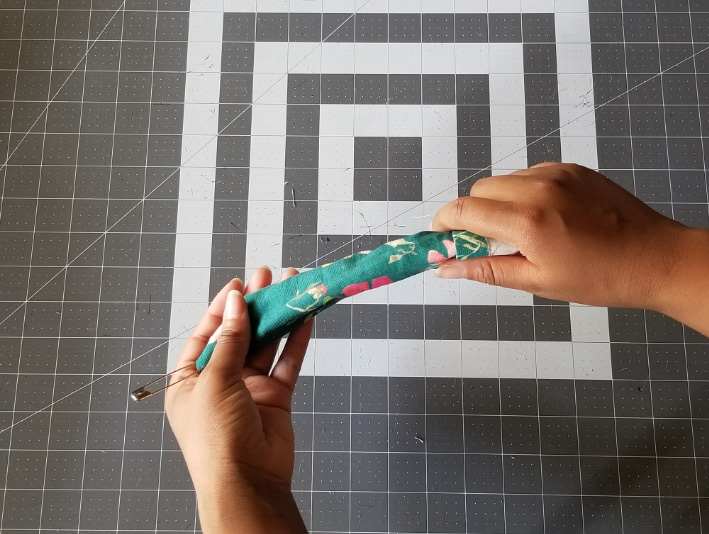
13. Press the handle so that the seam is in the center of the handle or along the side.
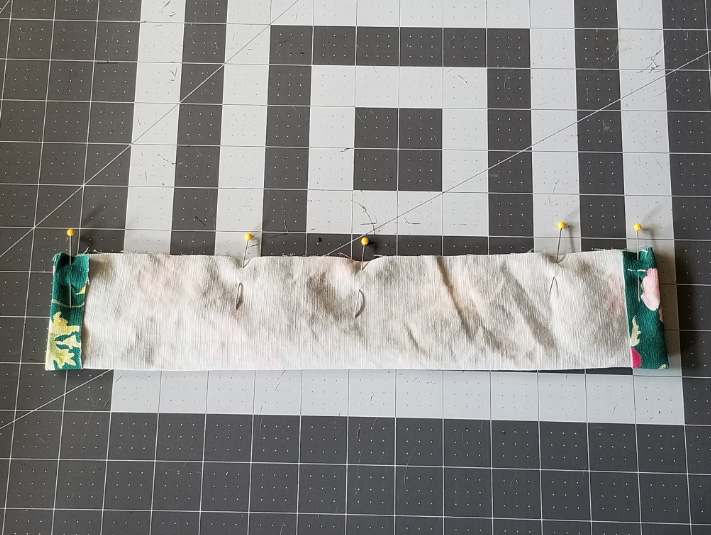
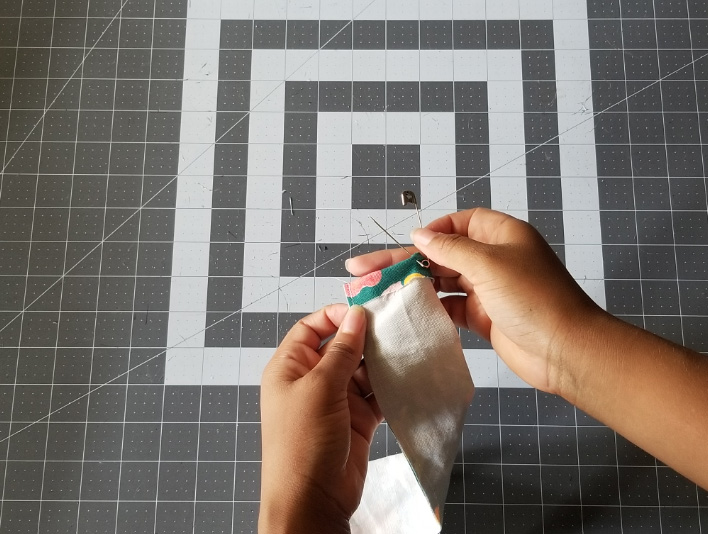
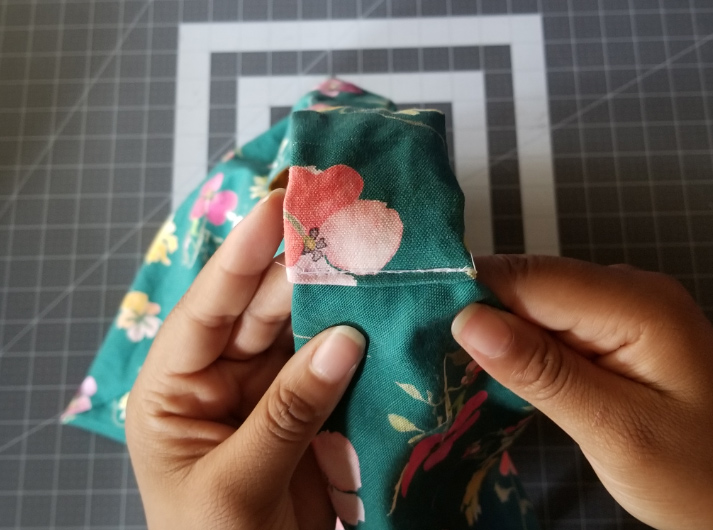
14. INSERTING THE BAG ENDS INTO THE HANDLE : Fold the edges of the bag ends inward where the handle will be placed, creating a triangle like shape. Insert one end of the handle over the bag ends until the handle stops and lays naturally. Pin along the folded edge of the handle to hold in place. Do the same thing for the other side.
15. Edgestitch both handles in place, making sure to stitch over the handle two or three times since strength and tension will be applied in this area frequently.
16. Give your bag one final press and remove any loose threads. You are finished!
If you’re looking for a video to walk you through the tutorial as well, Milan AC-JV also has an easy-to-follow tutorial here:
Tags
Shop this project
No sewing machine? No problem! Any products mentioned in this project are available to buy here so you can stay stitching.

Related Projects
Stay Connected
* Required fields