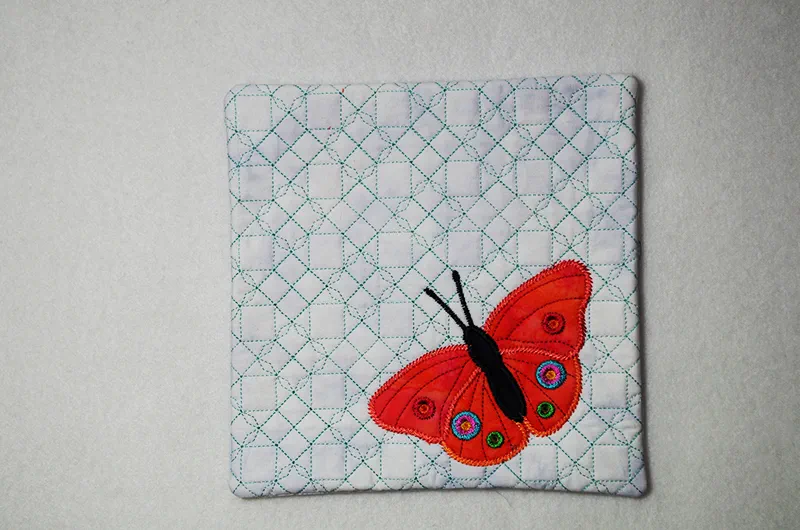
Quick Quilted Mug Rug using My Design Center
Mug Rugs seem to be a popular item and are quick to stitch out. But, I wondered, if I already have a quilted block, how can I make it a mug rug. This got me looking at the features of the Design Center on the Brother Dream Machine
with upgrade to version 2. Any quilted block can easily be made into a mug rug by adding 2 folded fabrics on the top of the finished quilted block in the hoop. A tack down stitch is used to sew the 2 folded fabrics to the finished quilted block. This is where the Design Center comes into play, by adding the tack down stitch to the original design.

- Start with any quilted block design. For this sample, we are using the Quilted Buckeye Block from Foxglove Flutter Block of the Month for June. Load the design. At the bottom of the screen there is a ADD button. This is how to add more to the initial design.

- Select the My Design Center button on the lower right of the screen.

- On the My Design Center screen, the first thing is to select a shape that will be used for the tack down stitch. Click on the button/icon with the Circle and Box. About midway down on the right side of the screen.

- Select the first Box and click on the OK Button.

- In the My Design Center Screen, select size, then use the arrow boxes to enlarge the Box to 7.50” x 7.50”. Click OK. The design is just under 8” square. This will result in ¼” seam to secure the folded fabric.


- From the My Design Center Screen, click on the NEXT Button.

- Click on the line icon on the right side of the screen,

- Select the 3rd button under the words “Line Property”. This is the tack down stitch. Click on OK.

- Click on the Preview button at the lower right side of screen.

- The following message will appear on the screen – The “My Design Center” data will not be saved. OK to continue? Click on the OK button.

- Click on the Set button.

- Click OK to the message “Converted to the embroidery pattern, and My Design Center will be exited. OK to continue to embroidery edit screen?

- The initial loaded design now has a square around it which is the Tack Down Stitches. This color change is added to the end of the original design. If desired, select the Memory button to save this file to use later.

- Stitch out the Quilted Buckeye Block, and stop at the last color change. This is the tack down stitches added at the end of the design.


- Place one folded fabric (same size as background fabric) on top of quilted block. Place the folded edge about a 1” pass the center of the hoop. Then place the second folded fabric on top of the quilted block with an overlap of about 2”. Place a piece of tape on the folded edge so the foot does not go under the folded edge when stitching the Tack Down stitch.


- Once the Tack Down stitch is complete, remove the block from the hoop and remove the tape from the folded edge.

- Using the Tack Down Stitch as a guide, trim about ¼” all around the block.


- Clip the corners and turn the block inside out. Now you have a completed Mug Rug.

 Using this method to add a Tack Down Stitch to secure the 2 folded fabrics via The Design Center can be used for any size quilted block – single hooping. A great way to make lots of Mug Rugs for special occasions or as quick gifts for friends.
-
All the Block of the Month designs include one or more 8” x 8” quilted blocks, as well as Quilted Blocks 1 and Quilted Blocks 2. Everything are available for purchase at Anna’s Awesome Appliqué Designs.
-
Anna’s Awesome Appliqué Designs
and Brother International Corporation makes no representations or warranties regarding such products.


