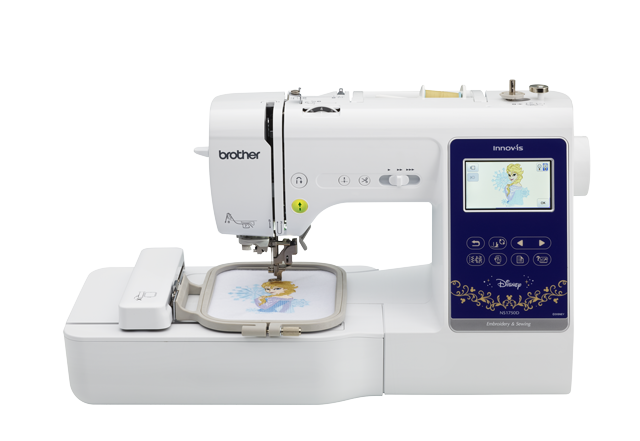
Quick Tip: Thanksgiving Baby Bib
Brother Sews Ambassador
Need a new baby bib in time for the Thanksgiving holiday? All you need is a blank baby bib to get started! Add an adorable Brother iBroidery design, and then quickly attach a cute ribbon using the button sewing stitch and your Brother button sewing foot. This DIY baby big is fast, fun, and the perfect way to help your little one celebrate the holidays. Read on to learn how to craft your very own!
Supplies:
Tip: A simple search for Thanksgiving
on iBroidery.com will bring up two pages of delightful Thanksgiving themed designs. [caption id="attachment_26320" align="aligncenter" width="800"]
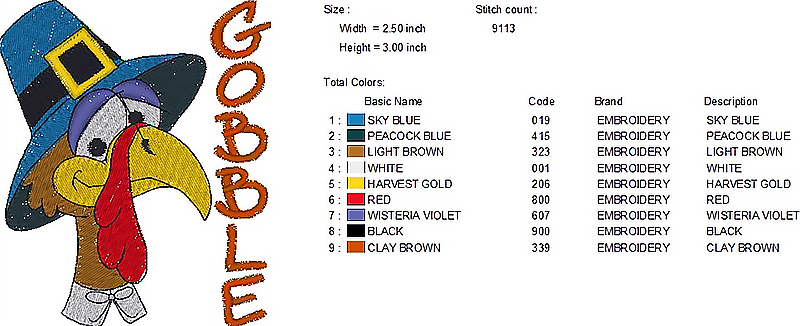 Figure #1[/caption]
Note: I used the Brother Luminaire
in this example. Check your machine for a button sewing stitch to coordinate with the button sewing foot. This stitch is available on many Brother computerized machines.
Step 1. Embroider bib using tear-away stabilizer on back and water soluble on top, to keep embroidery stitches from sinking into nap of fabric. Be sure to leave room for the ribbon at the top. Remove stabilizer and press bib. See Figure #2. [caption id="attachment_26321" align="aligncenter" width="800"]
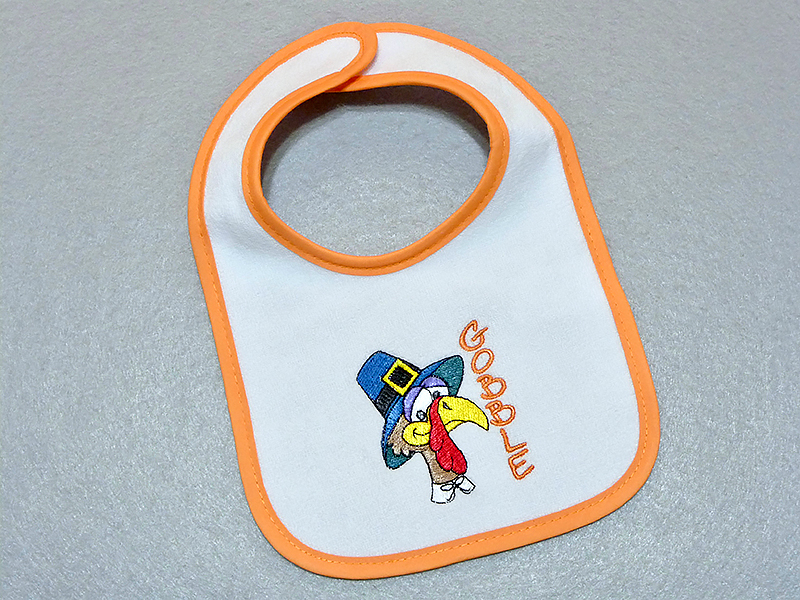 Figure #2[/caption]
Step 2. Pull back lever on Button Sewing foot M. Note: Pulling this lever forward creates a thread shank, allowing space for buttons to easily work with buttonholes in medium to heavy fabric. You don’t need this feature for sewing ribbons. See arrows showing lever pulled back in Figure #3a. Alternative button sewing foot “M” does not have a lever. See Figure #3b. [caption id="attachment_26322" align="aligncenter" width="800"]
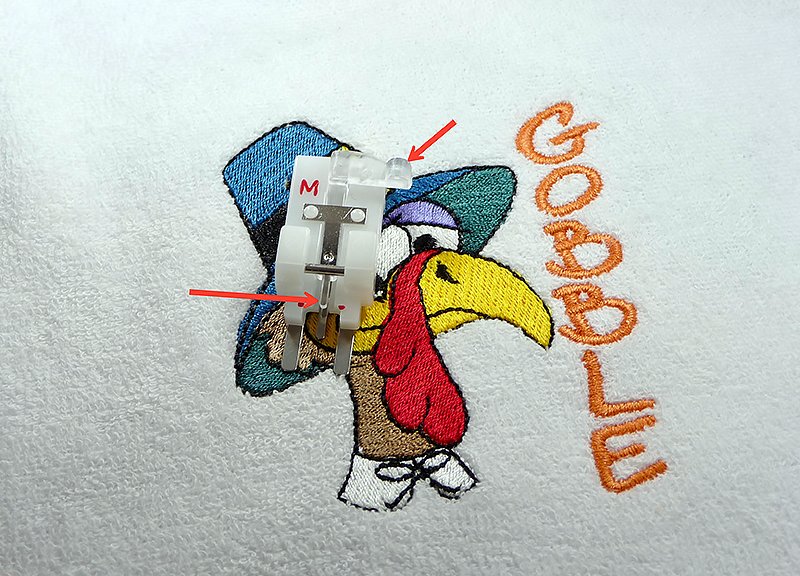 Figure #3a[/caption]
[caption id="attachment_26323" align="aligncenter" width="800"]
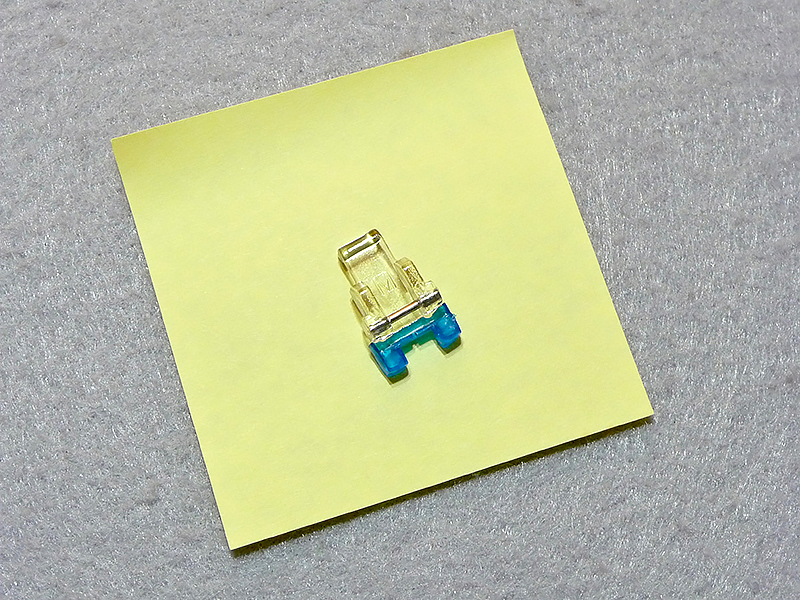 Figure #3b[/caption]
Step 3. Tie ribbon into a bow and center on top of bib. See Figure #4.
[caption id="attachment_26324" align="aligncenter" width="800"]
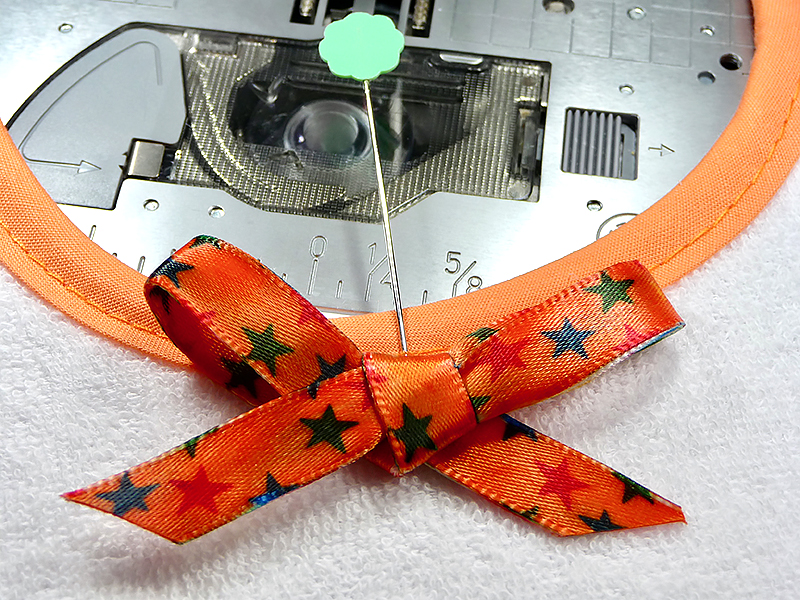 Figure #4[/caption]
Step 4. Select button sewing stitch. This is stitch No. 4-23, on the Brother Luminaire, included in the menu with buttonholes. Center foot in center of ribbon bow. See Figure #5.
[caption id="attachment_26325" align="aligncenter" width="800"]
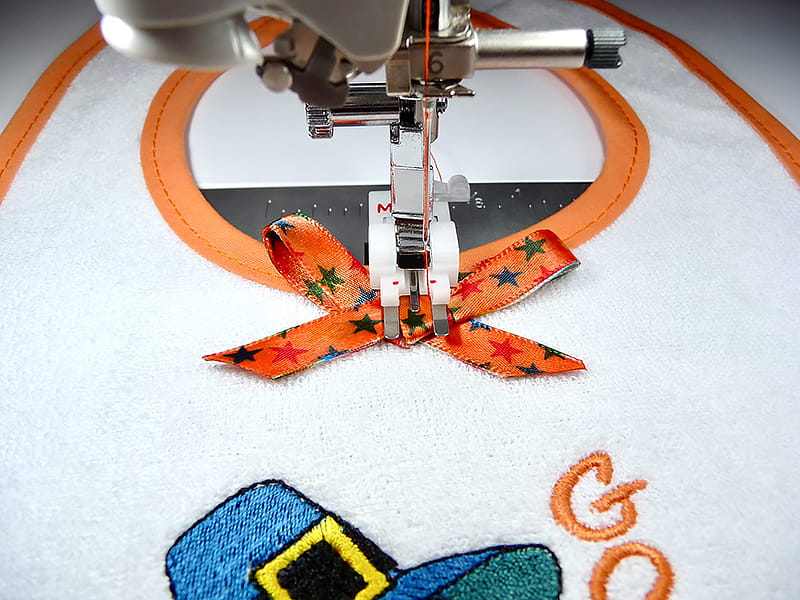 Figure #5[/caption]
Attach ribbon bow with button sewing stitch. See Figure #6.
[caption id="attachment_26326" align="aligncenter" width="800"]
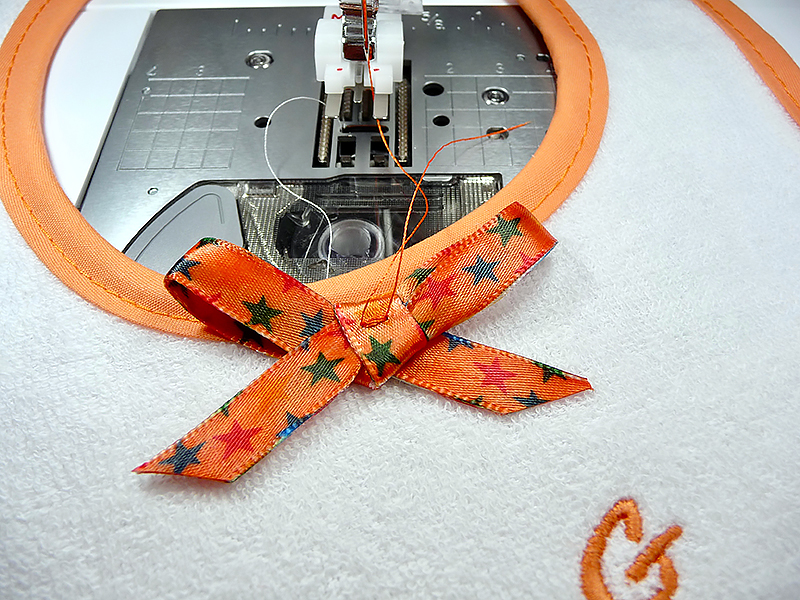 Figure #6[/caption]
Tie off thread tails by hand before clipping the tails. You are finished! Enjoy dressing the baby in this adorable Thanksgiving bib.

CLICK FOR PDF!
Need a new baby bib in time for the Thanksgiving holiday? All you need is a blank baby bib to get started! Add an adorable Brother iBroidery design, and then quickly attach a cute ribbon using the button sewing stitch and your Brother button sewing foot. This DIY baby big is fast, fun, and the perfect way to help your little one celebrate the holidays. Read on to learn how to craft your very own!
Supplies:
- Brother Sewing and Embroidery machine.
- Brother Embroidery Thread
- Brother Bobbin Thread for Embroidery
- SA580
Medium Weight Tear-Away Stabilizer for stabilizing back side of bib. - SA520
Water Soluble Stabilizer for topping on terry cloth bib. - Brother button sewing foot “M.” Note: Check your included accessories, button sewing foot “M’ is included with many Brother machines. This foot comes in two styles. One has a lever for adding a thread shank and the other is an open front foot without a lever. See both feet in the instructions below.
- Blank baby bib
- Coordinating ribbon measuring ¼-inch wide X 10-inches long
- Size 11 embroidery needle for embroidering.
- Featured embroidery design
, (Item Number: DC HY0796) purchased from iBroidery.com
, or another design of your choice. See Figure #1.
Tip: A simple search for Thanksgiving
on iBroidery.com will bring up two pages of delightful Thanksgiving themed designs. [caption id="attachment_26320" align="aligncenter" width="800"]
 Figure #1[/caption]
Note: I used the Brother Luminaire
in this example. Check your machine for a button sewing stitch to coordinate with the button sewing foot. This stitch is available on many Brother computerized machines.
Step 1. Embroider bib using tear-away stabilizer on back and water soluble on top, to keep embroidery stitches from sinking into nap of fabric. Be sure to leave room for the ribbon at the top. Remove stabilizer and press bib. See Figure #2. [caption id="attachment_26321" align="aligncenter" width="800"]
 Figure #2[/caption]
Step 2. Pull back lever on Button Sewing foot M. Note: Pulling this lever forward creates a thread shank, allowing space for buttons to easily work with buttonholes in medium to heavy fabric. You don’t need this feature for sewing ribbons. See arrows showing lever pulled back in Figure #3a. Alternative button sewing foot “M” does not have a lever. See Figure #3b. [caption id="attachment_26322" align="aligncenter" width="800"]
 Figure #3a[/caption]
[caption id="attachment_26323" align="aligncenter" width="800"]
 Figure #3b[/caption]
Step 3. Tie ribbon into a bow and center on top of bib. See Figure #4.
[caption id="attachment_26324" align="aligncenter" width="800"]
 Figure #4[/caption]
Step 4. Select button sewing stitch. This is stitch No. 4-23, on the Brother Luminaire, included in the menu with buttonholes. Center foot in center of ribbon bow. See Figure #5.
[caption id="attachment_26325" align="aligncenter" width="800"]
 Figure #5[/caption]
Attach ribbon bow with button sewing stitch. See Figure #6.
[caption id="attachment_26326" align="aligncenter" width="800"]
 Figure #6[/caption]
Tie off thread tails by hand before clipping the tails. You are finished! Enjoy dressing the baby in this adorable Thanksgiving bib.

CLICK FOR PDF!


