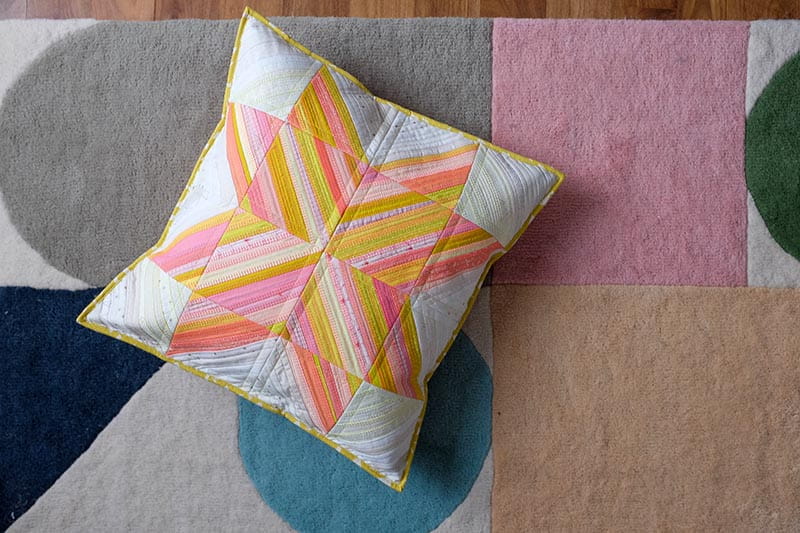
Quilt-as-you-go Scrap Strip Blocks and Throw Cushion Cover Tutorial
Quilt-as-you-go (QAYG) is a fun and efficient technique where you piece your quilt top and quilt the project at the same time. There are a couple of ways in approaching the QAYG method. With the method shown in this tutorial, we are creating ‘quilted’ blocks and then combining them to create a throw cushion. This method puts those fabric and batting scraps you’ve been saving up into good use.
Once you have grasped the basics of this technique, you could apply it to other types of projects such as bed quilts, table runners and more!

Supplies & Tools:
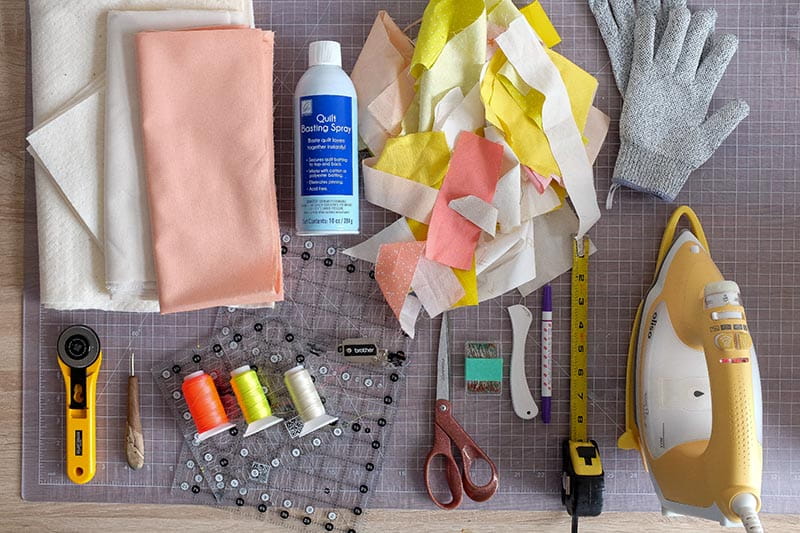
- Basic sewing machine – the Brother Innov-ís BQ3100 (Opens in a new tab)from the Quilt Club Series was used in this tutorial.
- Fabric:
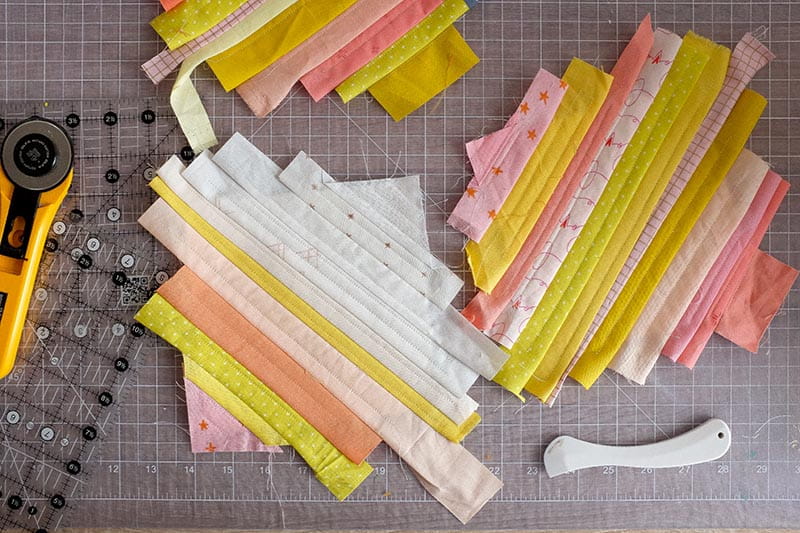
- For the front of the throw cushion cover, cut: a variety of scrap strips of fabric ranging from 3" to 11" in length and 1" to 1½" in width.
- For the back of the throw cushion cover, cut: two 14" x 20" rectangles.
- For cushion lining, cut: one 28" square; two 18" x 28" rectangles.
- For cushion trimming, cut: two 2" x 22" rectangles.
- For cushion binding, cut: two 2" x 42" rectangles; one 2" x 12" rectangle. Combine all binding rectangles at the short ends to create one approx. 2" x 94½" rectangle.
- Batting:
- For the cushion cover front, cut: sixteen 6" squares. Recommend high loft and sticking to the same type, loft or brand of batting*
- For the cushion cover back, cut: two 18" x 28" rectangles.
- Coordinating threads, 50wt for piecing and quilting
- Rotary cutter
- Quilting rulers – at least one with 45-degree-angle guide
- Measuring tape
- Cutting mat
- Fabric scissors
- Seam ripper
- Sewing pins
- Iron
- Basting spray (if spray basting) or safety pins (if pin basting)
- Brother Compact MuVit Digital Dual Feed Foot or walking foot attachment
- Quilting gloves
- Machine-washable fabric pen or pencil
- Hera marker or blunt butter knife
- Cushion insert, approx. 20" square
*Loft refers to the weight and thickness of batting. The higher the loft, the thicker it is. This project suggests using a higher loft because the fibers are more packed density and the integrity of the batting is less likely to be impacted as you work with it on the sewing machine.
Directions:
Similar to a cooking recipe, read through all the instructions before you start. This will help you identify what supplies you will need and give you an understanding of what to expect throughout the project.
General Instructions:
- Sew all right sides together with ¼" seam allowances, unless specified.
- Share your QAYG scrap moments and makes on social media by tagging: @the.weekendquilter, #TheWeekendQuilter @BrotherSews #BrotherSews.
- Piecing and Quilting QAYG Blocks for Cushion Front:
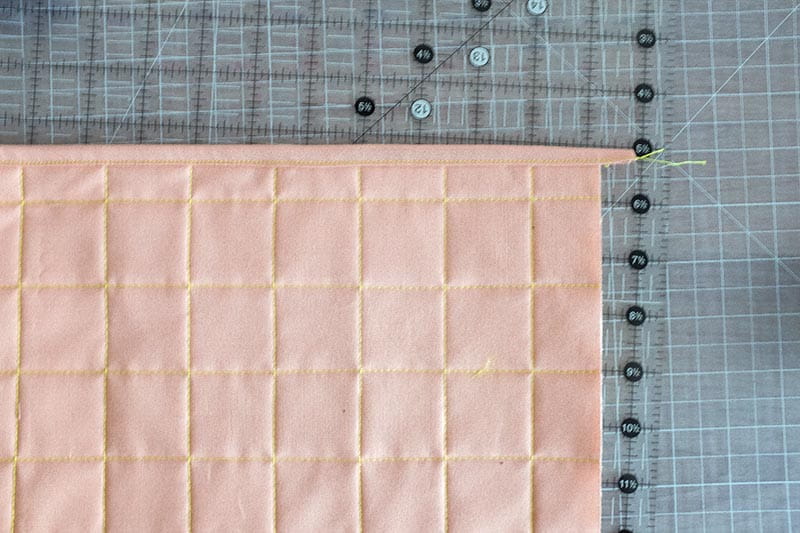
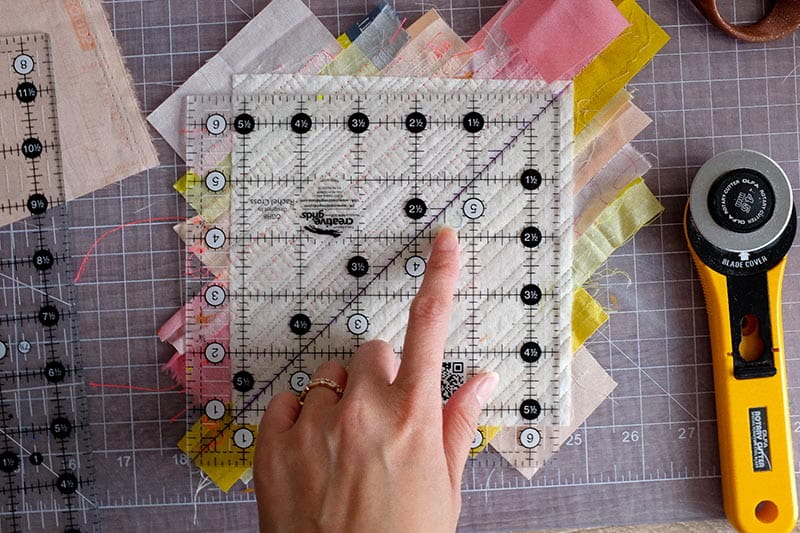
- On one side of one 6" scrap batting square, draw a diagonal guideline from the top left corner to the bottom right corner with a fabric marker. This marked line indicates the wrong side of the quilted block and will be used as a guide for squaring up the quilted block at a later step.
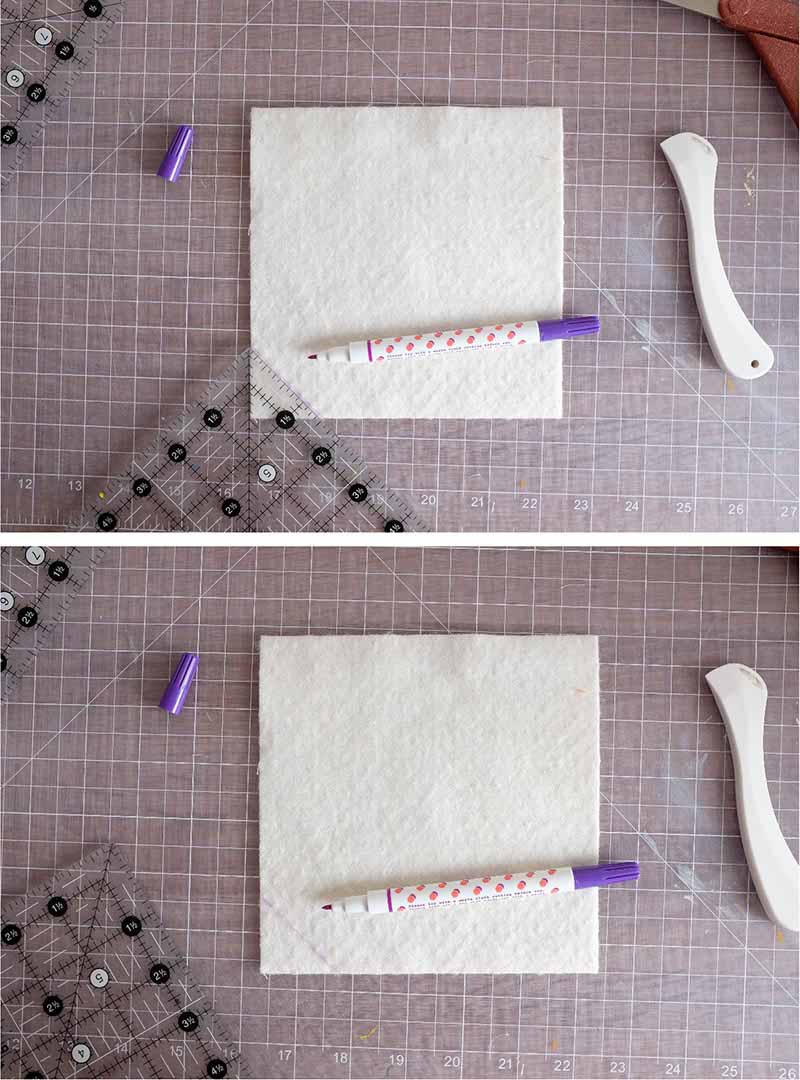
- Then turn the marked batting square from the previous step around, so the unmarked side is facing up. Identify the 45-degree-angle guideline on quilting ruler. Line up the guideline against the left or bottom edge of the square.
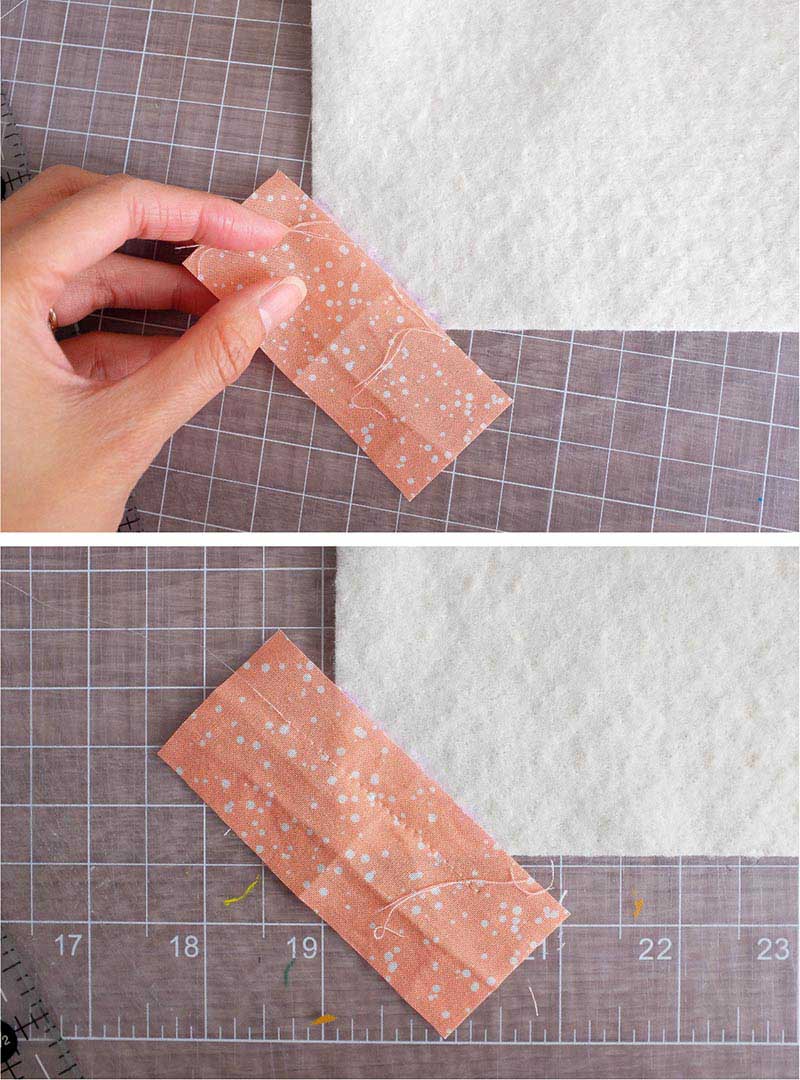
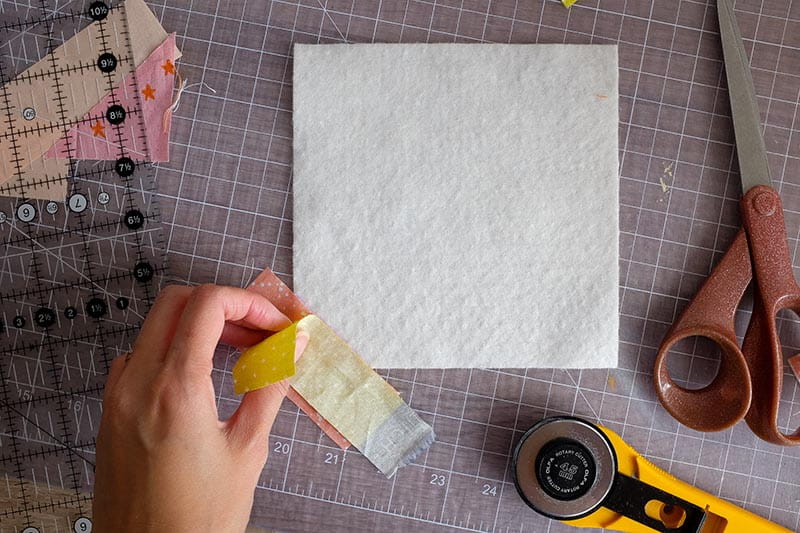
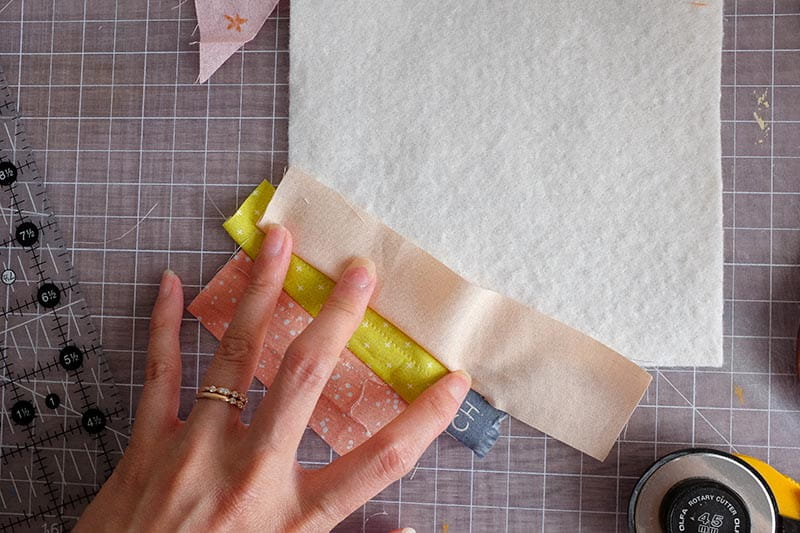
- Take a fabric scrap strip for the cushion front. Ensure it is large enough so that there is some overhang when you place the wrong side of the fabric on top of the batting. Line up the long edge of the fabric strip with the marked 45-degree angle from the previous step near the bottom left corner.
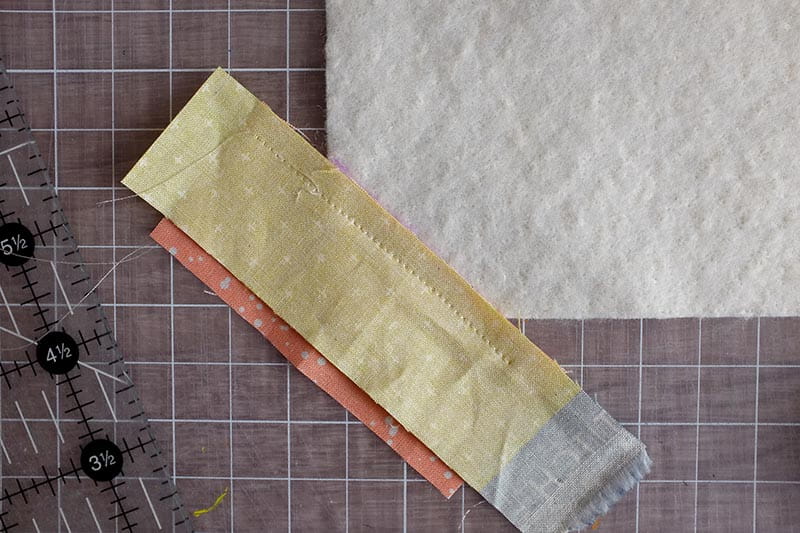
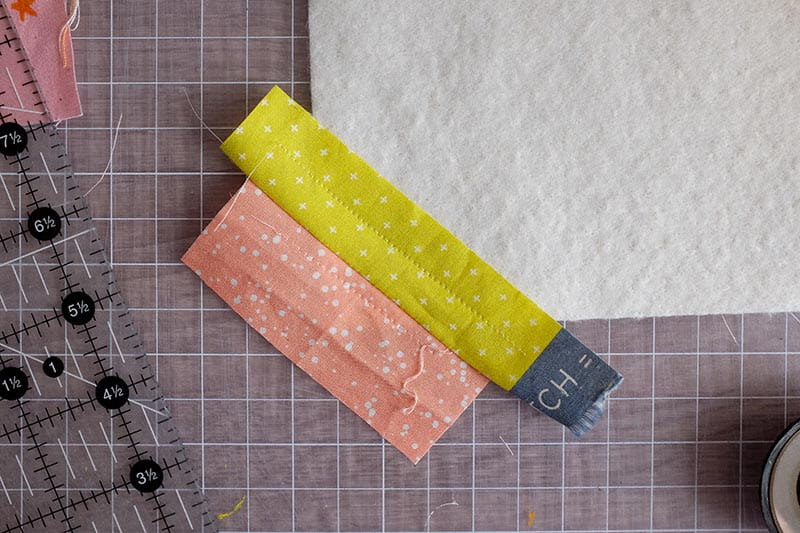
- Lay second fabric scrap strip on top of the previously sewn strip of fabric – right sides facing each other; align the long, raw edges of both strips; pin and sew ¼" away from the matched raw edge. Press to one side and sew a 45-degree-angle quilting seam anywhere on the second strip of scrap fabric to hold it in place. For decorative purposes, at this point, you could sew more 45-degree angled lines running parallel to the fabric strips.
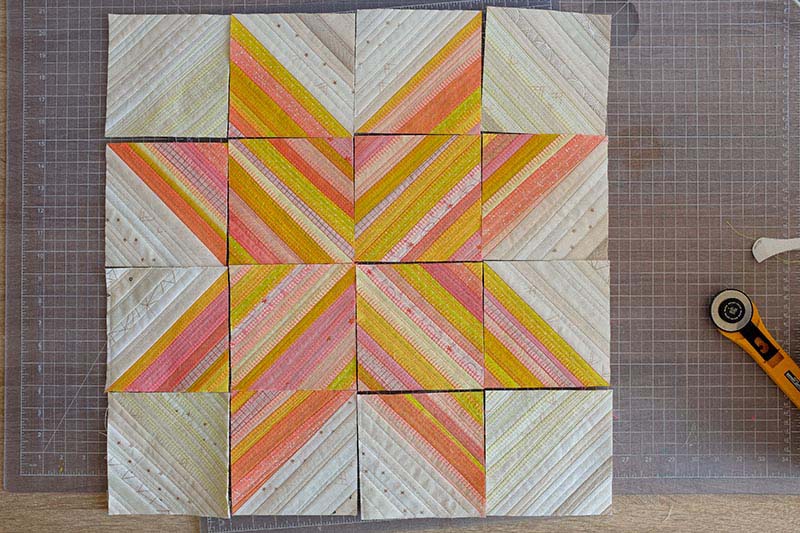
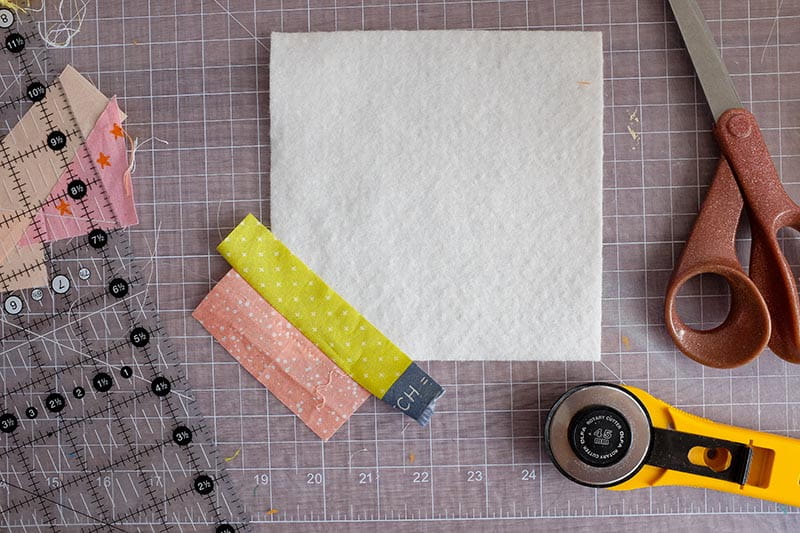
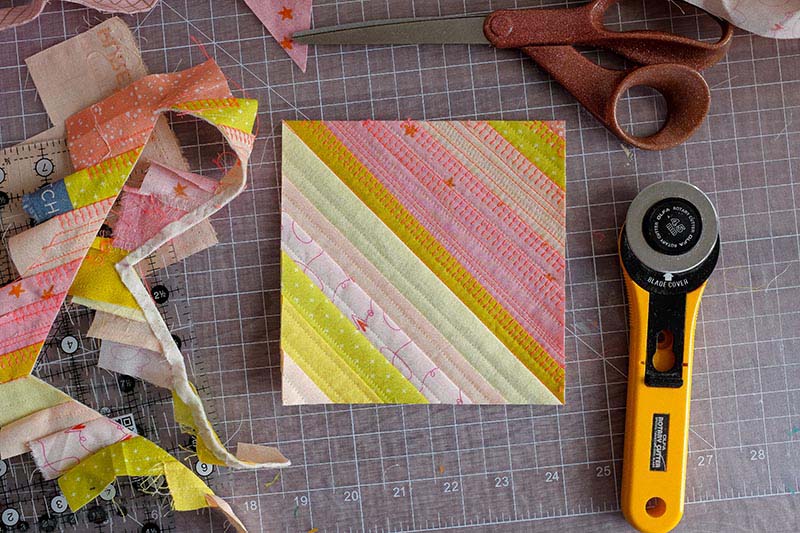
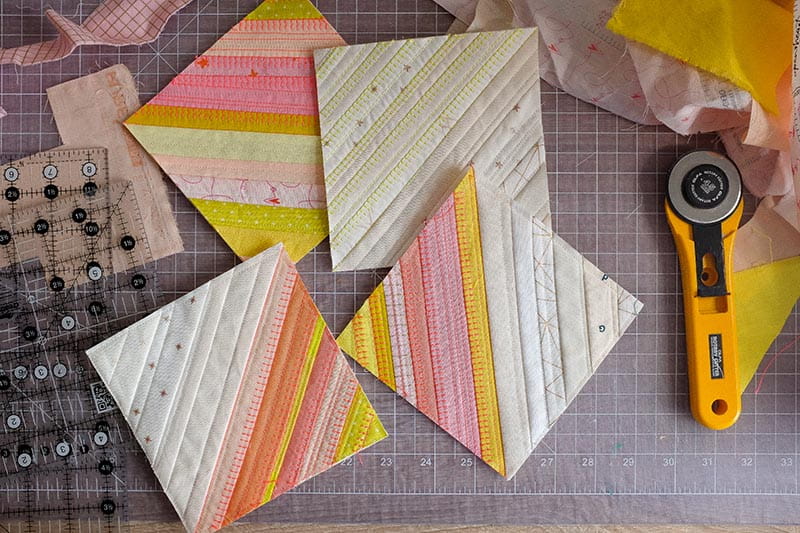
- Repeat steps 1a to 1d to create a total of sixteen Scrap Blocks. I intentionally sewed some of my blocks to look like half-square triangles and you’ll see why in step 2a when we assemble the front of the cushion.
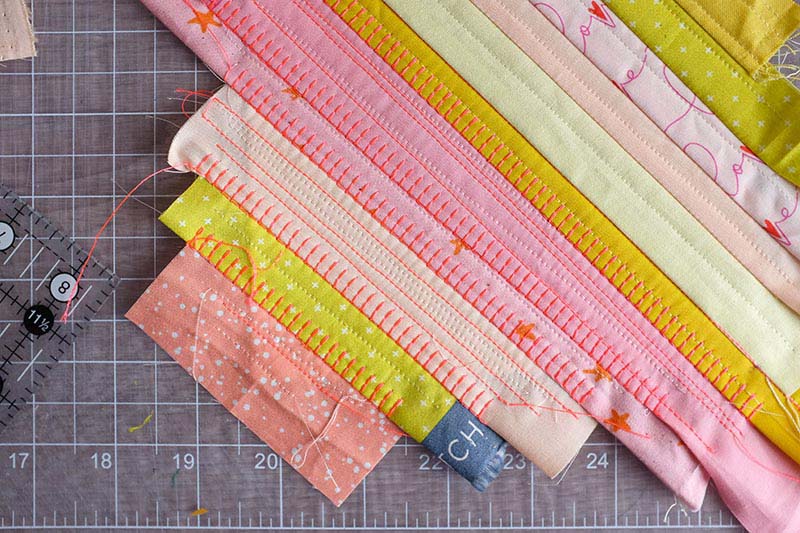
- It is very tempting to remove the excess batting and fabric strip scraps at this point. Don’t do it yet! We’re now going to take your project to the next level, by adding additional decorative quilting stitches and switching to a different coloured thread to make your project pop!
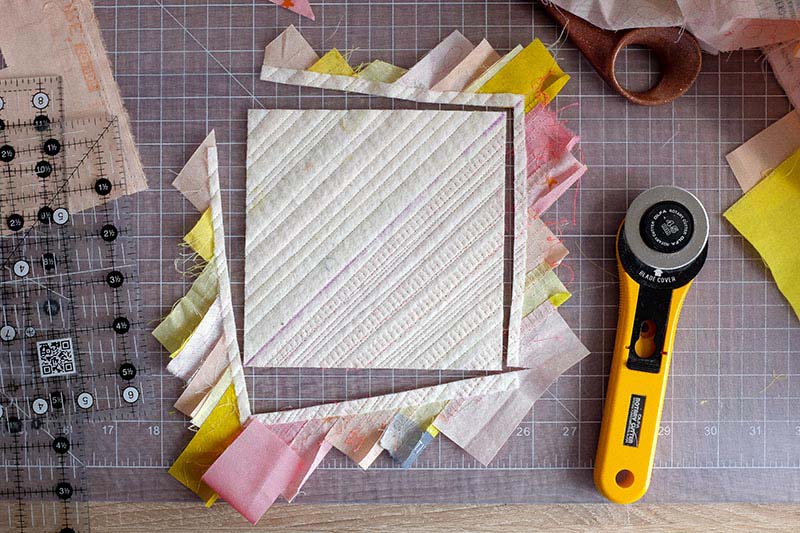
- Turn one Scrap Block, batting side facing up. Match the 45-degree-angled drawn line (from step 1a) with 45-degree-angled line on quilting ruler and trim Scrap Block down to 5½" square.
- Assembling Cushion Front:
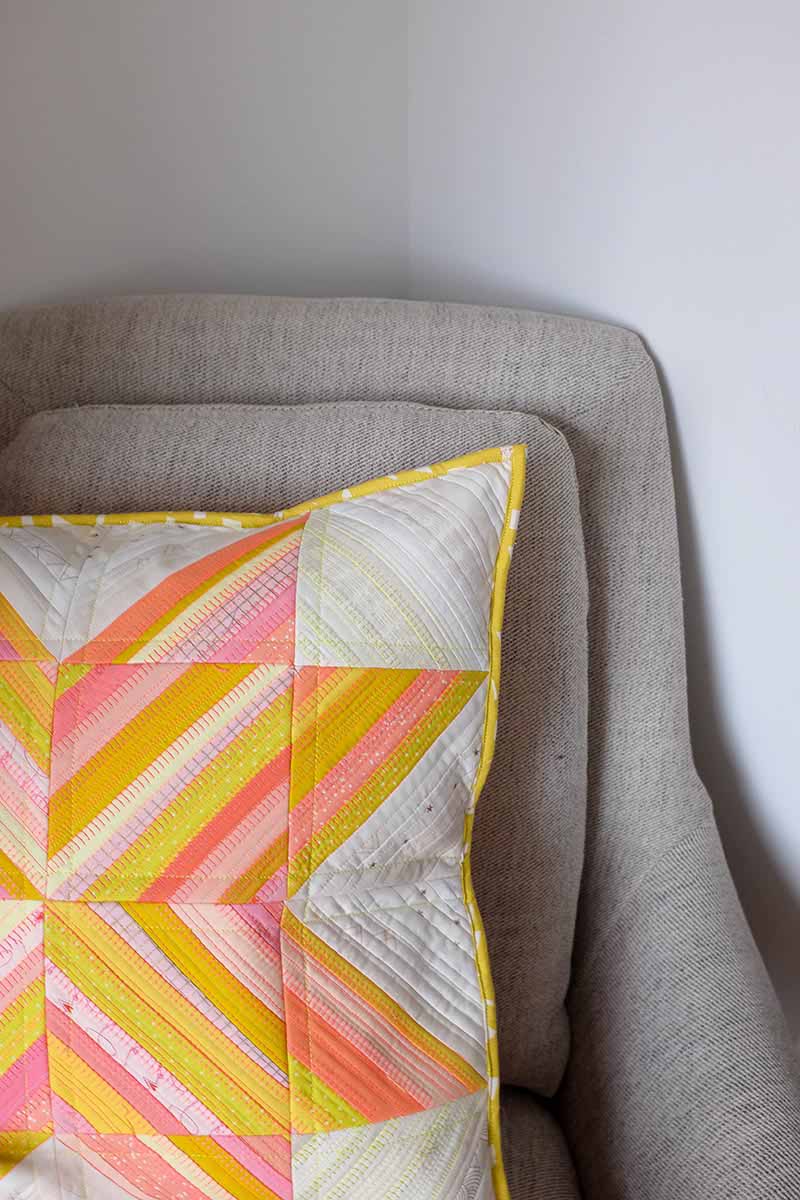
- Layout sixteen Scrap Blocks – four rows of four blocks. Sew together with a ¼" and press open as you go to complete Cushion Front.
With the half-square triangle like Scrap Blocks, I have arranged the blocks to look like a Sawtooth Star.
- Basting and Quilting:
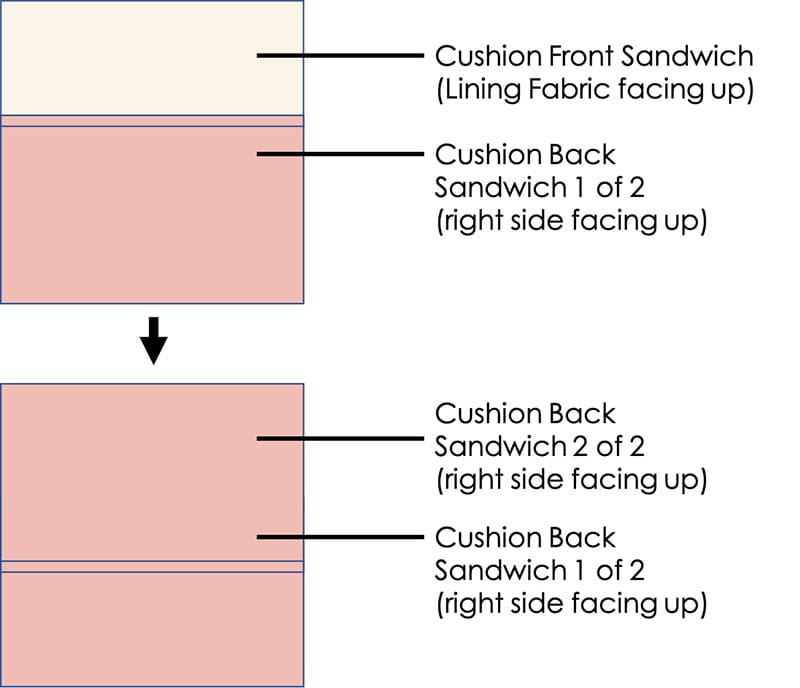
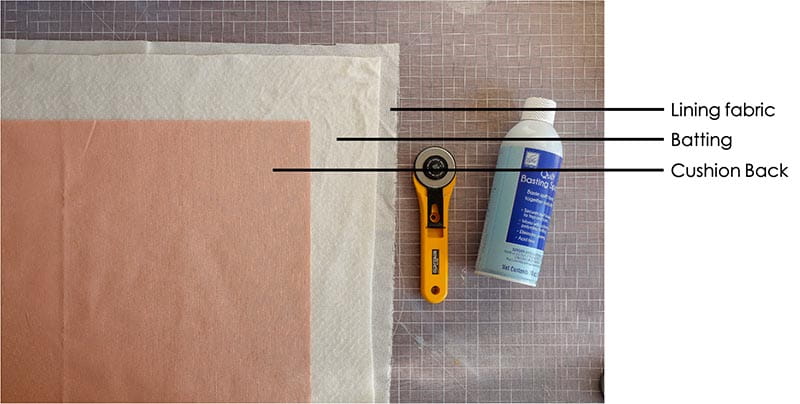
- For this project you need to create a total of three cushion sandwiches: one Cushion Front and two Cushion Back Sandwiches.
- Cushion Front Sandwich:
-Cushion Front (from step 2a)
-One Lining Fabric 28" square - Cushion Back Sandwich:
-One Cushion Back 14" x 20" rectangle
-One Cushion Back batting 18" x 28" rectangle
-One Lining Fabric 18" x 28" rectangle - Trim excess batting and lining fabrics, and square up all cushion sandwiches. Take extra care when squaring up. Each cushion sandwich must measure:
- Cushion Front Sandwich: 20½" square
- Cushion Back Sandwich: 14" x 20½" rectangle
- Cushion Trim
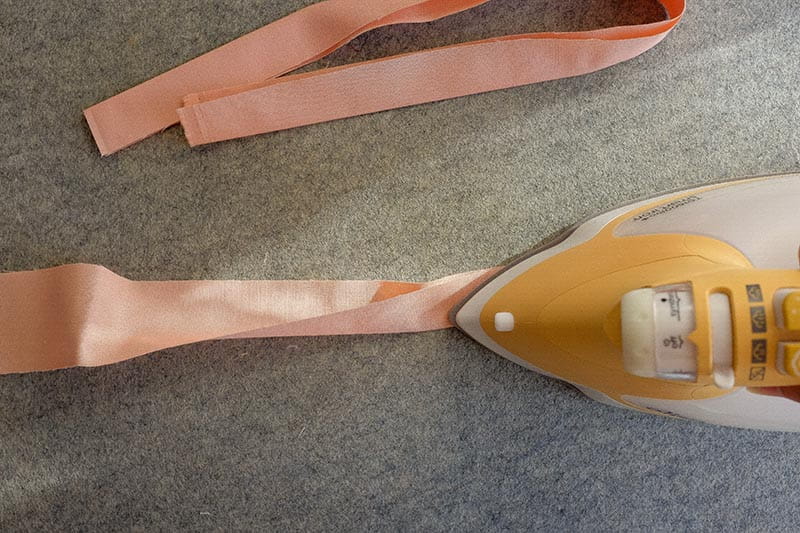
- Start with two Cushion Trimming 2" x 22" rectangles. Fold each rectangle in half lengthwise and press to create two Trim rectangles.
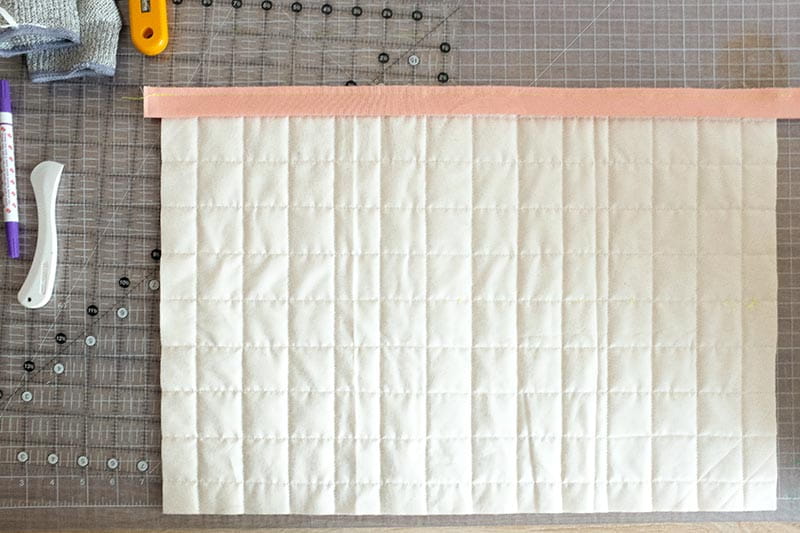
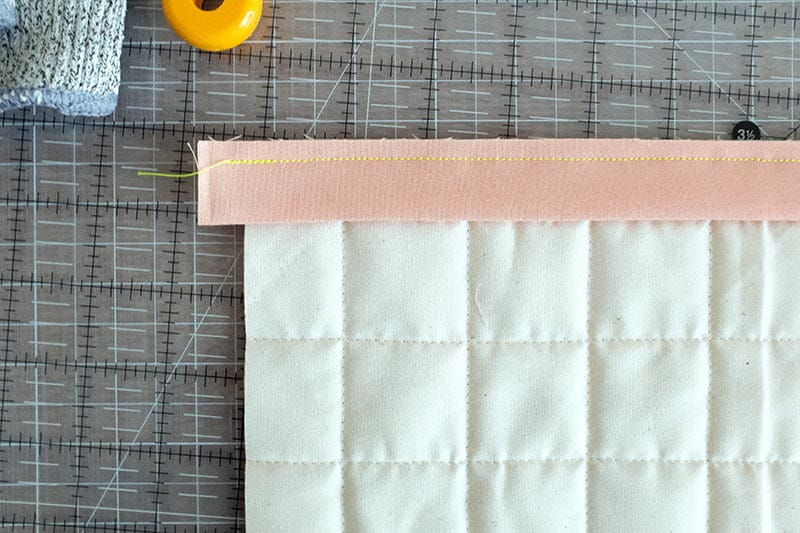
- With the lining of the Cushion Back sandwich facing up, align the raw edge of one Trim rectangle with the longer raw edge of the quilt sandwich. Sew ¼" away from the raw edge.
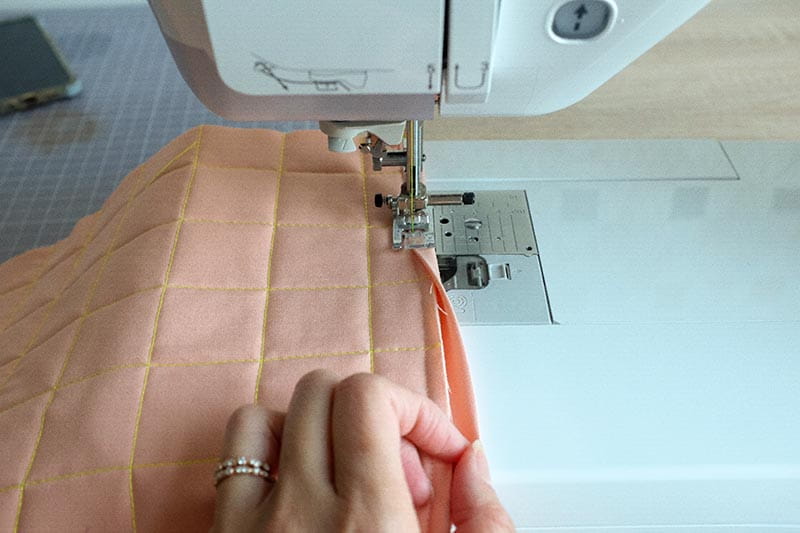
- Fold the finished edge of the Trim over to the right side of the Cushion Back. Use a coordinating thread and sew to secure the Trim.
- Use ruler and rotary cutter to remove excess Trim.
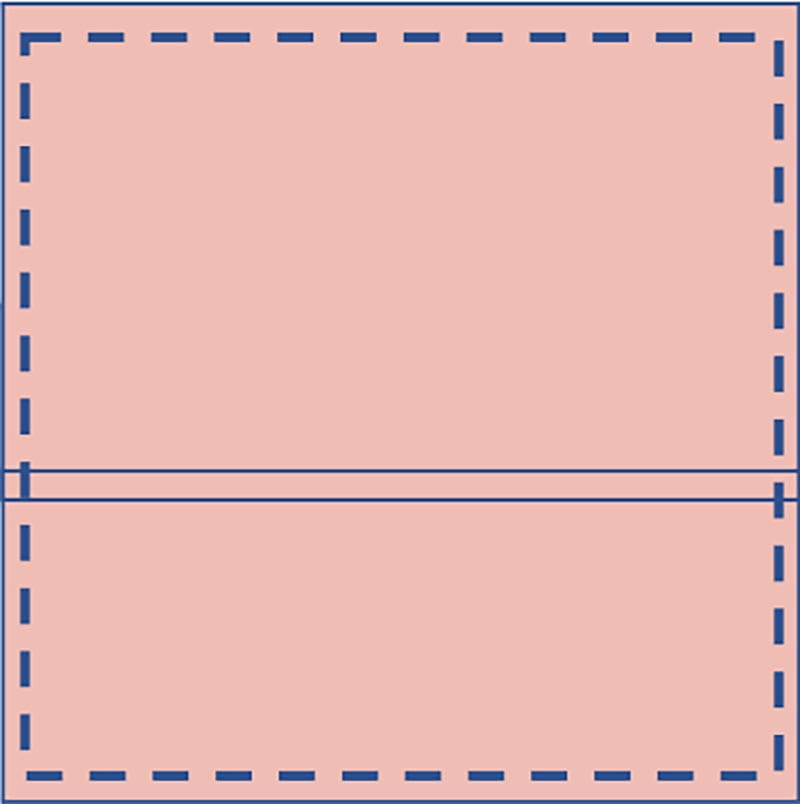
- 5. Cushion Assembly
- With lining sides together, lay 1 Cushion Back sandwich on top of Cushion Front Sandwich. Then, with lining sides together, lay the second Cushion Back Sandwich on top of the Cushion Top Sandwich and pin, as shown in the diagrams below. Ensure the Trims on the Cushion Back Sandwiches are positioned away from the outer edges of the cushion.
- Sew all the way around the outer edge with a ¼" seam allowance, backstitching at the beginning and end to create Cushion Cover.
The second Cushion Back Sandwich should lay partially on top of each other – this is intentional.
- Binding and Finishing
- Start with one approx. 2" x 94½" rectangle. Similar to step 4a, fold in half lengthwise and press to create one Binding Strip.
- Line up raw edges of Binding Strip with the Cushion Cover. Sew ¼" away from the raw edge.
- Fold binding over to the other side of the Cushion Cover. Machine or whipstitch binding to complete the Cushion Cover. For this tutorial, I have machine binded the binding on to the front of the Cushion Cover.
Trim any loose threads to complete the project.

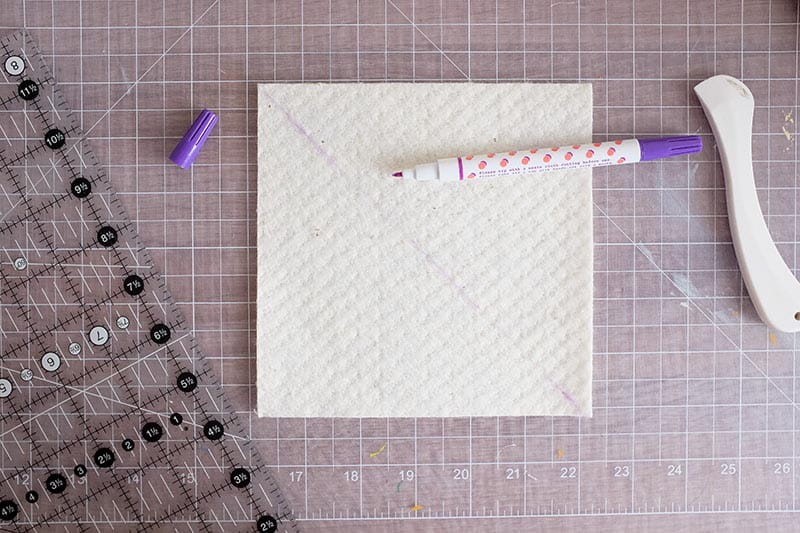
With a fabric pen or pencil, mark 45-degree-angle guideline approx. 1½" from the bottom left corner as shown in the photo below. Check that the marked guideline runs parallel to previously marked guideline. This marked guideline is used to ensure strips of fabric for the throw cushion cover are consistently sewn on parallel at 45-degrees.
Sew a 45-degree line, running parallel to and anywhere on the fabric strip to secure it to the batting square.
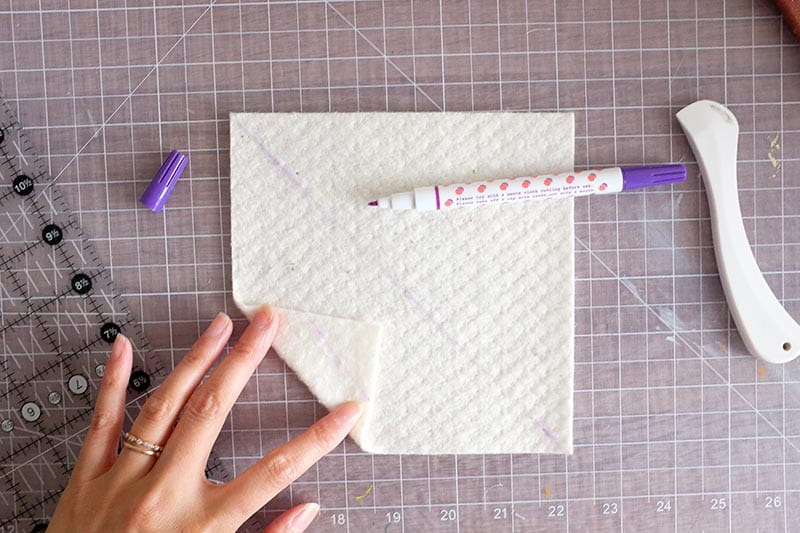
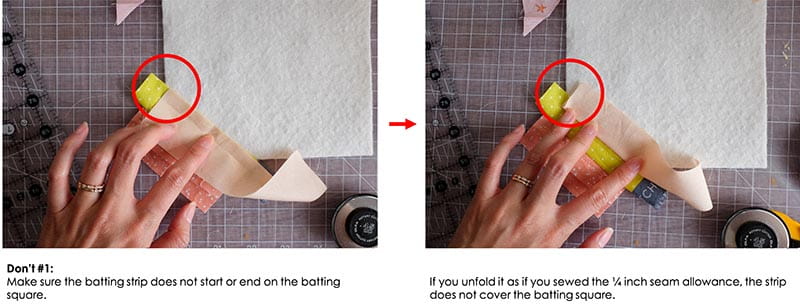
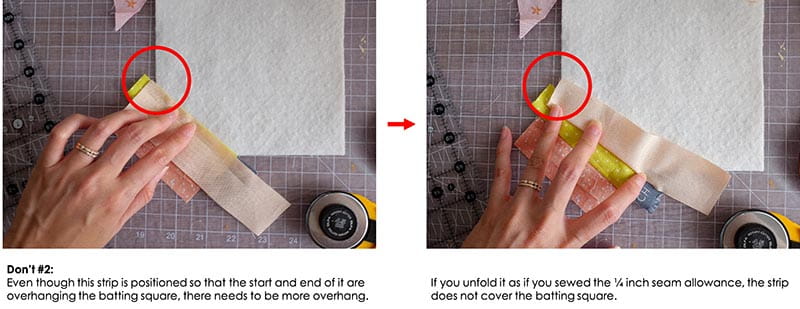
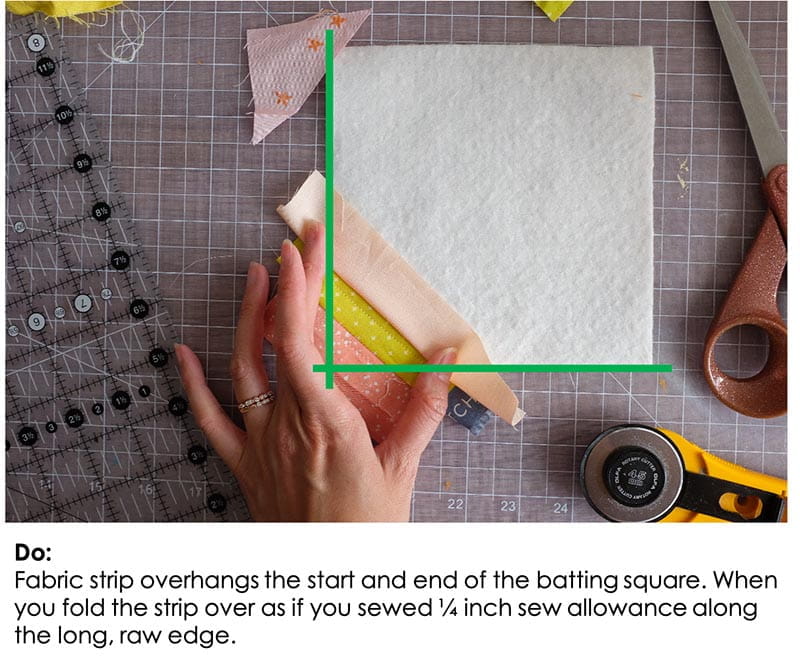
Tip: Take extra care when auditioning and sewing strips. Check that the fabric covers and overhangs the batting square when you fold the fabric over before sewing it into place. You may need to reposition the strip or cut another scrap fabric strip to cover the batting with some overhang. See below examples of what not to do and what to do.
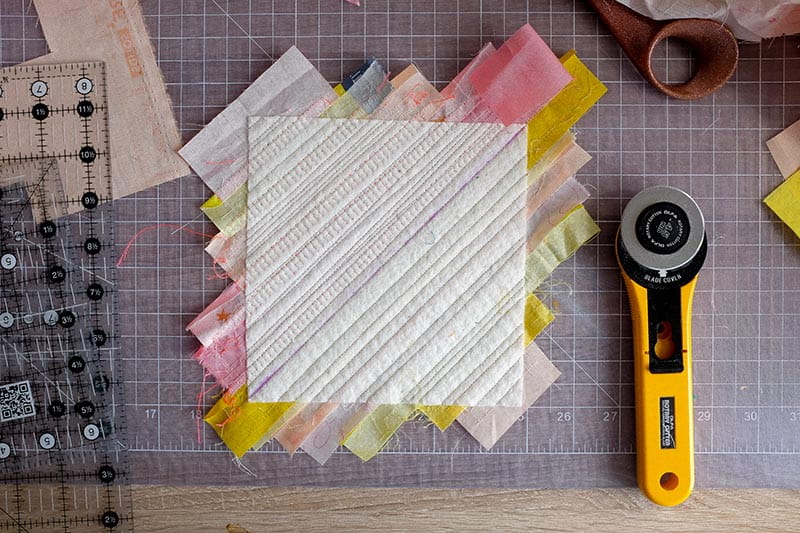
Repeat this step until the batting square is covered with fabric scrap strips to create one Scrap Block.
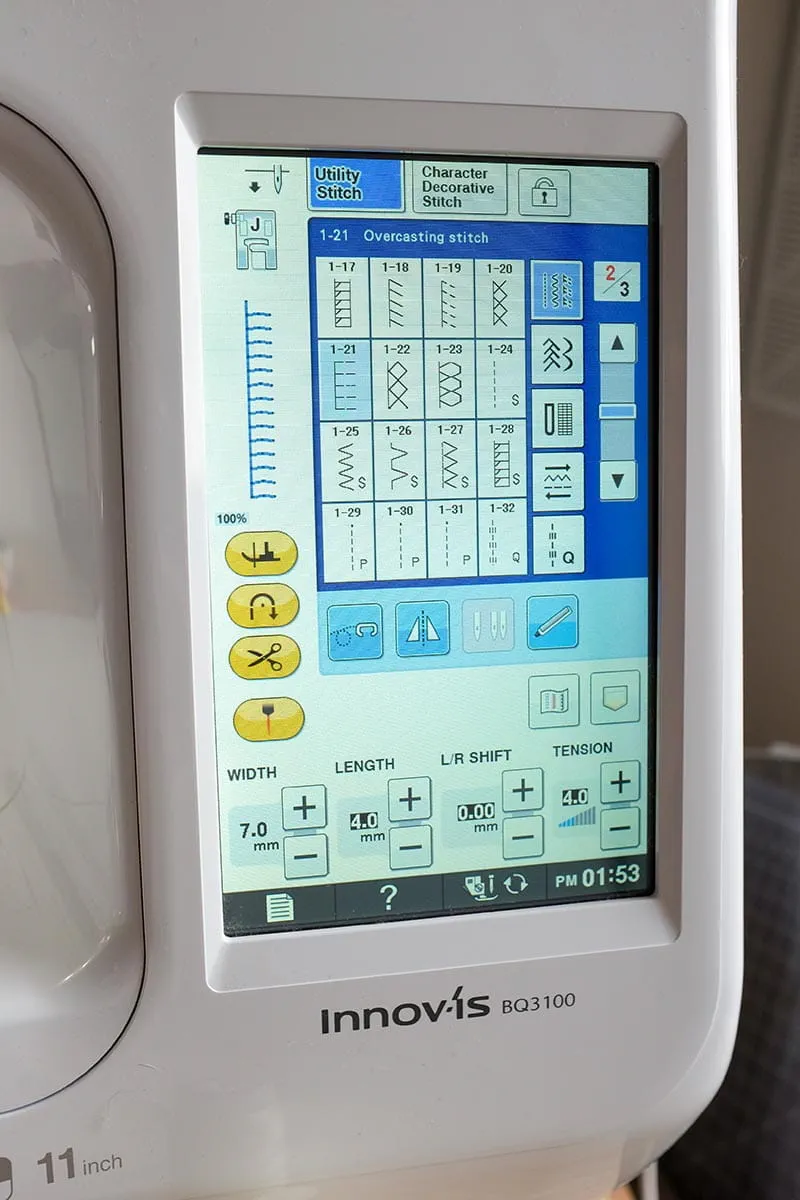
Here, I have used the overcasting stitch (#1-21) set at 7.0 width and 4.0 length. You have the creative freedom here to use whatever decorative stitch or colour thread.
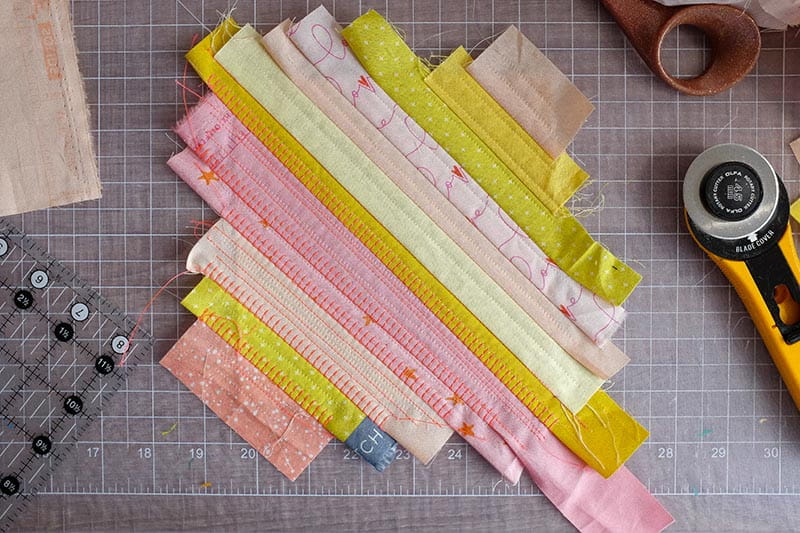
If you do choose to add additional decorative or just straight line quilting stitches, be sure to start sewing before the edge of the scrap quilt batting square top to end, approximately ½" to 1½" away from the batting square on the back. This is going to ensure the decorative stitch doesn’t start part way of a block when they’re trimmed down to size.
Repeat this step for all sixteen Scrap Blocks.
Repeat this step for all sixteen Scrap Blocks.
Each cushion sandwich consists of the following layers (in order from top to bottom):

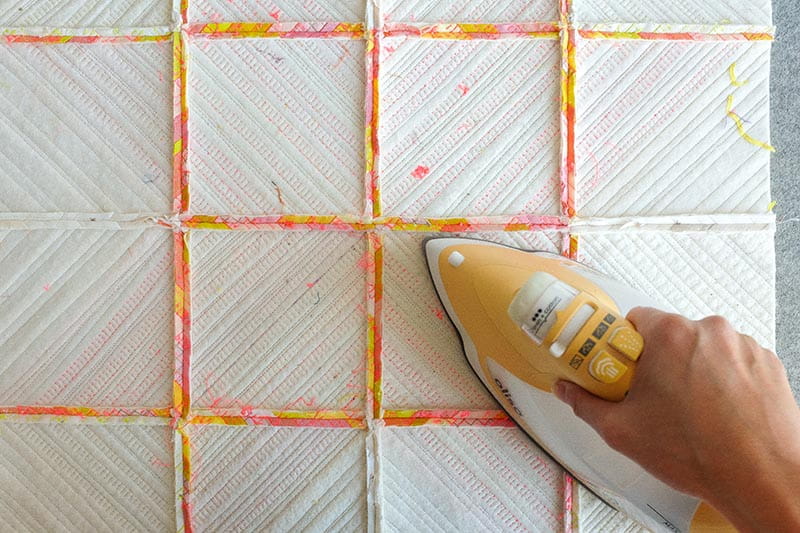
Baste: Attach the Brother Compact MuVit Digital Dual Feed Foot (or walking foot attachment) and quilt using your preferred method. With a Heramarker, I marked and sewed a 1½" grid on the Cushion Back Sandwiches, and on the Cushion Front Sandwich. I used the seams on the blocks as a guide and sewed ½" from some of the seams to hold the layers in place.
Related Projects
Stay Connected
* Required fields