Quiltbroidery Tips & Tricks, Part 1
~ Rebecca Kemp Brent, Brother Sews Ambassador
February is National Embroidery Month, and March celebrates quilting. What better way to enjoy them both than a bit of Quiltbroidery?
What is Quiltbroidery? Quiltbroidery lies at the intersection of quilting (including piecing and appliqué) and machine embroidery. It ranges from stitching machine-embroidery designs on patchwork to completing a bed-sized quilt with batting and backing, all using your embroidery machine. While some Quiltbroidery techniques are machine-specific, relying on the software and functionality of a particular machine model, others can be accomplished on any machine with basic embroidery capabilities…even in a 4" x 4" hoop. Since February is Embroidery Month, let's begin with embroidery quilting. Next month we'll revisit Quiltbroidery from the other perspective: quilting with an embroidery machine.
What supplies do I need for Quiltbroidery? The basic supplies are those used for machine embroidery: your machine
and embroidery hoops, needle and bobbin threads, and digitized designs. There are two categories of designs you can use for Quiltbroidery: decorative machine embroidery, including appliqué and other special techniques
 A
A
and quilting motifs, which are lines of stitching used to hold the quilt layers together.
 B
B
In addition to the basics, you may want to use special software available on your machine, such as the rectangular and hexagonal border and sashing functions available on the Brother Luminaire 2 XP2
. You can also use computer software to create or convert designs for Quiltbroidery, both decorative motifs and quilting designs.
 C
C
What kinds of embroidery designs should I use? While quilting motifs should be simple outline-only patterns, like stippling and geometric motifs or those based on traditional quilting, the sky's the limit for decorative embroidery designs on quilts. Here are a few things you should consider as you choose motifs:
 D
D
How can I use embroidered motifs on a quilt top? The first thing most of us picture is simply placing an embroidery design at the center of a plain-fabric quilt block. Size your blocks to finish 1/2" – 1" larger on each side (cut 3/4" – 1 1/4" away from the embroidery to include the seam allowance); a smaller margin risks crowding the embroidery design, while a wider space lessens the impact of the embroidery. This kind of block is a great way to use test stitchouts; look for ways to combine various sizes and fabric types in a single quilt project. Another strategy is to piece a quilt top first and then embroider designs onto it. With patterns like Irish Chain, you may give yourself more space for an embroidered motif by piecing first; this 5" x 7" embroidery fits nicely, even though the base blocks are just 6" tall.
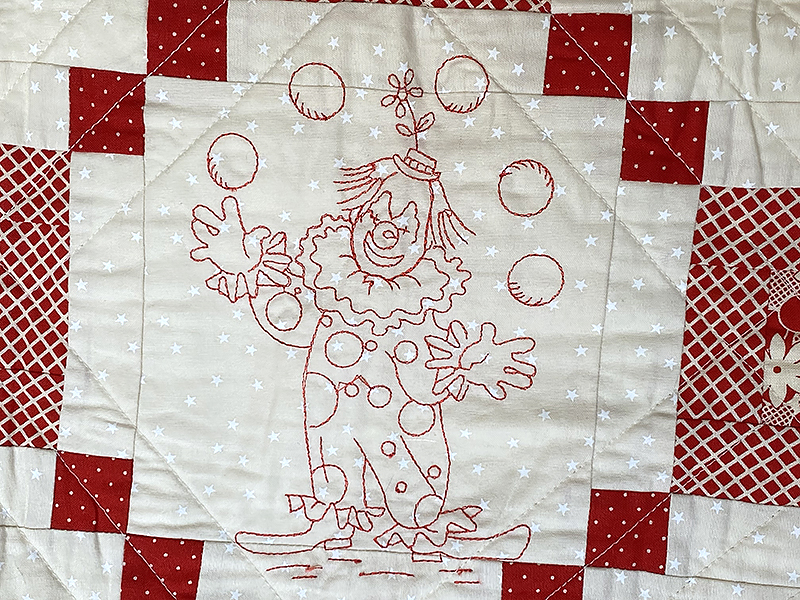 E
E
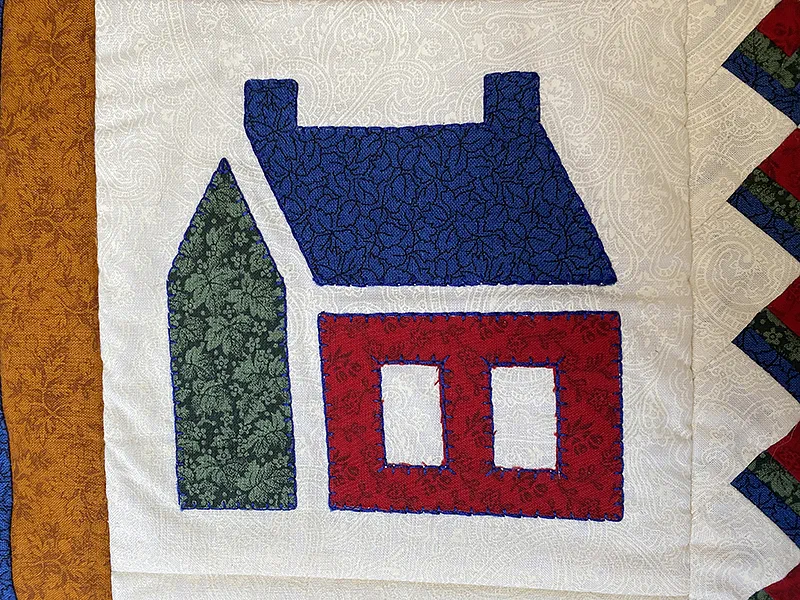
Alternatively, you can match the shape of a smaller embroidery motif to a fabric patch; for example, stitching a corner motif on a triangular fabric patch. Embroidery can even mimic piecing for seamless blocks.
 F
F
Then there are the designs that hold the quilt layers together. There are specially digitized designs for this purpose that dance around the motif in a continuous line or with very few jump stitches. Your machine may include some quilting motifs, especially if it has software designed for quilting borders; these produce long stretches of continuous pattern. You could also experiment with using only the outline of a traditional embroidery design as a quilting motif, especially if you can convert a satin-stitch outline to a single running stitch in PE Design
or other software.
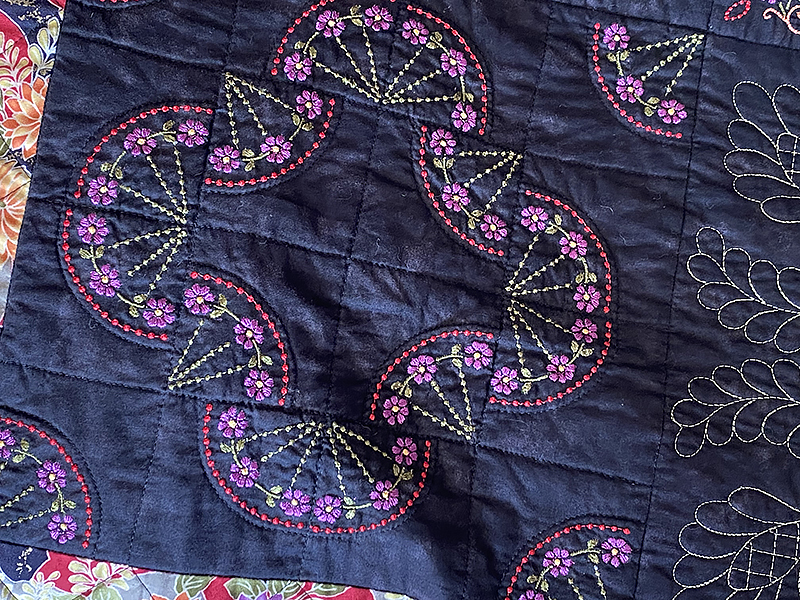
Examine your quilting-motif embroidery designs to discover how they stitch. Some employ a simple running stitch and will provide more texture than color or design in the finished project.
 G
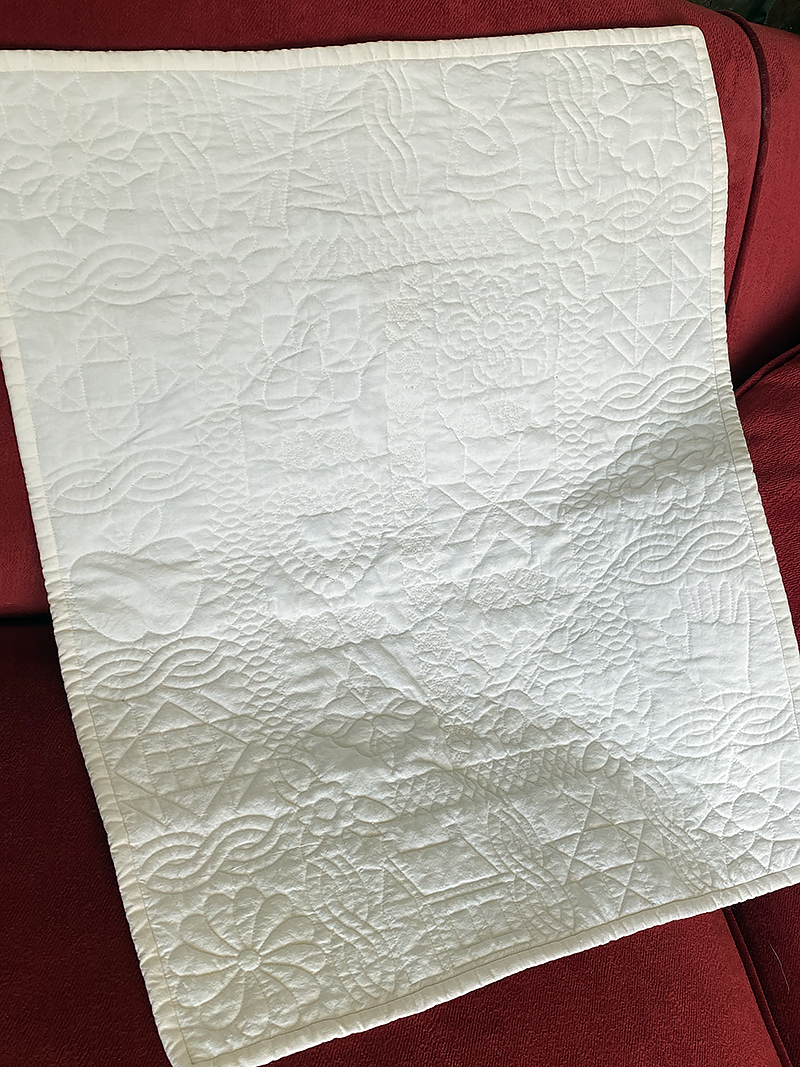
This 20" x 25" doll quilt was created with just a 4" x 4" embroidery hoop!
G
This 20" x 25" doll quilt was created with just a 4" x 4" embroidery hoop!
Others use a bean stitch or triple stitch, meaning the thread passes over each embroidery stitch multiple times.
These bean stitch designs lay a lot of thread on the quilt surface; consider using a finer thread or incorporate the shape and color of the quilt stitches into your design vision.
 H
H
With either type of quilting design, remember that the bobbin thread will be visible on the back of the quilt. You may want to use the same thread in the needle and bobbin for these designs, or choose a bobbin color that coordinates with or blends into the quilt backing. Next month, in celebration of all things quilty, we'll talk more about that last design category, and how you can use your Quiltbroidery skills to put a quilt together.
DESIGN CREDITS A and H: Brother embroidery card #22 B: Brother embroidery card #58 C: Brother embroidery card #45 E: Fill in the Blanks with Machine Embroidery by Rebecca Kemp Brent F: Designs by Petro, Quilt Blocks and Corners (4x4) by Ina Stoltz G: Brother embroidery card #18 H: Brother embroidery card #22
CLICK HERE FOR PDF!
February is National Embroidery Month, and March celebrates quilting. What better way to enjoy them both than a bit of Quiltbroidery?
What is Quiltbroidery? Quiltbroidery lies at the intersection of quilting (including piecing and appliqué) and machine embroidery. It ranges from stitching machine-embroidery designs on patchwork to completing a bed-sized quilt with batting and backing, all using your embroidery machine. While some Quiltbroidery techniques are machine-specific, relying on the software and functionality of a particular machine model, others can be accomplished on any machine with basic embroidery capabilities…even in a 4" x 4" hoop. Since February is Embroidery Month, let's begin with embroidery quilting. Next month we'll revisit Quiltbroidery from the other perspective: quilting with an embroidery machine.
What supplies do I need for Quiltbroidery? The basic supplies are those used for machine embroidery: your machine
and embroidery hoops, needle and bobbin threads, and digitized designs. There are two categories of designs you can use for Quiltbroidery: decorative machine embroidery, including appliqué and other special techniques
A
and quilting motifs, which are lines of stitching used to hold the quilt layers together.
B
In addition to the basics, you may want to use special software available on your machine, such as the rectangular and hexagonal border and sashing functions available on the Brother Luminaire 2 XP2
. You can also use computer software to create or convert designs for Quiltbroidery, both decorative motifs and quilting designs.
C
What kinds of embroidery designs should I use? While quilting motifs should be simple outline-only patterns, like stippling and geometric motifs or those based on traditional quilting, the sky's the limit for decorative embroidery designs on quilts. Here are a few things you should consider as you choose motifs:
- Large designs with solid areas of fill take longer to stitch. Multiply the time necessary for one motif by the number of embroideries on your quilt and consider the total investment of time.
- Appliquéd designs are as traditional as their pieced counterparts, and digitizing makes them so much faster, simpler, and more accurate. Whether you purchase appliquéd embroidery design files or create your own, remember that you can cut the pieces with your Brother ScanNCut
for the ultimate in speed and accuracy.
D
- Use your largest hoops for embroidery on quilt tops. 4" x 4" designs may look lost on a project as big as a queen-size quilt, although there are some embroidery tricks that help, such as grouping small designs or creating repeating borders. You'll also need more small designs to complete the project, so the time spent hooping grows as well.
- Remember how easy it is to mirror and repeat designs with machine functions. Two 5" x 7" hoopings will easily fill an 8" x 8" block with design, leaving a pleasing margin around the edge. Two 6" x 10" hoopings can fill a 12" block!
How can I use embroidered motifs on a quilt top? The first thing most of us picture is simply placing an embroidery design at the center of a plain-fabric quilt block. Size your blocks to finish 1/2" – 1" larger on each side (cut 3/4" – 1 1/4" away from the embroidery to include the seam allowance); a smaller margin risks crowding the embroidery design, while a wider space lessens the impact of the embroidery. This kind of block is a great way to use test stitchouts; look for ways to combine various sizes and fabric types in a single quilt project. Another strategy is to piece a quilt top first and then embroider designs onto it. With patterns like Irish Chain, you may give yourself more space for an embroidered motif by piecing first; this 5" x 7" embroidery fits nicely, even though the base blocks are just 6" tall.
E
Alternatively, you can match the shape of a smaller embroidery motif to a fabric patch; for example, stitching a corner motif on a triangular fabric patch. Embroidery can even mimic piecing for seamless blocks.
F
Then there are the designs that hold the quilt layers together. There are specially digitized designs for this purpose that dance around the motif in a continuous line or with very few jump stitches. Your machine may include some quilting motifs, especially if it has software designed for quilting borders; these produce long stretches of continuous pattern. You could also experiment with using only the outline of a traditional embroidery design as a quilting motif, especially if you can convert a satin-stitch outline to a single running stitch in PE Design
or other software.
Examine your quilting-motif embroidery designs to discover how they stitch. Some employ a simple running stitch and will provide more texture than color or design in the finished project.
G
This 20" x 25" doll quilt was created with just a 4" x 4" embroidery hoop!
Others use a bean stitch or triple stitch, meaning the thread passes over each embroidery stitch multiple times.
These bean stitch designs lay a lot of thread on the quilt surface; consider using a finer thread or incorporate the shape and color of the quilt stitches into your design vision.
H
With either type of quilting design, remember that the bobbin thread will be visible on the back of the quilt. You may want to use the same thread in the needle and bobbin for these designs, or choose a bobbin color that coordinates with or blends into the quilt backing. Next month, in celebration of all things quilty, we'll talk more about that last design category, and how you can use your Quiltbroidery skills to put a quilt together.
DESIGN CREDITS A and H: Brother embroidery card #22 B: Brother embroidery card #58 C: Brother embroidery card #45 E: Fill in the Blanks with Machine Embroidery by Rebecca Kemp Brent F: Designs by Petro, Quilt Blocks and Corners (4x4) by Ina Stoltz G: Brother embroidery card #18 H: Brother embroidery card #22
CLICK HERE FOR PDF!
Tags
Shop this Project
Does this project inspire you? Well, Brother has you covered! The products in this inviting project are available for purchase so you can click, shop, and get to quilting!
Embroidery Machines
Related Projects
Stay Connected
* Required fields