Sewing machine needle 101: Beginners guide
Whether you're working on a high-fashion garment, a quilt, or a bedspread, you should always use a needle that matches the project's fabric and thickness.
The wrong needle type can break, snag, or tear your fabric or create stitches that pull or look sloppy.
Read on if you're a beginner sewist and unsure what needle to choose for each project or fabric.
Different types of sewing machine needles
Sewing machine needles are very specialized, though you can keep your choice simple and essential for many applications.
Fortunately, you don't have to worry about compatibility!
Sewing machine needles feature a standardized shank style, so they work in any sewing machine regardless of the brand or model.
- Universal needles: Most sewing machines come with a pack of universal needles in different sizes. These work well for a range of woven fabrics.
- Quilting needles: Designed for working with multiple layers of fabric, quilting needles usually have a reinforced shaft for durability.
- Ballpoint needles: Instead of a sharp tip for piercing fabric, ballpoint needles have a rounded tip that pushes fabric threads out of the way. These are most useful for knit fabrics.
- Stretch needles: These have a rounded tip plus a scarf on the back of the needle shaft. The scarf helps your machine's hook or shuttle get closer so you can avoid missed or skipped stitches.
- Denim needles: For heavy-duty woven fabrics like denim or canvas, a denim needle's sharp point and strong shank make a big difference. These needles help you avoid jams, broken needles, and bent needles.
- Leather needles: These specialized needles have a triangular or chisel-shaped tip to make clean holes in leather and suede.
- Embroidery needles: Designed for thicker embroidery thread, these needles have a larger eye than traditional needles. They also have a unique scarf style and the eye is closer to the needle’s point.
- Twin needles: Twin needles are often used for decorative stitching or sewing on knits without a serger, and you’ll attach them to a single shank. They require two spools of thread to create top stitches.
Sewing machine needle sizes explained
When you’re looking for the right needle for a material, pay attention to both the tip style and the size.
Needle sizes are listed as two separate numbers, like 75/11 or 80/12, often separated by a slash or dash.
The larger number is the European size, while the other number is the American size. In both sizing systems, the smaller the numbers, the lighter the fabric.
European needle sizes reflect measurements in millimeters. An 80-size needle has a diameter of .80 millimeters.
American needle sizes have an assigned size scale that doesn’t directly correspond to a specific measurement.
How often should I change my sewing machine’s needle?
You want to change your machine needles regularly—not annually!
Bent, dull, or burred needles can cause skipped stitches, thread breaks, and tear or pull your fabric.
Taking care of your machine is easier than you may think, including changing your needle regularly.
It's also important to use the correct needle for your sewing project, as it can make a big difference in the end results.
How to change your sewing machine’s needle
Not sure how to change the needle in your sewing machine? We've got you covered!
Give yourself room to work
Lower the presser foot or remove the snap-on presser foot attachment to get it out of the way.
Rotate the machine wheel to raise the needle to its highest position. Some machines have a needle position button.
Loosen the needle clamp screw
Use a short, flathead screwdriver (or the accessory that came with your sewing machine) to turn the needle clamp screw toward the front of the machine.
Swap needles
Remove the old needle by pulling it straight down. Insert the new needle into the needle clamp groove.
Ensure the flat side of the needle's shank faces the back and the round side faces the front. Keep guiding the needle upwards until it's fully seated in the clamp.
Tighten the needle clamp screw
Holding the needle in place with your left hand, tighten the needle clamp screw with your right hand.
To tighten, turn the screw toward the back of the machine.
What are the benefits of a sewing machine’s needle functions?
Let's take a quick look at why it's worth knowing how to use the needle up/down, speed control, and reverse buttons on your sewing machine.
Needle up/down:
- Useful when pivoting corners
- Helps as a third hand when needing to stop and add pins
Speed control:
- Helps you have more control when sewing curves
Reverse:
- Reinforce seams at the beginning and end of a row of stitching
You can watch the video below to learn more. It provides a demonstration on the Brother Sewing Machine CE8100.
What is the best needle for faux leather?
Use the #14 denim jean needle in your sewing machine when sewing faux leather.
Denim needles are very sharp, which helps them to create clean holes in faux leather without tearing the material.
How to install and use a twin needle
Follow along as designer and sewing consultant Angela Wolf discusses how to create a professional-looking hem with a twin-needle topstitch—even if you don't have a cover stitch machine.
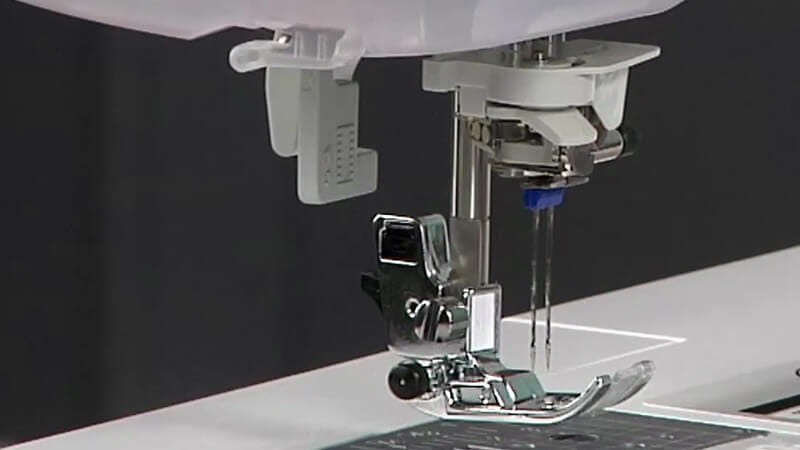
In this video, Angela will cover:
- How to install the twin needle
- What settings, if any, to adjust on your machine
- Which presser foot to use
- Which needle plate to use
Plus, learn how to thread your machine once the twin needle is attached and start using the twin needle that comes with your Brother sewing machine.
How to use a twin needle to sew decorative stitches
Sewing with a twin needle, two complimentary colors of embroidery thread, and a few common decorative stitches is an easy way to embellish so many sewing projects.
When my husband saw my stitch sample, he envisioned it as a placemat, which would actually be a terrific way to make use of a twin needle stitchery sampler!
All of the stitches are part of the utility stitch menu, but I think you’ll agree they’re quite decorative!
Threading for a twin needle varies with different machines, so consult your machine manual for detailed threading instructions.
Keep in mind that you cannot and should not use the automatic needle threader or the auto cut feature on your machine.
Always thread the needles manually and use scissors to cut threads when using any twin needle.
I used the twin needle included with many Brother machines to sew all the stitches displayed here. Figure #1 shows the needle and the package.
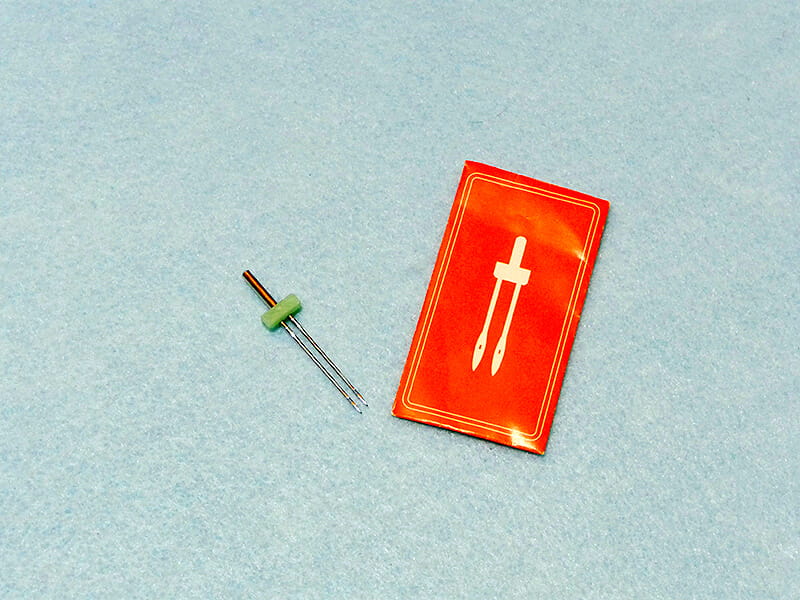
The part code for a replacement needle is X57521-021. This size needle is 2.0/75. The 2.0 means there are 2 millimeters between the needle tips and the 75 indicates a size 11 needle.
To solve what may be a mystery to you, 75 is the European system number and 11 is the American system number. This size needle is suitable for light to medium weight fabrics.
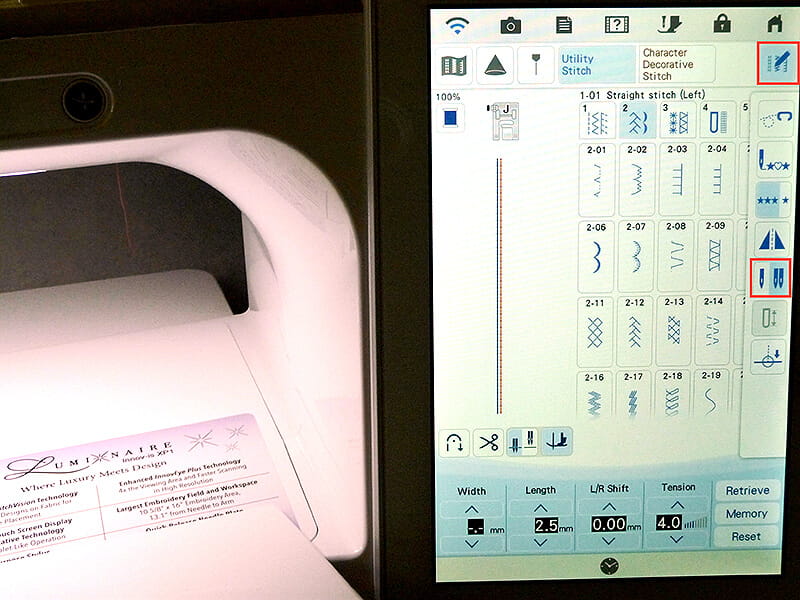
If you have a machine with a twin needle key, the machine expects you to use this needle size.
Selecting this key lets the machine do the thinking for you, protecting you from selecting a stitch or stitch width that is inappropriate for the 2mm twin needle.
Take a look at your sewing machine to see if this is an option.
If your machine does not include this feature, use the hand wheel to walk through each stitch before sewing.
If your needle comes too close to the edge of the throat plate, stop and try a narrower stitch width or choose another stitch.
Note that it’s best to select stitches that are open and not too dense. Figure #2 shows this key activated on the Brother Luminaire.
To make this little sample, I started with a medium weight cotton fabric backed with fusible stabilizer.
I selected menu #2, and then menu #3 and stitched out most all of the allowable stitches in a row.
I had to squeeze in one extra motif along the first edge, but otherwise they are in order. See Figure #3.
This makes it easy for me to reference my favorites so I can use them again without testing.
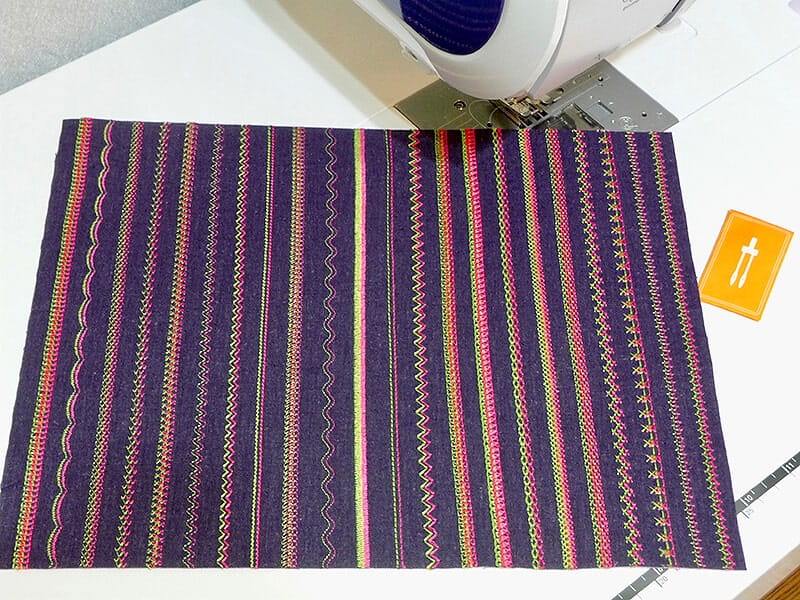
I hope this sample inspires you to pull out that twin needle, thread up your machine, and make a pretty sampler.
Even if you don’t make anything with the piece, I think you’ll have fun playing with your sewing machine. Enjoy!
How to finish knits with a twin needle
When sewing with knit fabric, you can create a professional hem by using a twin needle in your sewing machine.
The result will look just like a professional coverstitch hem!
For the most professional look, use a twin needle with a narrow distance between needles.
This helps reduce the bubbled look or tunneling effect that can occur with more widely spaced needles.
You may need to adjust your thread and bobbin tensions to get the perfect stitches for your material.
How to use the 2mm twin needle
Many Brother machines have a 2mm twin needle (part code XE4963-001), included with the standard accessories, and each needle is a size 75/11.
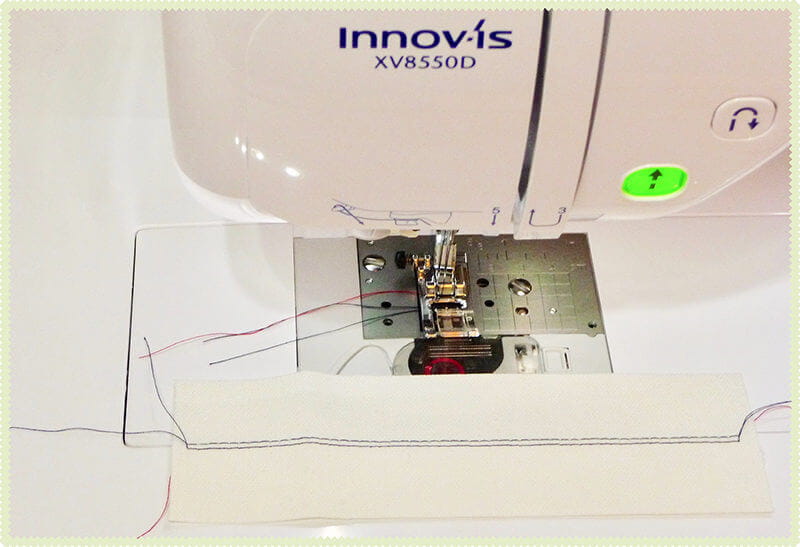
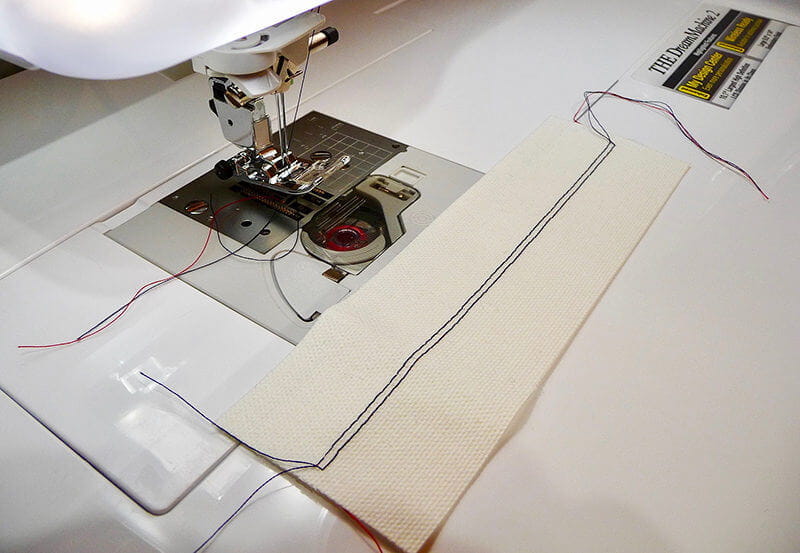
With two needles attached to one shank, you can use this needle for topstitching—and for select decorative stitches too!
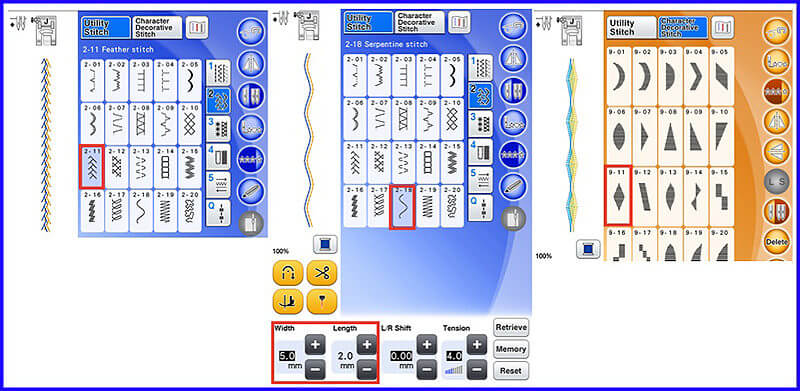
Take a look at the photos below, showing a straight stitch along with a sampling of decorative stitches sewn with the 2mm twin needle. See Figure #1, #2, and #3.
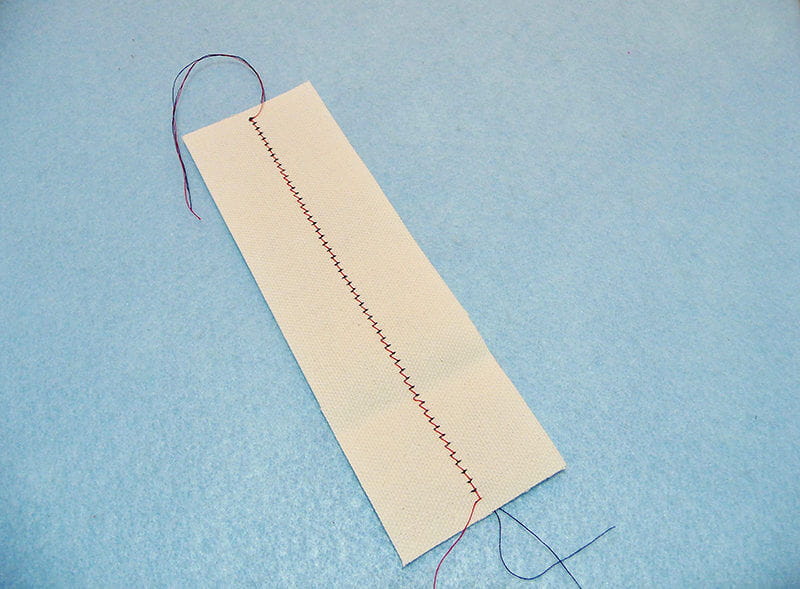
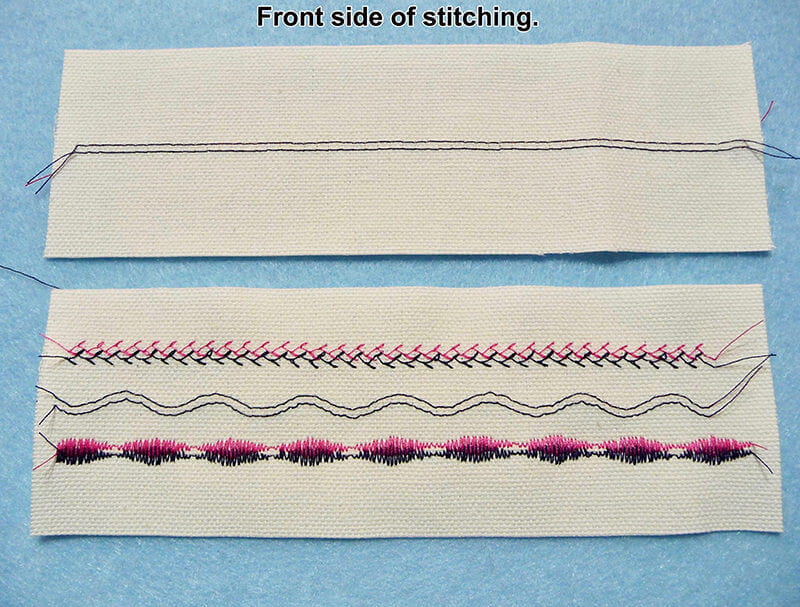
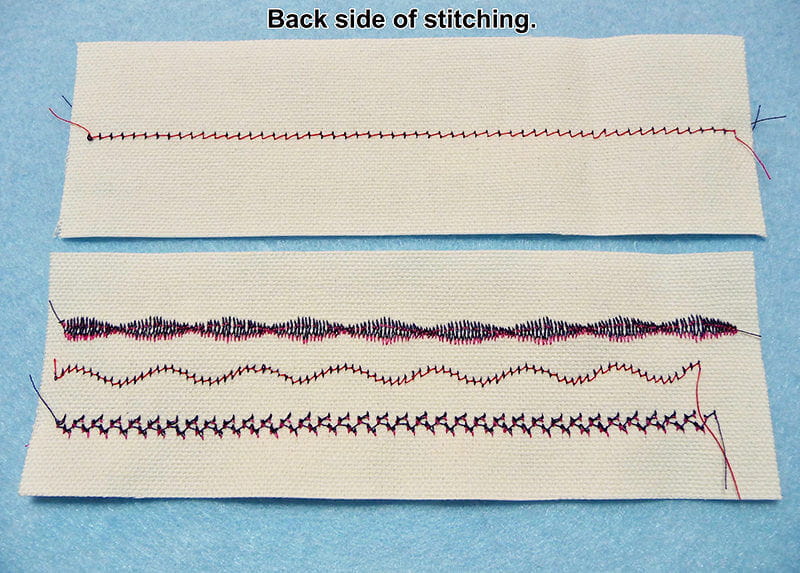
Before you begin, study your manual for the specific threading method required for your machine.
You’ll need a designated spot to hold the secondary spool of thread and it’s important to follow instructions that apply to your personal Brother machine.
Next, check to see if your machine has a button to press for twin needle mode.
If you have this option, you’ll want to touch this icon before you select a stitch.
Once you activate the key, your machine will protect you from using an unsuitable stitch, or from setting a stitch width that is too wide for use with the twin needle.
Your machine will also recommend the proper presser foot.
Remember that these settings are specifically for a 2mm twin needle. See Figure #1a.
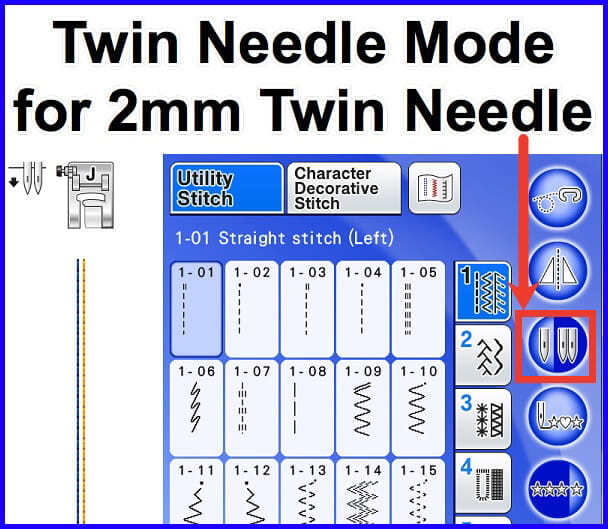
For machines without this option, or for twin needles with larger spacing, manually check the width by turning the handwheel to make sure the needle clears the throat plate on both right and left sides.
If the setting is not correct for the needle or stitch you have selected, you run the risk of needle breakage.
When selecting a straight stitch without twin needle mode, always begin with the needle position set for center.
Some quick twin needle tips!
Here are a few more tips when sewing with the twin needle:
- Thread the machine using the same type of thread for both spools. Make sure the thread is standard weight, strong, and of good quality.
- Use a slow to medium sewing speed for best results.
- Notice that the bobbin thread “shares” the two needle threads and forms a slight zig zag across the fabric.
- In many cases, particularly when top-stitching, it’s best to use the standard A foot. For some decorative stitches, the N foot is appropriate, or a similar accessory foot.
Build up your needle collection for limitless sewing
While many beginner sewers stick to basic woven fabrics and use the pack of universal needles that come with their sewing machines, expanding your needle collection ensures you’re ready for any project.
Consider stocking up on other commonly used sewing needles like ballpoint needles, stretch needles, twin needles, and embroidery needles in a few different sizes.
With a larger collection of needles, you can adapt more easily to new fabrics and sewing projects without dropping everything to run to the sewing supply store.
Remember, certain needles and sewing materials work best with specific types of sewing thread, so familiarize yourself with thread varieties, too.


