DIY Sun-Protective Bucket Hats: Fashion Meets Function

Summer's here, and it's our favorite time for family adventures to the beach, parks, and more. We're making cherished memories with fun basketball games, lazy fishing days, delicious picnics, and camping activities to fill our schedule; plus, we have a trip to Orlando. With all this outdoor fun, sun protection is crucial. We rely on sunscreen and stylish hats that provide shade and block the sun's rays. These hats are a key part of our summer wardrobe, keeping us trendy and protected. Let's talk about the best options for you and your family!
If your kids are under 10, they may not care about style, but older kids often want to express themselves with fashion. Right now, bucket hats are trendy again for teenagers and young adults. They match well with outfits and provide sun protection. Let's make a custom bucket hat—remember, less is more to stay on trend.
Bucket hats, known as Boonie or Fisherman Hats, are perfect for summer, offering style and sun protection. I'll show you how to embroider one using the Brother Stellaire Innovis XJ1. The Brother SE625 is also suitable with a 5x7 hoop. This project is easy and fun, letting you personalize your hat. Once done, you'll have a unique hat ready for the beach, combining protection with style.
SUPPLIES
- Brother Stellaire Innov-is XJ1
- Brother Stellaire Innov-is XJ1 Embroidery Base
- 5x7 Embroidery Hoop
- Embroidery Sewing Foot
- Embroidery Needles
- Embroidery Thread
- 2 Full Bobbins
- Bucket Hat
- Canvas Scrap fabric (minimum 5” x 5”)
- Tear Away Stabilizer
- Temporary Fabric Spray Adhesive
- Pencil
- Fabric Marking Tool
- Ruler/ Tape Measure
- Applique Scissors
- Fabric Clamps (optional- They should be large enough to fit around the embroidery hoop)
- Masking tape optional
INSTRUCTIONS
First, let’s choose an embroidery design. Here are some tips when looking:
- Make sure that the design file is no larger than 2” in height and 3” in width.
- Try not to choose any design that requires more than 3 colors.
- Visit ibroidery.com for a lot of fun embroidery design ideas.
1. Measure and cut a piece of tear-away stabilizer, making sure that it is at least 1 inch larger than the hoop on all sides.
2. Take the stabilizer that you’ve previously cut and hoop it into your 5x7 embroidery hoop.

3. With your pencil, draw a vertical and horizontal line down the center and mark the center of the stabilizer.

4. Use the markings on the hoop, to draw vertical and horizontal center lines on the stabilizer to mark the center of the embroidery area.

5. Spray the stabilizer with a temporary spray adhesive and allow it to dry until it gets tacky. This should only take a few seconds.

6. Determine the placement for your embroidery on your hat. Then, draw vertical and horizontal lines to mark the center of the design area on the fabric.

7. Adhere the hat to the center of your stabilizer, making sure that the marked lines and centers align perfectly. Smooth out the fabric to ensure that no folds are in the way of the embroidery. Pull the excess fabric out of the way and hold it in place with masking tape and fabric clamps. Set aside.

8. With your Brother Stellaire Innovis XJ1 embroidery machine turned Off, attach the embroidery unit to the machine. Power the machine on and proceed to load your selected design.


9. Attach the embroidery hoop to the machine, lower the foot, and press the green button. The machine should automatically start sewing.

10. When the machine signifies you to change the thread color, do so without interrupting the hoop.

11. Once your embroidery is complete, your machine will let you know. Carefully pull the hoop out of your machine.

12. Pull the hat off of the tear-away stabilizer.

13. Cut away any loose threads.

That's it!
IMPORTANT NOTE: Practicing on scrap fabric before starting on your bucket hat is crucial. It helps perfect technique, ensures proper design placement, and catches issues like thread tension and color choices early. This step lets you try different threads and designs without pressure, refining skills and saving materials. Ultimately, a successful practice run leads to stylish, functional sun-protective gear.

Are you excited about this bucket hat project? Take your style to the next level by pairing your fashionable bucket hat with a fun Beach Towel Tote Bag for all your beach days! Plus, why not whip up some stylish Reusable Snack Bags for picnics, road trips, or playground adventures? Get the complete look and enjoy your outings in style!
FAQs
Q: Are bucket hats still in style in 2025?
A: Bucket hats continue to be a fashionable and functional accessory in 2025. Their enduring popularity is attributed to their versatility, bold designs, and the resurgence of 1990s fashion trends.
Q: What are some other names for bucket hats?
A: Bucket hats are sometimes referred to by different names depending on the style or region. Here are a few variations of hats with similar shapes: fishing hat, boonie hat, safari hat, and sun hat.
Q: What fabric is good to make a bucket hat?
A: When choosing a fabric for your bucket hat, consider the season, the look you're going for, and the durability you need. Lighter materials like cotton, linen, or nylon are great for casual summer outings, while thicker fabrics like wool, corduroy, or tweed work better for colder weather.
Q: What color does not attract the sun?
A: Light colors like white, beige, and pastel tones reflect sunlight, making them cooler to wear in hot, sunny conditions.
Tags
Shop this Project
No sewing or embroidery machine? No problem! Any products mentioned in this project are available to buy here so you can stay stitching.
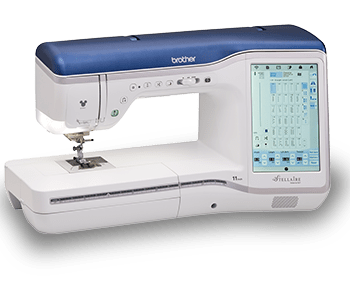
Brother Sewing and Embroidery Machines
- My Design Snap Mobile app for Background, Line Art and Illustration Scan.
- Large 9.5” x 14” embroidery area
- 11.25” needle to arm and 5” height from sewing bed to top of machine arm
Related Projects
Stay Connected
* Required fields
Follow Us
- Product Support
- Product Support Assistant
- Terms of Sale
- Product-Registration
- Search Supplies/Accessories
- Ordering & Shipping Information
- Ordering & Account FAQs
- View Order Status
- Warranty & Extended Warranty Information
- Recall Information
- Return Policy
- Security Support Information(Opens in a new tab)
- Contact Brother
