Welcome to Week 1 of Spring Serenade quilt along!

Time to Complete:
Gathering fabric: Varies
Cutting fabric: 1.5 to 2 hours
Skill Level: Beginner
Project Summary:
Hello! I’m Wendy from The Weekend Quilter, and I’m thrilled to welcome you to the first week of the Spring Serenade Quilt Along (QAL)! This week, we’ll kick things off by gathering fabrics and cutting into them. If you’re following along with the Spring Serenade quilt pattern, focus on pages 3, 4, and 18. Don’t have the pattern yet? No worries — it’s available as a FREE download here.(Opens in a new tab)
In this blog post, I’ll share practical tips for safe and precise rotary cutting, including guidance on blade maintenance and must-have tools to make the process smoother and more efficient. Every Monday throughout the QAL (starting March 3, 2025), a new blog post will guide you through the weekly tasks. While some tips are tailored to the Spring Serenade quilt pattern, the fundamentals can easily be applied to your future quilt projects!
To receive updates about the new blog posts as well as weekly QAL tasks, be sure to sign up for the weekly newsletter here.(Opens in a new tab) They will be sent via The Weekend Quilter and only for the 6 weeks of the QAL*.
For more information on what the QAL entails (schedule, tools and supplies, etc.), please check out the previous Spring Serenade QAL blog post here.
The QAL officially starts on March 3, 2025. You’re more than welcome to join at any point and work at your own pace. You could also follow the same schedule as outlined in the first blog post(Opens in a new tab) with all the QAL info at a later date.
We’ll be keeping all our weekly tips, tricks, and recommendations in one location for reference here, so you may want to bookmark this one.
*By signing up for the Spring Serenade QAL updates, you also agree to sign up to be on The Weekend Quilter and Brother International email newsletter list. We will not sell your email or spam you.
Supplies and Tools:

This week is all about the gathering and cutting fabrics. You’ll need the following items for this week’s task:
- Download the Spring Serenade quilt pattern for FREE from The Weekend Quilter’s website here
- Printer to print out fabric labels (optional)
- Printer paper (if you’re printing the fabric labels); paper or sticky labels (if you’re not printing the fabric labels)
- Pen or marker to write out labels (if you’re not printing the fabric labels)
- Iron and ironing board or wool pressing mat
- Fabric starch (optional)
- Rotary cutter
- Quilting rulers—preferably a long ruler (e.g., 6in x 24in) to cover longer cuts and a medium ruler at least 12in square and with a 45-degree angle guide to trim / square up the quilt blocks.
- Cutting mat
- Fabric scissors
- Paper scissors
- Fabrics, quilting cotton – Fabric requirements are based on 42in width of fabric:Quilt Top – The colors listed below refer to the digital mockup below:
- Fabric A (Summer sun): 1½ yards (138 cm)
- Fabric B (Coconut milk): 1½ yards (138 cm)
- Fabric C (Pampas): ⅜ yard (35 cm)
- Fabric D (Georgia pink): ¼ yard (23 cm)
- Fabric E (Tender green): ¼ yard (23 cm)
- Fabric F (Canary): ¼ yard (23 cm)
- Fabric G (Fields of lavender): ¼ yard (23 cm)
- Quilt Back: 4 yards (412 cm)
- Quilt Binding: ½ yard (46 cm)
- Measuring tape (optional)
- Fabric pen or pencil (optional)
- Spare rotary cutter blades (optional)
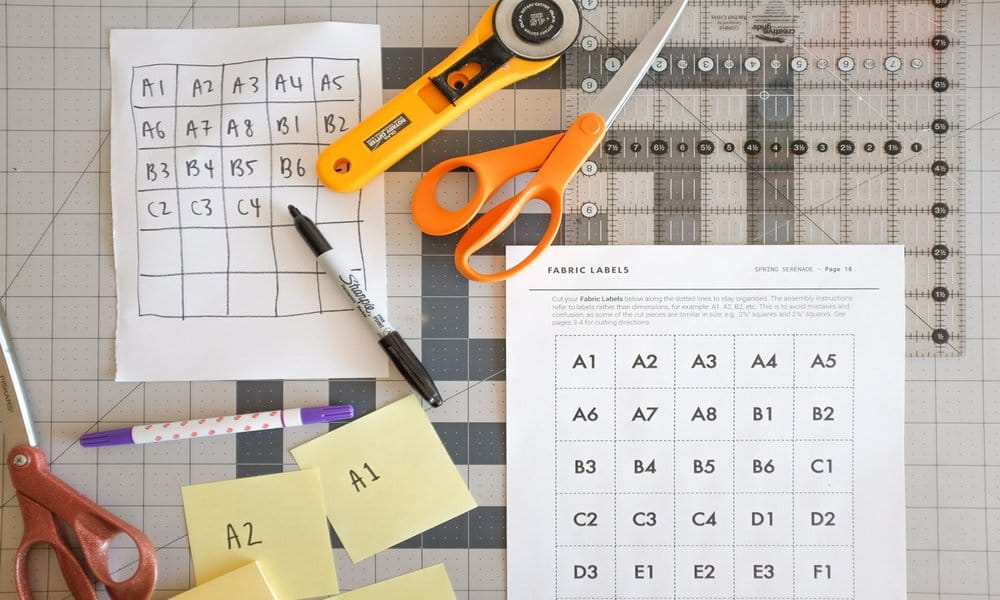
Fabric Labels
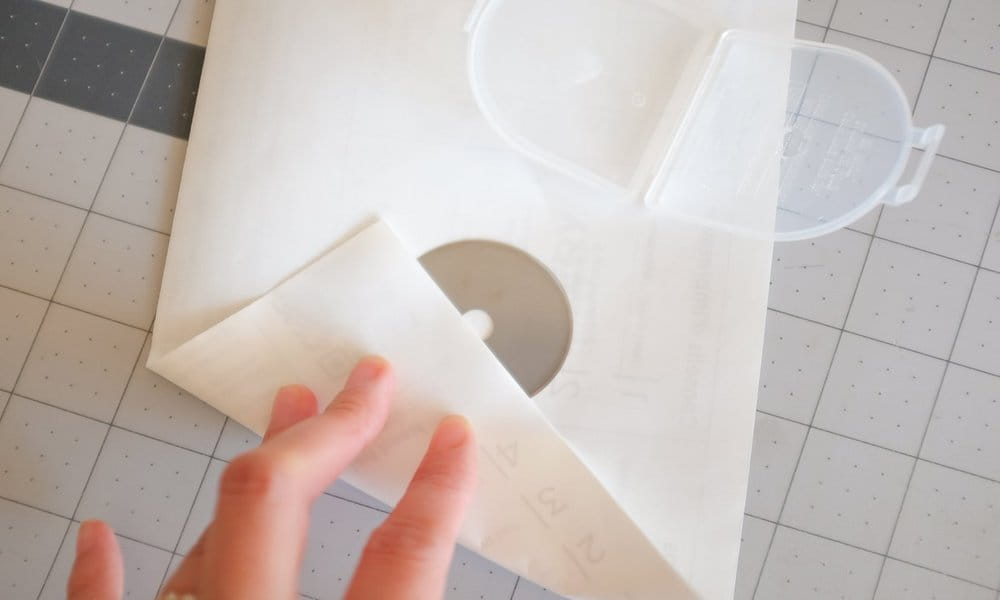
Before we jump into the nitty gritty stuff around prepping and cutting into fabrics, turn to page 18 of the Spring Serenade PDF quilt pattern. Then print the fabric labels and cut on the dotted lines. If you don’t have a printer, draw out a five-by-six grid on a piece of paper or on 30 sticky notes, write out the fabric labels outlined on page 18.
These fabric labels will help you stay organized throughout the quilt-making process, from cutting to assembling the quilt project. The assembly instructions in the quilt pattern refer to labels rather than dimensions of the cut fabric, for example: A1, A2, B3, etc. This is to avoid mistakes and confusion, as some of the cut pieces are similar in size, e.g., 2½" squares and 2⅞" squares.
When you’re done creating your labels set those aside for the meantime, and we’ll bring them back into the picture when we start cutting.
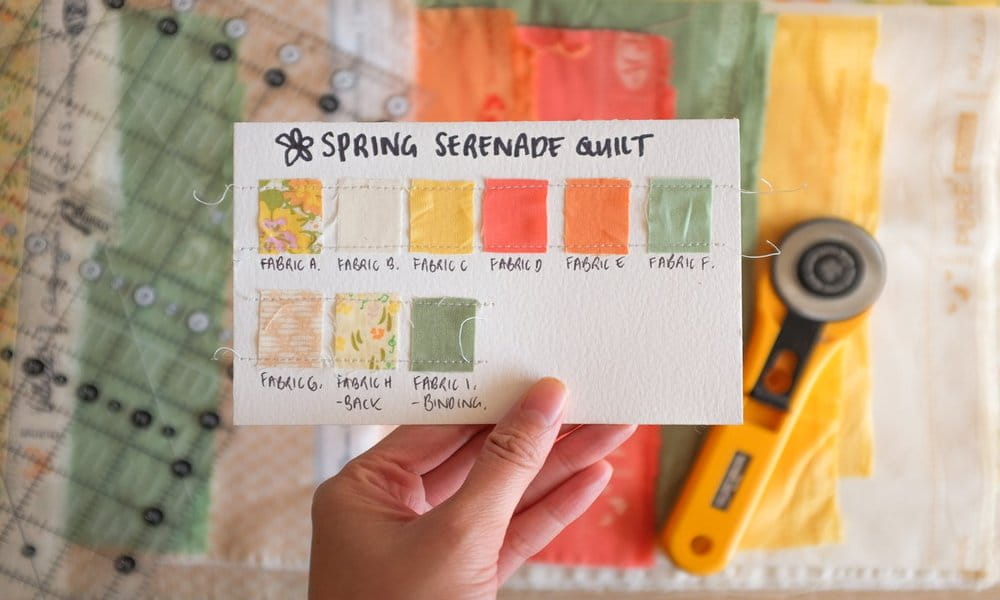
If you’d like to go the extra mile, you can also create a fabric key (or swatch) card. With this card, you glue, tape, or sew down little square or rectangle swatches of the fabric you’ll be using throughout the project. I like to use a heavier cardstock for my fabric key cards like watercolour paper, so it keeps shape as I’m moving it around in the sewing room. Then write down the corresponding fabric label, for example, Fabric A, Fabric B, etc., and refer to it whenever you are uncertain or don’t remember which fabric is which. Other information you could include on the card is the fabric’s name, colour, designer and / or manufacturer, and use it as a reference card if you need to purchase more of a certain fabric for a future project or save it as a keepsake. Now, let’s move on to the fabric prepping.
Practical Tips for Safe and Accurate Rotary Cutting
Rotary cutting is an essential skill in quilting, and mastering it ensures precise pieces that come together beautifully. Whether you’re a beginner or looking to refine your technique, here are some practical tips for safe and accurate rotary cutting, including advice on maintaining your blade and tools to make the process easier.
1. Choose the Right Rotary Cutter
Not all rotary cutters are created equal. Select a size that suits your project:
- 45mm rotary cutter: Ideal for most quilting tasks such as cutting squares and rectangles for a quilt top, squaring up, trimming seam allowances, and more. This is the gold standard size. If you’re going to invest in one rotary cutter, a 45mm is the one to go.
- 28mm rotary cutter: Great for smaller pieces or intricate cuts.
- 60mm rotary cutter: The larger blade is stable and efficient for straight, extended cuts, such as trimming fabric yardage or cutting sashing, borders, and backing pieces.

2. Use a Quality Cutting Mat
A self-healing cutting mat protects your surface and prolongs the life of your rotary blade. Use a mat large enough to accommodate your fabric pieces without constant repositioning. Keep it clean by wiping it down with a damp cloth and storing it flat, away from direct sunlight, to prevent warping.
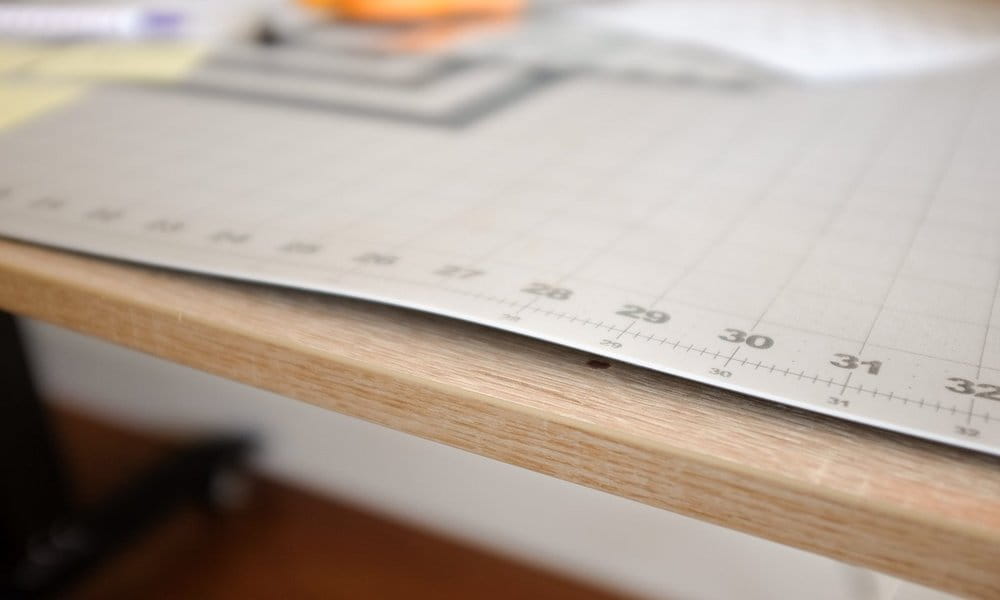
Over the past few years, the popularity of wool pressing mats has increased, and speaking from experience, don’t press seams on top of the cutting mat with the wool pressing mat. The residual heat will also cause the cutting mat to warp (as shown in the photo below).
3. Keep Your Blade Sharp
A dull blade leads to uneven cuts and requires more force, increasing the risk of injury. Replace blades regularly and keep a spare on hand. If you notice skipped threads or frayed fabric edges, it’s time for a new blade. Dispose of old blades safely by storing them in the packaging of your new blades, a dedicated blade disposal case, or carefully wrap the blade in some scrap paper and dispose.
4. Prioritize Safety
Rotary cutters are sharp tools, so safety is paramount:
- Always engage the blade guard when not in use.
- Always pay attention. Keep your fingers away from the blade when cutting.
- Cut standing up for better control and visibility.
- Store your rotary cutter out of reach of children when not in use.
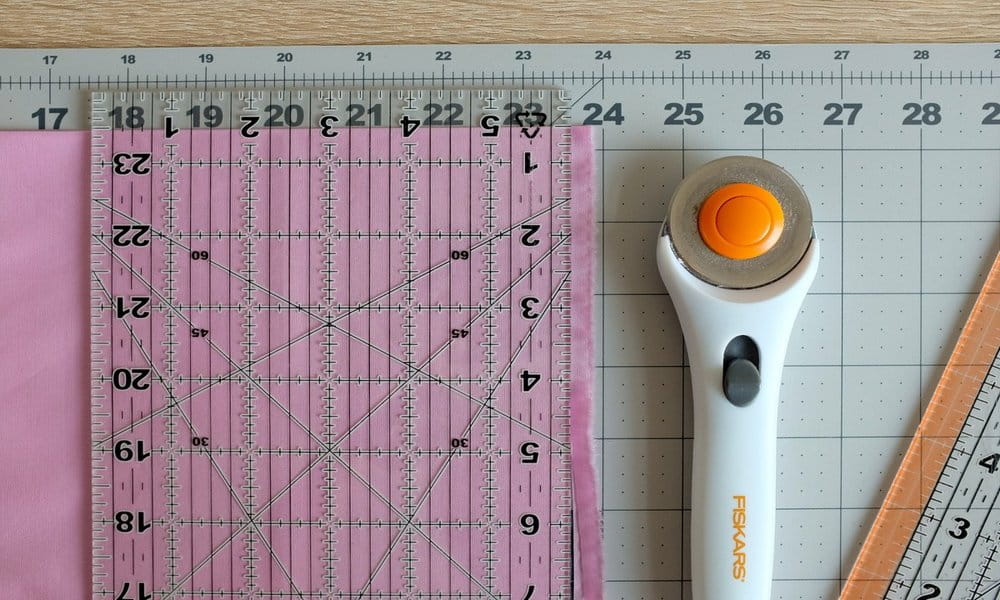
5. Invest in a Reliable Ruler
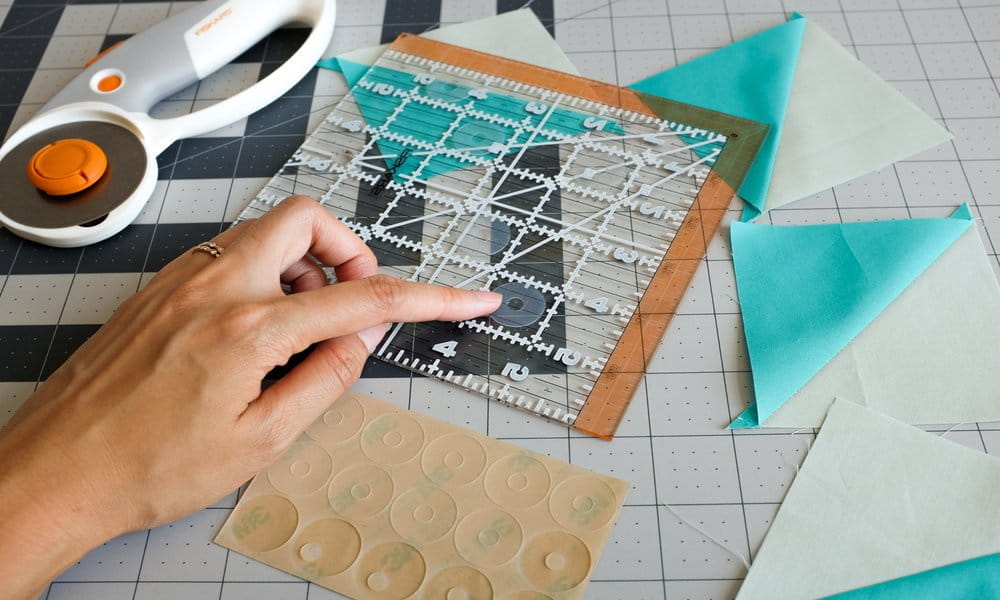
A sturdy acrylic ruler is key to achieving straight, accurate cuts. Look for rulers with clear, easy-to-read markings and non-slip grips. Consider adding non-slip adhesive strips or dots to prevent slipping (as shown in the photo below).
6. Master the Technique
For clean cuts every time:
- Remove any jagged or uneven edges before making any actual cuts for your project. To do this, use the long edge of the ruler to push out any air bubbles in the fabric. Then, line up a horizontal guide on the ruler with the folded edge of the fabric, and remove the jagged edge that is perpendicular to the fabric fold.
- Hold the ruler firmly with your non-dominant hand, applying even pressure.
- Cut away from your body with steady, even pressure, keeping the blade perpendicular to the fabric. Avoid sawing motions to ensure clean cuts.

7. Maintain Your Tools
Proper maintenance extends the life of your tools:
- Clean your cutting mat by gently scrubbing with a soft brush and mild soap.
- Check your rotary cutter regularly for loose screws or debris build-up
- Store tools in a dry, cool place to avoid damage.
Rotary cutting is a skill that gets easier with practice. By incorporating these tips, you’ll achieve accurate, clean cuts every time, setting the foundation for a beautifully pieced quilt. For more reading and tips on cutting fabrics, check out my guest blog post from last year’s QAL here. In this blog post I cover tips on how to prepare, read quilt patterns, and cut fabrics.
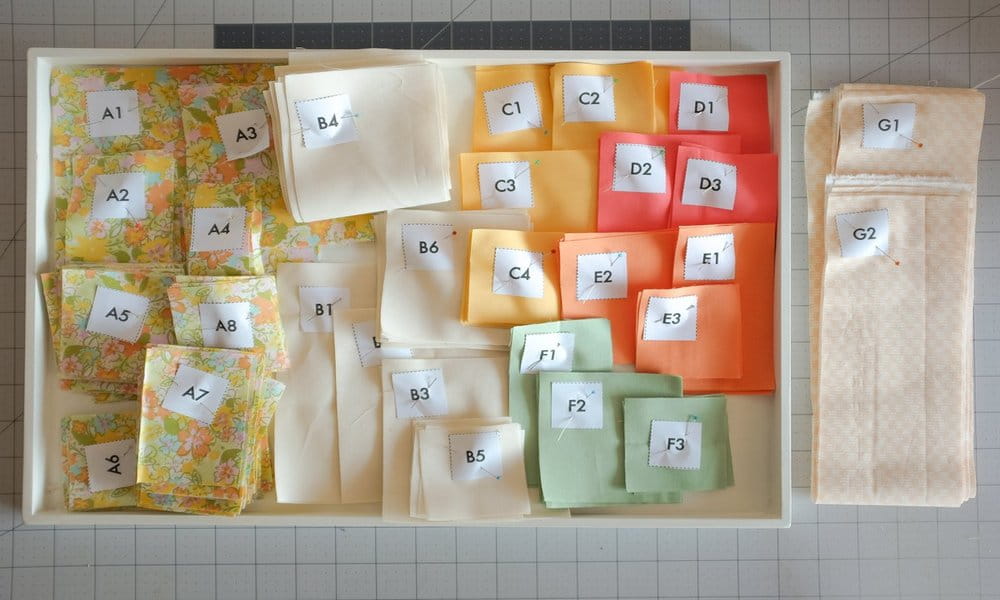
When you’re done cutting all your fabrics for the Spring Serenade quilt project, don’t forget to keep all the same fabric colours and cuts in the same piles, and use the fabric labels to stay organised and avoid confusion throughout the project.
Seeing your work brings us so much joy. Be sure to also share your works-in-progress on social media by tagging Wendy @The.WeekendQuilter and @BrotherSews and using the #SpringSerenadeQuilt #BrotherSews hashtags.
Till next time, happy sewing!
Related Projects
Stay Connected
* Required fields