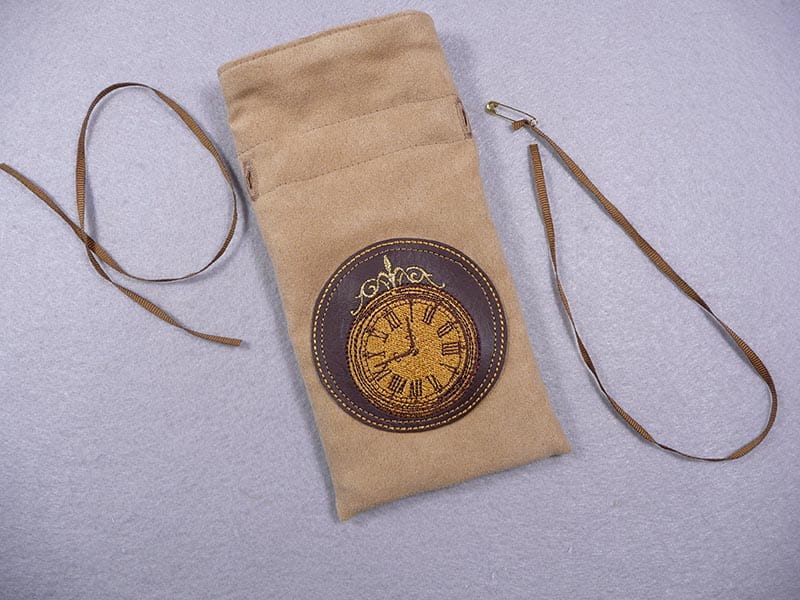
Free Design of the Month for May – Suede Pouch with Embroidered Patch!

Father’s Day is coming soon and it’s time to say thank you to Dad! If you’re giving Dad a small gift, you’ll find this classy pouch to be the perfect wrapping. Embroider a patch using the Brother Free Design of the Month and use it to decorate the front of this small pouch. An item like this is perfect for storing a watch, extra keys, or other small but important items that can be easily lost and need some protection. Make this self-lined pouch in a short bit of time and use it for additional gift giving occasions. It’s perfect for bridal or baby shower favors and always nice for giving gift cards too! Are you ready? Let’s go sew!
Finished size of pouch: 4 ½-inches wide X 7 ½-inches high.
Note: this embroidery design fits a 4-inch hoop. Use any Brother embroidery machine with 4-inch or larger hoop capability and any Brother sewing machine to complete the project.
Materials and Supplies for Pouch:
- Brother(Opens in a new tab) sewing and embroidery machine with 4-inch hoop capability.
- SA5815(Opens in a new tab) medium-weight adhesive backed tear-away stabilizer for embroidering patch. Option: In place of adhesive stabilizer, hoop cut away stabilizer and tape patch piece to stabilizer using low tack tape on the corners.
- Embroidery threads and size 11 embroidery needle for embroidering. I used the following threads: Brother MT998(Opens in a new tab) Gold metallic, Brother ETP328(Opens in a new tab) Brass Polyester, and Brother ETP058(Opens in a new tab) Dark Brown Polyester. Note: I prefer Non-Stick needles when embroidering with sticky back tear-away stabilizer. Standard embroidery needles may require cleaning with rubbing alcohol to remove build-up of adhesive during the stitching process.
- Size 12-14 sewing needle and sewing thread to match fabric for constructing the pouch.
- Basic sewing notions including a removable marker, small scissors for cutting vinyl, and a tool for pushing out points and corners. Note: A simple chopstick will do for this task if you have nothing else on hand.
- Buttonhole foot with ½-inch button for making buttonholes, plus a small piece of tear-away stabilizer to support buttonhole stitching.
Materials for Drawstring Pouch:
- Fabric for self-lined pouch: Cut one piece measuring 5-inches wide X 32-inches long. I used a dress weight suede cloth fabric, but cotton will work just as well.
- Material for patch: One piece of marine or home décor vinyl measuring 3 ½-inches square. Option: You can substitute felt or any other no fray fabric suitable for stitching for this patch piece.
- Two pieces of grosgrain ribbon or other narrow cording measuring 1/8-inch to ¼-inch wide X 18-inches long for drawstring closure.
- Brother Free Design of the month,(Opens in a new tab) See Figure #1 below.
Figure #1

Please read through all instructions before beginning this project. Basic steps are as follows:
- Create patch with clock face design.
- Sew buttonholes on pouch piece.
- Sew patch to pouch front.
- Sew seams for pouch.
- Add drawstrings for closure.
All Steps to Create Pouch:
- Create a combination design with the clock face design and a triple stitch circular frame pattern from the built-in frame shapes menu. Resize circular frame pattern to equal 3-inches. See Figure #2.
- Hoop adhesive backed stabilizer in 4-inch hoop. Score paper with a pin and remove paper covering to expose sticky side of stabilizer. Center patch piece in the hoop. Embroider design. When finished, remove piece from hoop, tear away excess stabilizer, and cut into a circle shape, trimming just outside the stitching line. See Figure #3a, Figure #3b, Figure #3c, and Figure #3d.
Figure #3a

Figure #3b

Figure #3c
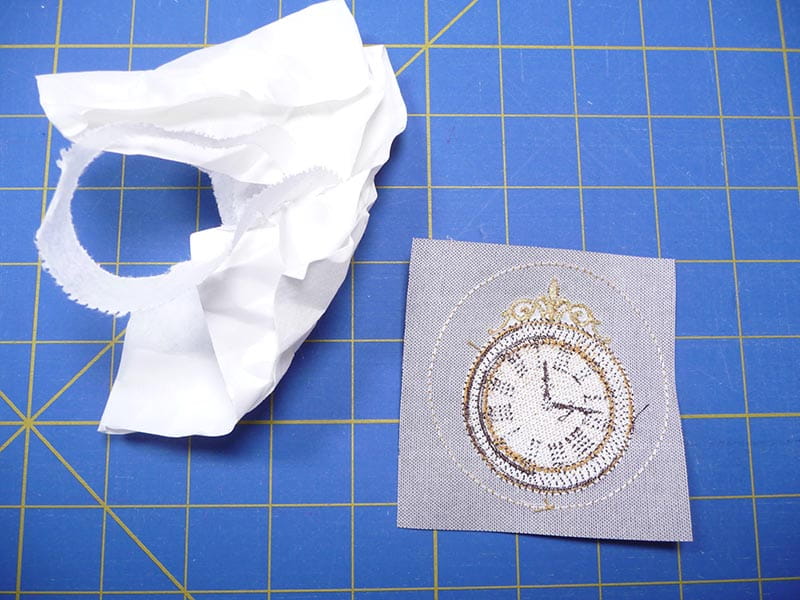
Figure #3d

- Gather supplies for completing pouch. Mark lines for making buttonholes, marking a line 2-inches from one short edge along with two lines ¼-inch from the sides. See Figure #4.
- Select piece cut for pouch. Place stabilizer under buttonhole area and make two buttonholes along each side seam, having each buttonhole start 2-inches from the short end, with the edge of the buttonhole foot along the side marking. Remove tear-away stabilizer and cut buttonhole open with seam ripper. See Figure #5a and Figure #5b.
- Center completed patch 2-inches below line drawn for buttonholes. See Figure #6.
- Set up machine for straight sewing and stitch patch in place, stitching just inside the outer circle. See Figure #7.
- Fold strip in half lengthwise with two short raw edges aligned. Pin top edge, marking off a 3-inch opening at the center. Place pins along bottom fold line. See Figure #8.
- Sew top seam, stitching a ½-inch seam allowance, taking care to anchor stitches at beginning and end of opening. Next, refold the piece, pinning side seams and matching bottom pins to top seamline, with seam pressed away from buttonholes. Tip: Avoid touching vinyl with iron during construction of pouch. See Figure #9.
- Sew both side seams from end to end. Tip: Sew down seam allowance where top seam is to anchor it in place. This will make it easier to insert cording for drawstring. Trim corners to eliminate bulk. See enhanced photo showing stitches in Figure #10.
- Turn pouch right side out through opening. See Figure #11.
- To form pouch, tuck end without buttonhole into opposite end. Lightly press top edge of bag, turning under raw edges at the front opening. Pin and then topstitch close to upper edge, closing opening in the process. See Figure #12a and Figure #12b.
- Use a removeable marker to draw casing lines just above and just below the buttonholes. See Figure #13.
- Next, turn pouch inside out to topstitch along marked lines for casing. Note that pouch is too small to fit over a free arm. Stitch slowly around the bag, smoothing it as you go and taking care to stitch small areas at a time while you continue to flatten out the fabric as you stitch. See Figure #14.
- Press pouch carefully if you need to. To finish, turn pouch right side out. Remove any markings. To create an opposing drawstring for closing the bag, begin by attaching one piece of drawstring cording to the small safety pin. See Figure #15.
Figure #2

Figure #4

Figure #5a

Figure #5b

Figure #6

Figure #7

Figure #8

Figure #9

Figure #10

Figure #11

Figure #12a

Figure #12b

Figure #13

Figure #14

Figure #15
Next, insert cording into one buttonhole and follow the casing until you exit the same buttonhole. See Figure #16.
Figure #16

Now, attach the second drawstring piece to the pin and insert in the opposite buttonhole, again going all through the casing until you exit the same buttonhole where you entered. Note: You’ll need to maneuver the pin a bit to get it past the side seams. Pull on each drawstring to close pouch, smooth out the drawstrings and then knot ends and cut at an angle. See Figure #17.
Figure #17

You are finished! Enjoy!
Options and ideas: Increase width and length of the piece to make a larger pouch. Consider using novelty fabrics without embroidery for a really quick pouch project.
Related Projects
Stay Connected
* Required fields
Follow Us
- Product Support
- Product Support Assistant
- Terms of Sale
- Product-Registration
- Search Supplies/Accessories
- Ordering & Shipping Information
- Ordering & Account FAQs
- View Order Status
- Warranty & Extended Warranty Information
- Recall Information
- Return Policy
- Security Support Information(Opens in a new tab)
- Contact Brother
