Tutorial: How to Quilt Faux Leather
Faux leather and vinyl fabrics are currently trending for garments, accessories and home decor. Here are a few tips for customizing your faux leather and vinyl fabrics with quilting. Sewing machine: DreamWeaver™ XE VM6200D(Opens in a new tab)
Features: • Mu-Vit™ Digital Dual Feed Foot(Opens in a new tab)
• Sew Straight™ Laser Vision Guide(Opens in a new tab)
Supplies: • faux leather or vinyl fabric • fleece fabric cut a little larger than the faux leather • quilters ruler • clay tailor’s chalk • #14 denim jean needle
Setting Up the Fabrics
Layer the faux leather on top with the right side facing up, and the fleece on the bottom with the right side facing down. Notice I have the fleece cut a little bit larger than the faux leather. This makes it easier when quilting, because I can always see where the bottom layer is. I will trim the edges to match when I’m finished quilting. If you’re worried about the fabric layers moving around while quilting, use clips to secure the edges.
Tip: Never use pins on faux leather or vinyl because the pins will leave permanent holes in the fabric.
We’re going to start by giving ourselves a guide to follow when sewing. Starting somewhere in the middle of the fabric, use a quilters ruler and tailor’s chalk to mark a line from one side of the fabric to the other. This will be your first stitch line.

Setting up the Sewing Machine
Sometimes when stitching with faux leather, the bottom layer of fabric tends to feed differently than the top layer resulting in puckered fabric. The Mu-Vit™ Digital Dual Feed Foot is the perfect option for quilting these layers of fabric. The Mu-Vit™ Digital Dual Feed Foot is different than a walking foot, as this foot communicates with the sewing machine allowing you to change settings to control how the top of the fabric will feed and the bottom fabric will feed independently.
Quilting
Line up the fabric with the chalked line in the center of the foot. Change the needle position to the center, adjust the stitch length to 3.5, and insert the needle into the fabric, directly on top of the chalked line. Another feature on the machine that comes in handy when quilting is the Sew Straight™ Laser Vision Guide. Turn the laser light on, and move the laser light until it lines up with your needle. With the laser light, stitching a straight line is as simple as sitting back and lining up the laser light with the chalked line and stitching!


 The first row of stitching will be the guide for the second row of stitching. Move the needle to the far left position (adjust the stitch length to 3.5) and the laser light to the far right position. This is shown on the screen of the DreamWeaver™ XE VM6200D at the left.
Align the laser light with the previously stitched line as shown at the right and stitch a second row. How easy!
Following the same steps, continue to stitch rows!
The first row of stitching will be the guide for the second row of stitching. Move the needle to the far left position (adjust the stitch length to 3.5) and the laser light to the far right position. This is shown on the screen of the DreamWeaver™ XE VM6200D at the left.
Align the laser light with the previously stitched line as shown at the right and stitch a second row. How easy!
Following the same steps, continue to stitch rows!

Designing the Fabric
In order to quilt lines that are a little bit further apart, again using the stitched lines as guides, use the quilters ruler to chalk mark additional lines further apart. For example, here my stitch lines with be two inches apart. Continue to mark and stitch new lines.
 Experiment with moving the needle to the left or the right position, and adjusting the laser light for narrower or wider rows of quilting. This makes stitching a straight line so much fun!
 Once the fabric is full of quilted rows going one direction,
 I use my quilters ruler to chalk mark additional lines perpendicular to the stitched lines.

 Stitch along all of the new chalk marks you've drawn.
Finishing Touches
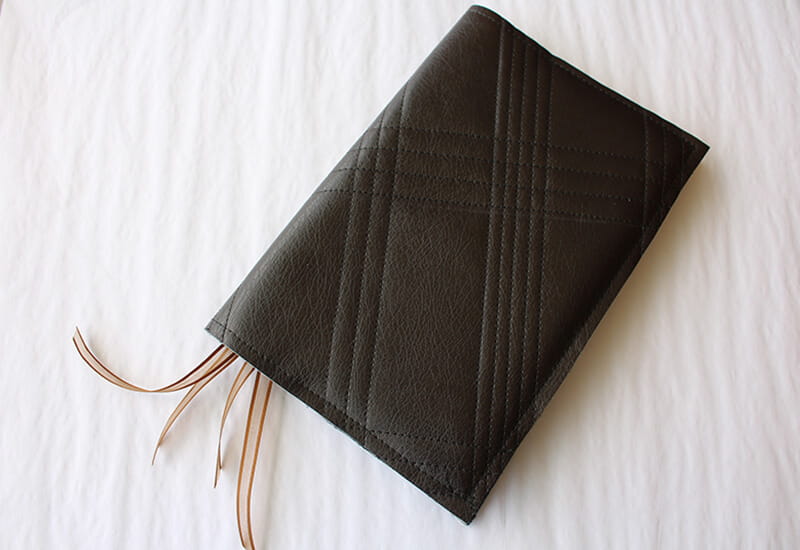
Once finished, brush off the tailors chalk with a soft cloth. Finally, trim off the excess fleece. Your custom quilted fabric is finished!
[caption id="attachment_2368" align="aligncenter" width="800"]
Your custom quilted fabric is finished!
[caption id="attachment_2368" align="aligncenter" width="800"] Fleece side, finished.[/caption]
[caption id="attachment_2370" align="aligncenter" width="712"]
Fleece side, finished.[/caption]
[caption id="attachment_2370" align="aligncenter" width="712"] Faux leather side, finished.[/caption]
What are you going to use your fabric for? It would make a great pillow or handbag!
I used this technique to design the fabric for this jacket and for the vest I'm wearing.
[caption id="attachment_2336" align="aligncenter" width="800"]
Faux leather side, finished.[/caption]
What are you going to use your fabric for? It would make a great pillow or handbag!
I used this technique to design the fabric for this jacket and for the vest I'm wearing.
[caption id="attachment_2336" align="aligncenter" width="800"] You can see more about this jacket on It's Sew Easy Episode 713. Click here to see.(Opens in a new tab)
[/caption] I’m going to use the fabric made in this tutorial for a book cover, which I'll show you all in THIS VIDEO!(Opens in a new tab)
Related Projects
Stay Connected
* Required fields