UPCYCLE: Button Down Shirt into a Strapless Top
It's time for another Upcycle project! As we roll into summer, one of the hottest trends is the shoulder baring strapless top. Here's an easy way to transform a button-down shirt into this stylish look.

Machine used:
DreamWeaver® XE VM6200DMaterials and Supplies:
- Start by try on the top and measuring where you would like top of the strapless to land on your body. Place a mark at the center front of the top.

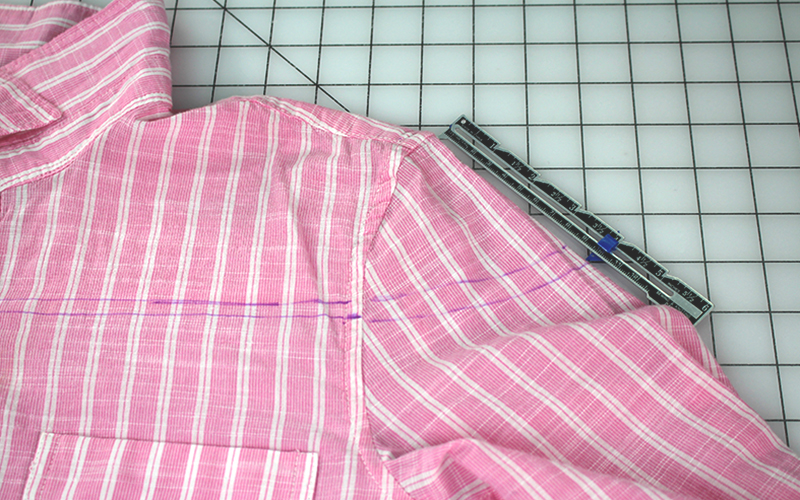
- Lay the shirt down flat and use a quilters ruler to draw a line across the front of the garment, starting at the mark you measured and extend parallel across the top of the shirt.


- At the armscye seam, measure from the shoulder to the marking you drew across the shirt. In my case it’s about 4 inches from the shoulder to the marking of where I want my strapless top to go.

- Place a mark along the outside edge of the sleeve, the same distance from the shoulder down - in my case 4 inches. Draw the line extending from the shirt across the sleeve as shown. Add a ¼” seam allowance to the entire line.
- Cut across the line for the seam allowance.


- Stitch or baste the center front opening closed.

- Starting at the center back, pin the bias tape to the shirt, right sides together, lining them up at the cut edge.


- Continue to pin all the way around the top as shown.

- When you get to the back where you started pinning, overlap the bias tape by about 1”.

- Stitch along the folded edge of the bias tape as shown.


- Turn the bias tape toward the inside of the garment, press, and stitch. You may choose to place a few pins to hold the bias tape in place as you stitch.


- When you get to area with the bias tape overlaps, stop stitching in order to leave enough room to feed the elastic into it.

- Attach a safety pin to one end of the elastic.

- Insert the elastic into the back opening of the bias tape.
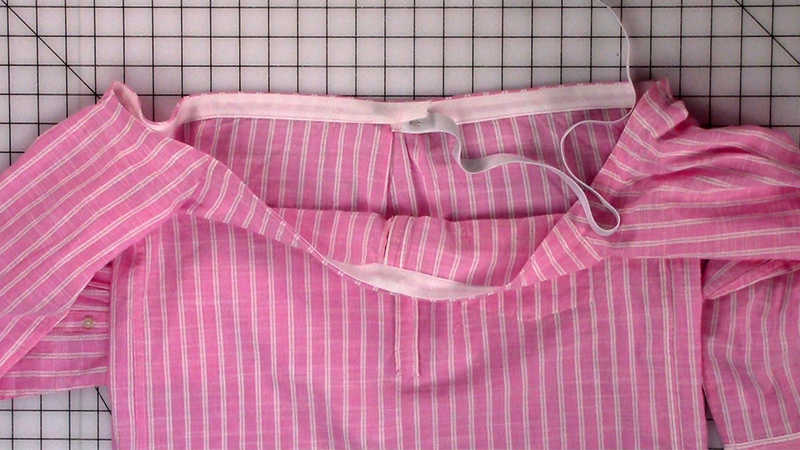
- Feed the elastic through the casing along the entire top edge.


- Tighten the elastic as much as needed to keep the top on your shoulders. You might want to try on the top and double check the fit, tighten or loosen the elastic as needed. Overlap the elastic, and stitch with a zigzag stitch to secure together.


- Close the bias opening in the back and stitch.


 That’s it! What an easy way to transform a basic button-down shirt into a stylish and feminine top! What do you think, are you going to try this? I am definitely using this top as a swimsuit cover up for summer. Want to extend its usefulness into early fall? Add a simple couched scarf (we've got a project for that too!)
😊 Be sure to share your photos, I would love to see what you’re working on! Tag us at #StitchingSewcial, @brothersews and #angelawolf. Cheers, Angela

Related Projects
Stay Connected
* Required fields