UPCYCLING: Turn a Simple Tee into a Stylish Dress
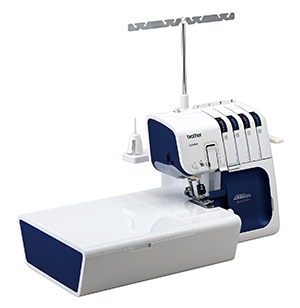
Somehow, T-shirts seem to multiply. What to do with the extras that find there way home? How about turning them into a stylish dress with some of that extra knit fabric you've got in your stash? Utilizing your serger, my 5234PRW comes with a Blind stitch foot and I also use an Elastic foot, I'll show you how to put together this simple dress. Let's get to it!
Supplies needed:
- Serger (I am using the Project Runway™ Limited Edition 5234PRW(Opens in a new tab)
) - Blind stitch foot
- SA212 Elastic foot for Serger(Opens in a new tab)
- Three or 4 spools of serger thread
- Quilters ruler
- Tailors chalk or fabric marking tool
- Scissors
- Seam ripper
- Narrow ribbon
- Yarn needle
- T-shirt
- ¼ to ½ yard of cotton fabric (depending on how long you want the skirt)
- ½” wide elastic

Restyling – Cutting up the Tee
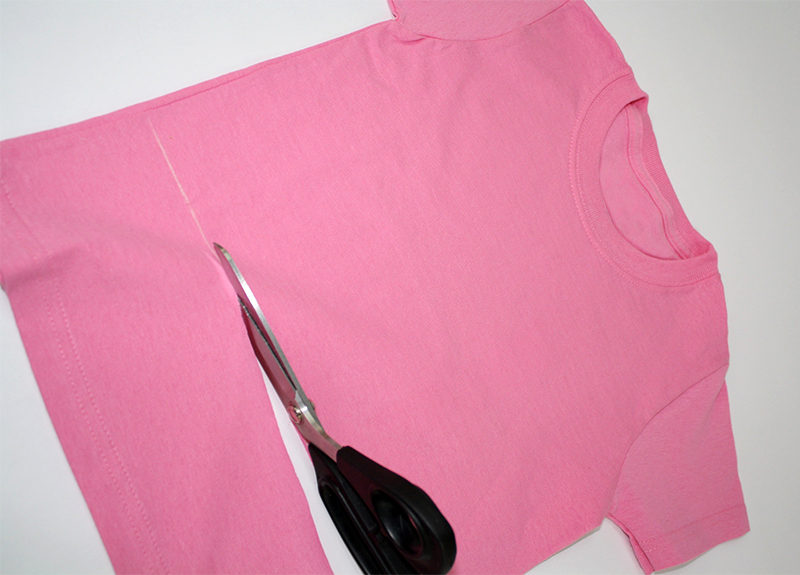
- Try on the Tee and determine where you want the skirt fabric to start: high for an empire waist, on the natural waist line, or lower for a drop-waist style. Draw a line (parallel to the hem) at this location.
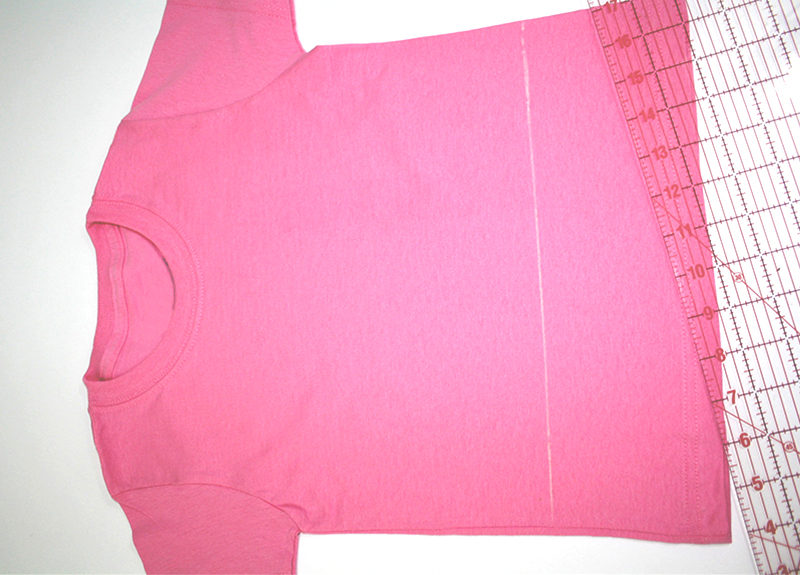
- Cut along line.
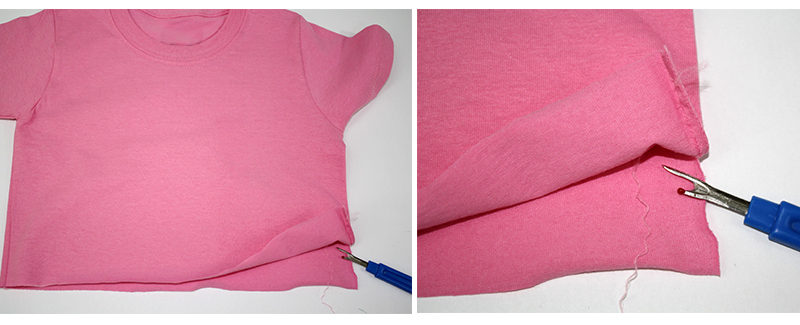
- Use a seam ripper to open one of the side seams 2 to 3 inches.
- Cut the skirt pattern: a. Width = Measure the width around the tee and add at least 5” b. Length = Desired length of skirt plus 3” (2” for the hem allowance and 1” for seam allowance for the waistband)
Setting Up the Serger for Inserting Elastic
- 3 or 4-thread overlock stitch (Note: the 4-thread overlock is a sturdier stitch)
- Stitch length: 4”
- Stitch width: 5”
- Elastic foot for Serger
- Flip open the guide, slide the elastic through the opening as shown, and slide the plastic lever closed so it sits close to the edge of the elastic.
- Adjust the dial on the elastic foot: choose a higher number and the elastic will stretch as its serged in place. Be sure to test the stitch and elastic on a scrap piece of fabric.

Attaching the Skirt
- Starting at the opened side seam, with right sides of the fabric and T-shirt facing each other, serge. Continue serging all the way around the base of the T-shirt.

- Cut off the excess fabric for the skirt.

- Pin the side seam closed. Change back to a standard foot and set the serger up for a 3 or 4-thread overlock stitch. Serge the side seam closed.


Creating a Fashionable Ladder Stitch
 Set up the serger for a blind hem stitch:

- Stitch Width: 5 mm
- Stitch Length: 3 to 4 mm
- Left Needle: decrease tension 0
- Upper Looper: increase tension 6 – 7
- Lower Looper: decrease tension 3
- Press up the hem allowance 2”.

- Insert the blind hem foot, turn the knob to adjust the plastic lever to the left for a wider stitch. The idea is to have a wide stitch that shows up on the right side of the fabric, test the stitch on a scrap of fabric first.
- Turn up the hem along the pressed edge. Then fold the pressed edge back toward the right side fabric.
- Line up the fold of fabric with the plastic edge of the foot. The raw edge of the hem allowance will be further to the right of the knife, as shown.
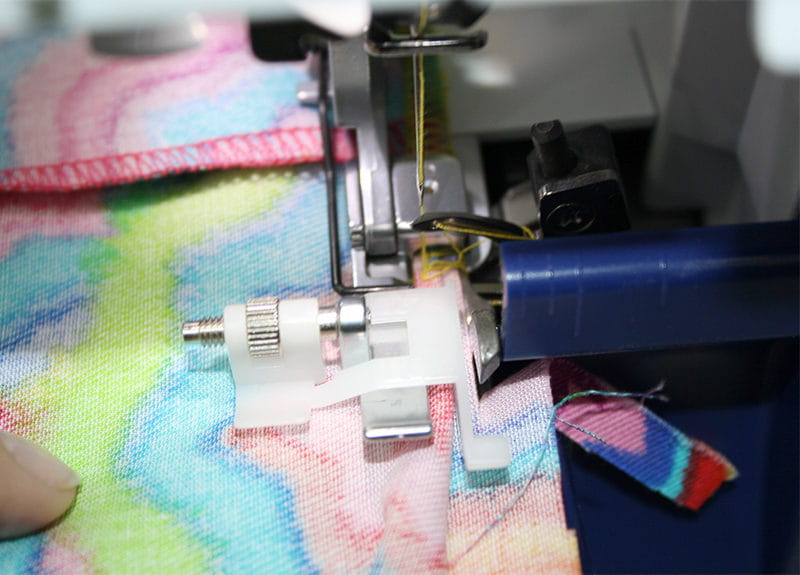
- Serge all the way around the hem. Press the hem.


Ladder Stitch on the Sleeve Hem
- The sleeve on the T-shirt is already hemmed with a coverhem stitch – leave this hem. Turn the sleeve edge up toward the right side of the fabric. Stitch the same ladder stitch along the folded edge as shown.

- Press the hem back down.

Add a Touch of Ribbon to the Ladder Stitches

- On the right side of the fabric, insert the needle every three or four stitches.

- Pull the ribbon in and out of the ladder stitches.


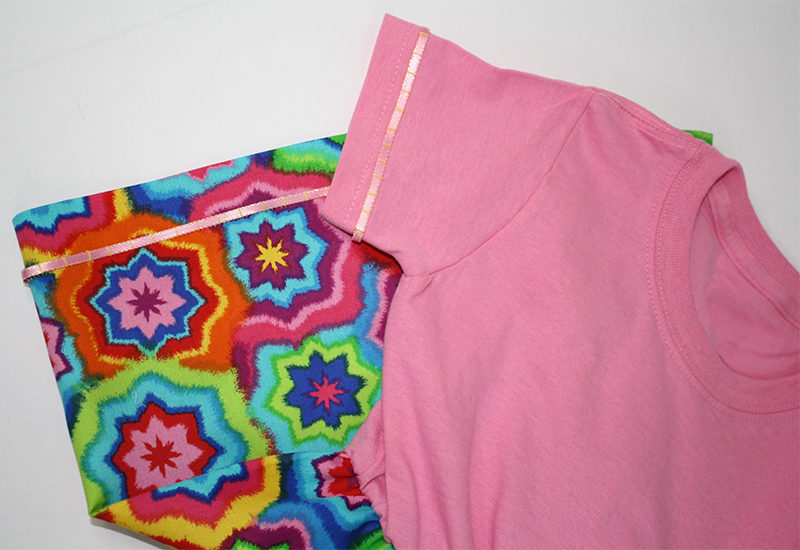 That’s it! This new dress turned out Adorable!
 As you can see, a serger has lots of stitching and embellishing capabilities. Be sure to share photos of your Upcycled Dress by tagging us @Brothersew and #StitchingSewcial on Facebook and Instagram.
Cheers,
As you can see, a serger has lots of stitching and embellishing capabilities. Be sure to share photos of your Upcycled Dress by tagging us @Brothersew and #StitchingSewcial on Facebook and Instagram.
Cheers,
 Have you seen the Two Shirts Upcycled into a Denim Shirtdress? Click on over to see this project!
 (Opens in a new tab)
Related Projects
Stay Connected
* Required fields
Follow Us
- Product Support
- Product Support Assistant
- Terms of Sale
- Product-Registration
- Search Supplies/Accessories
- Ordering & Shipping Information
- Ordering & Account FAQs
- View Order Status
- Warranty & Extended Warranty Information
- Recall Information
- Return Policy
- Security Support Information(Opens in a new tab)
- Contact Brother
