Sew a Valentine Project
-Brother Sews Blogger
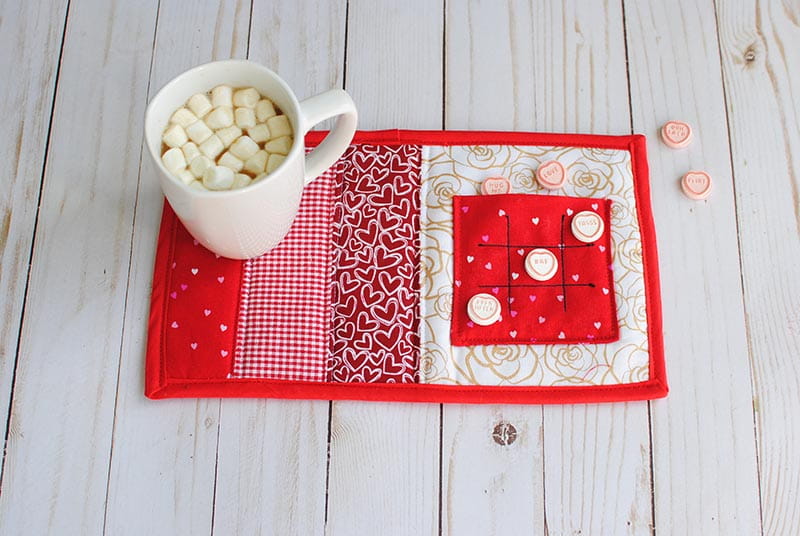
This Valentine themed “mug rug” is a fun beginner quilting project and ideal for using up fabric scraps. My son helped me make this one and came up with the idea for the tic-tac-toe pocket. We can enjoy some cocoa and treats together while playing tic-tac-toe. Wrap this up with ribbon and place in a new mug as a Valentine gift. Get the details below on how to sew this Valentine Mug Rug.
Supplies:
- Brother SE1900 Sewing Machine
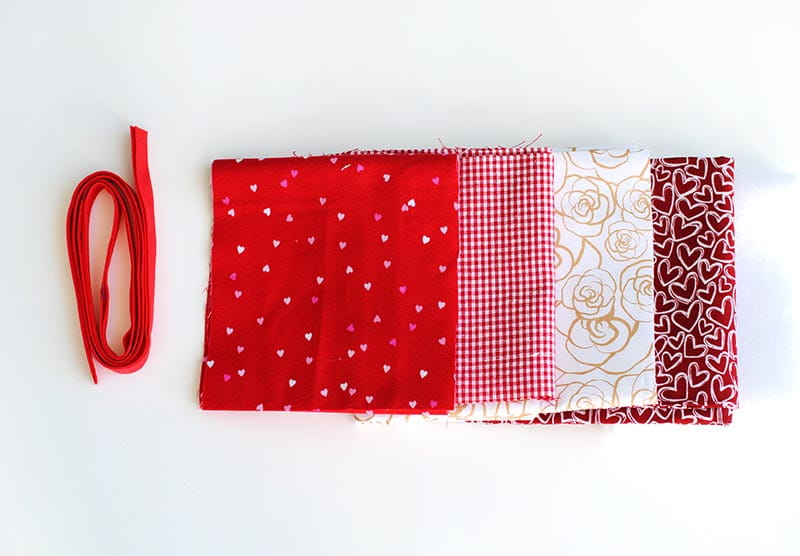
- 4 different fabrics (you can use scraps or fat quarters as well)
- fusible fleece or quilt batting
- grid ruler
- rotary cutter
- double fold bias tape
- Cutting:
- 1 piece that measures 6 x 7”(length)
- 3 different fabrics that measure 2.5 x 7”
- Pocket that measures 4.5 x 8”
- Back fabric that measures: 12 x 7”
- Fusible fleece or quilt batting that measures 12 x 7”
- Double bias tape: 42”
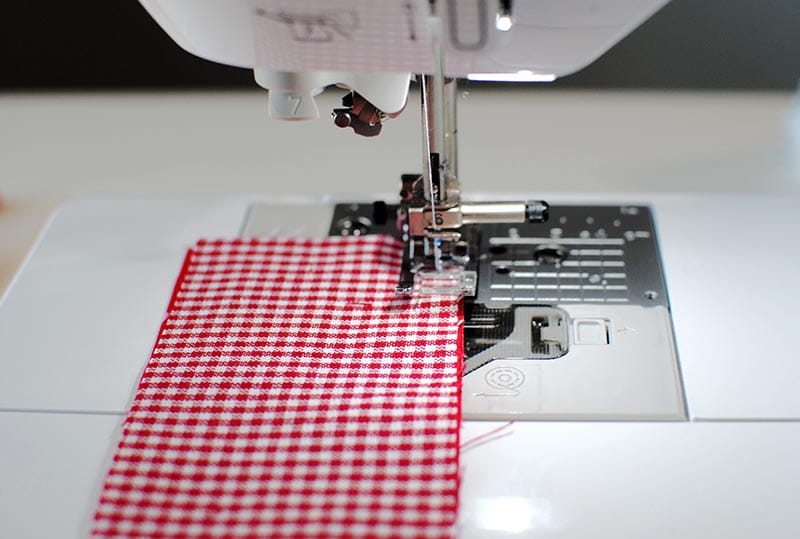
Lay out your materials the way you want them sewn together. Begin with the outer two and stitch right sides together (1/4” seam allowance).
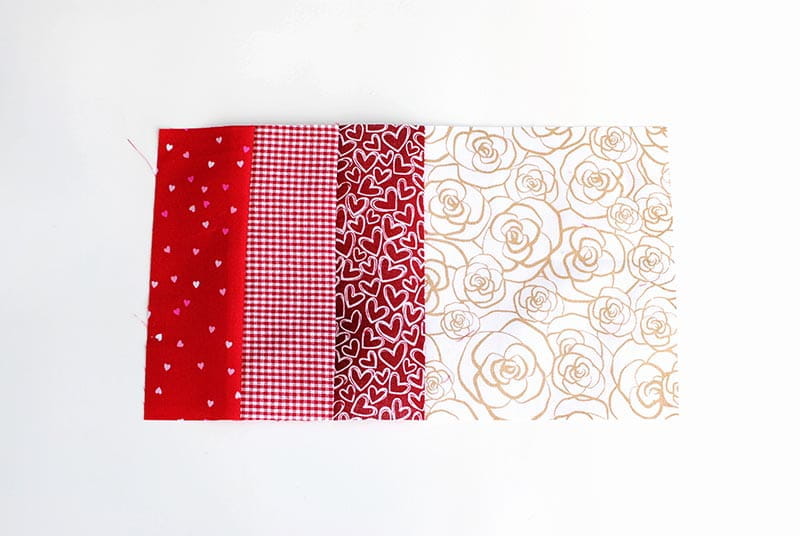
Continue until the front piece is sewn and press flat.
Pocket:
Fold your pocket fabric in half so right sides are facing and stitch leaving a 1.5” opening on one of the sides.
Clip corners and flip right side out through opening. Press to create a nice flat square.
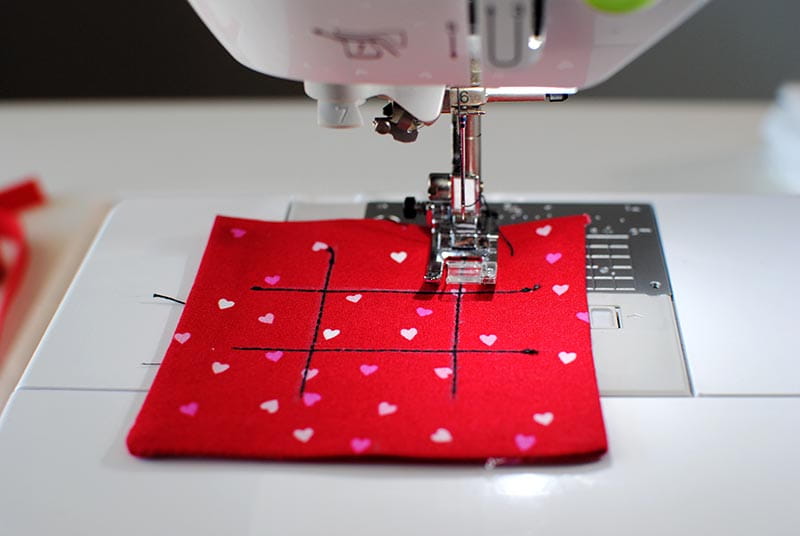
Use a fabric marking tool and grid ruler to draw out tic-tac-toe lines. I made them 1” apart each way.
Top stitch with a heavy duty thread like Button and Craft thread (do not use for bobbin thread) to create detailed lines.
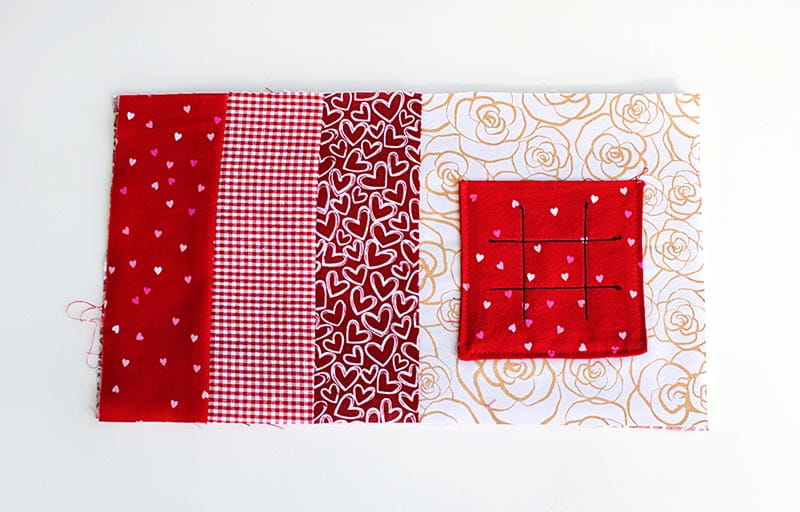
Pin in the center of the larger piece and topstitch the sides and bottom to create a pocket.
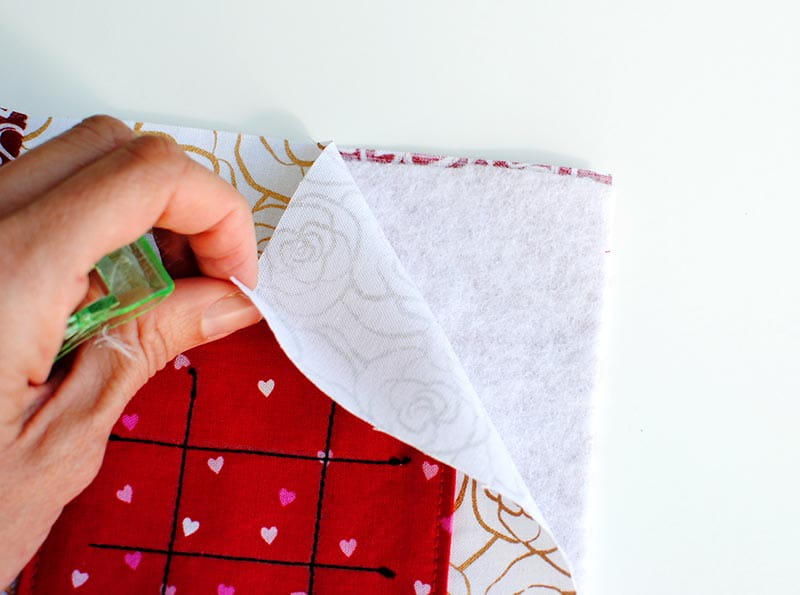
Place front and back pieces with batting in between. I used Fusible Fleece. If you use batting use a spray adhesive to keep the layers from shifting.

Pin the layers together in the center and sides and top stitch along the seams to connect the layers together. You can use a contrasting color of thread for the topstitching. Stitch along the seams of the different fabrics and the edges to keep the fabric in place.
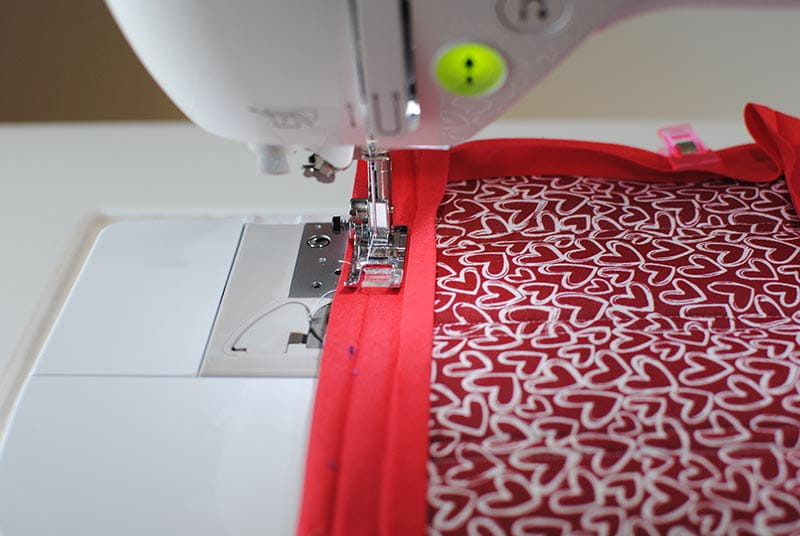
Finish the edges by stitching double fold bias tape around.
Enjoy!
Tags

Brother Sewing and Embroidery Machines
Related Projects
Stay Connected
* Required fields
Follow Us
- Product Support
- Product Support Assistant
- Terms of Sale
- Product-Registration
- Search Supplies/Accessories
- Ordering & Shipping Information
- Ordering & Account FAQs
- View Order Status
- Warranty & Extended Warranty Information
- Recall Information
- Return Policy
- Security Support Information(Opens in a new tab)
- Contact Brother
