Winter Time Faux Fur Stole
Winter has arrived, and it means layering and cozy sewing projects. I love a Faux-Fur Stole to add to my looks this time of year. It can be used as elegant scarf or a glam cover up for a dress. It’s a nice accessory to add in the winter when you have special occasions that require a dress and you need a more coverage and warmth (i.e. New Year’s Eve). This Faux-Fur Stole was a simple to make with my Brother SE1900
and a few supplies. Also check out our Sewing with Faux-Fur post
for helpful tips when working with this material. Get the details below and make your own Faux-Fur Stole.
Supplies:
- Brother SE1900 Sewing and Embroidery Machine
- Pattern
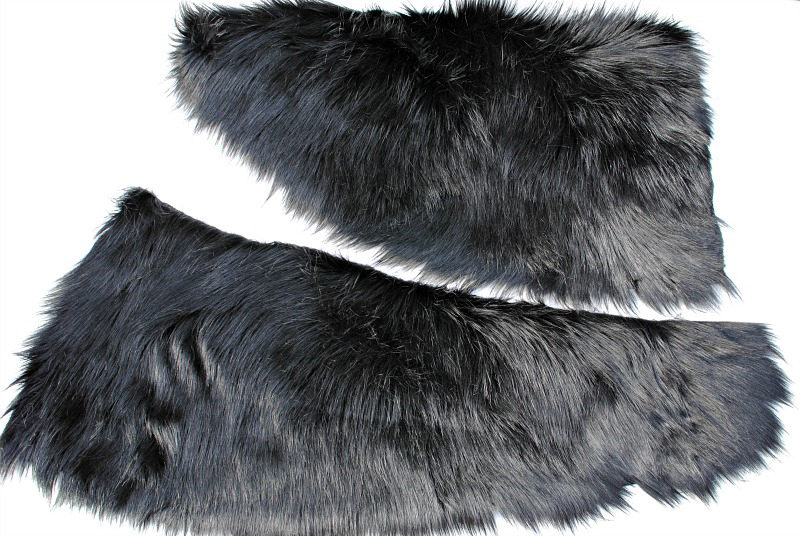
- ½ yd. Faux-Fur (I used Shannon Fabrics Artic Fox Fur Black - use what's best for you*)
- ½ Liner (satin) (I used Silky Satin Solids - use what's best for you*)
- Rotary cutter or razor to cut faux-fur
- Marking tool
- Thread
- Jeans Needle
- General Sewing Supplies
*Disclaimer: The additional fabrics listed here, Shannon Fabrics Artic Fox Fur Black and Silky Satin Solids are not Brother products. Brother International Corporation makes no representations or warranties regarding such products.
 Draft a pattern that is similar to the template above or use a pattern. The overall measurements are personal preference based on how big or small you want the stole to be. I suggest using muslin fabric to get this right. Mine wrapped nicely around my shoulders and connects in the front with a tab sewn on the liner. I did add 1.5” (width) x 3” (length) darts about 8” from the center back edges. This helps keep the stole from falling off the shoulders.

 Step 1
Create your pattern and lay it out on the wrong side of the faux fur. Be mindful of the way the nap of the faux fur goes (The hair of the fabric is known as the pile, the direction the pile goes is the nap. You will want to keep this in mind when planning your project). If you want some additional tips on sewing and cutting faux fur, head to our blog post here.
Step 1
Create your pattern and lay it out on the wrong side of the faux fur. Be mindful of the way the nap of the faux fur goes (The hair of the fabric is known as the pile, the direction the pile goes is the nap. You will want to keep this in mind when planning your project). If you want some additional tips on sewing and cutting faux fur, head to our blog post here.Step 2 Place your pattern pieces on the wrong side of the fabric. Use a permanent marker or crayon since I’m using black faux fur and trace the pattern into place. Be sure to mark the pattern markings as well darts.
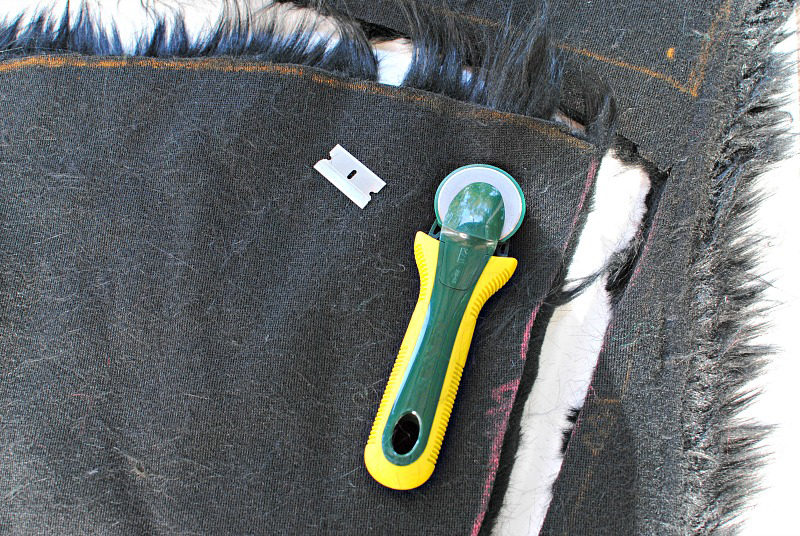
 Steps 3 and 4
Cutting:
When cutting you will again be working on the wrong side of the fabric. You won’t cut through faux fur like you typically do with other fabrics. You will only want to cut through the backing. This is easiest to achieve when using a razor blade or rotary cutter. Simply pierce through the backing and removed each pattern piece. If you don’t have a razor blade, scissors will do but you will use just the tips of the scissors and cut short little snips which can take a lot longer than a blade.
Steps 3 and 4
Cutting:
When cutting you will again be working on the wrong side of the fabric. You won’t cut through faux fur like you typically do with other fabrics. You will only want to cut through the backing. This is easiest to achieve when using a razor blade or rotary cutter. Simply pierce through the backing and removed each pattern piece. If you don’t have a razor blade, scissors will do but you will use just the tips of the scissors and cut short little snips which can take a lot longer than a blade.
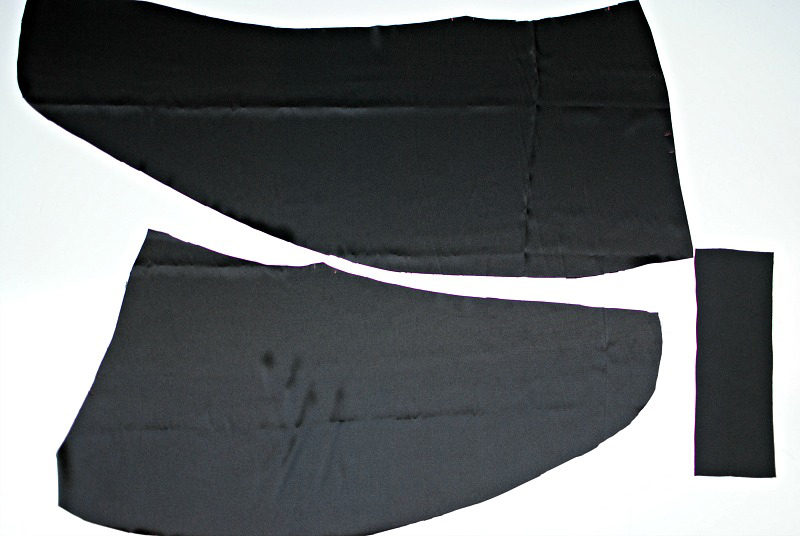 Liner:
Cut out a liner with the same pattern you used for the faux fur. I’m using a satin material.
Sewing:
Liner:
Cut out a liner with the same pattern you used for the faux fur. I’m using a satin material.
Sewing:

 Step 5
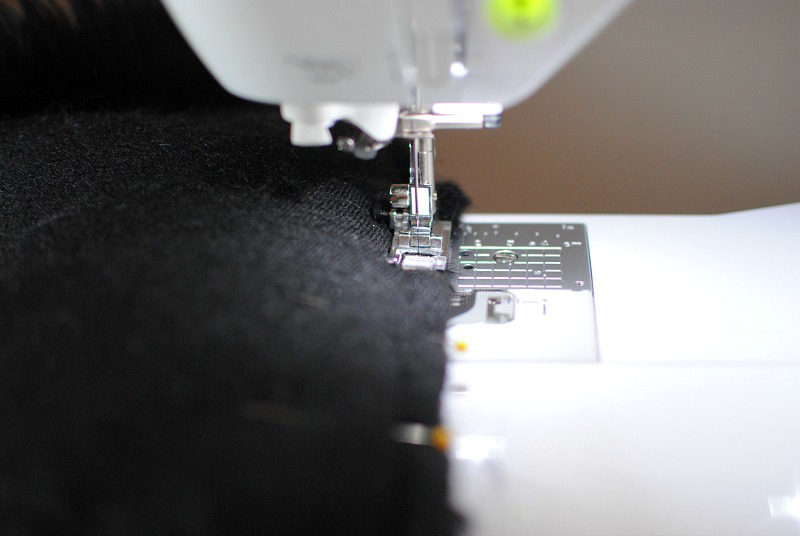
Sew the shoulder darts on both faux fur and liner. Pin the center seam right sides together and sew for both the liner and the faux-fur.
Step 5
Sew the shoulder darts on both faux fur and liner. Pin the center seam right sides together and sew for both the liner and the faux-fur.
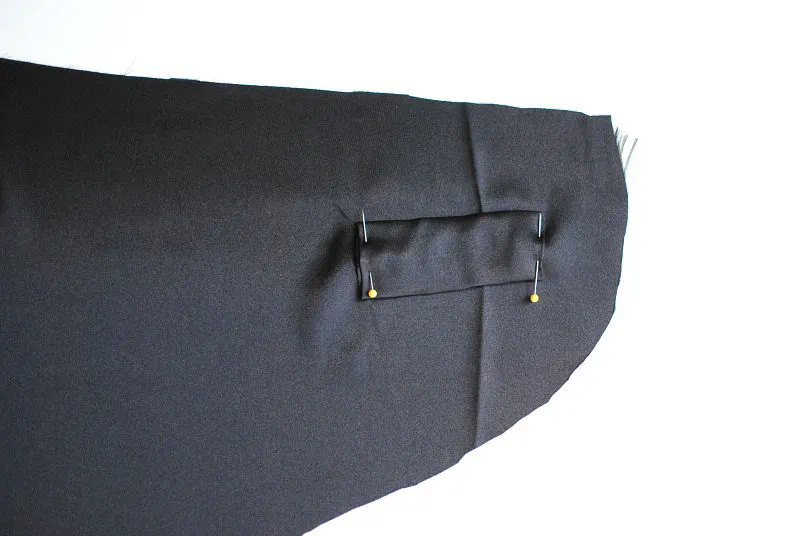
 Step 6
For the liner you will want to add a strip of fabric or ribbon that is 4” wide onto the end of the right side. Fold over the edges, pin into place, and top stitch the ends into place.
Step 6
For the liner you will want to add a strip of fabric or ribbon that is 4” wide onto the end of the right side. Fold over the edges, pin into place, and top stitch the ends into place.

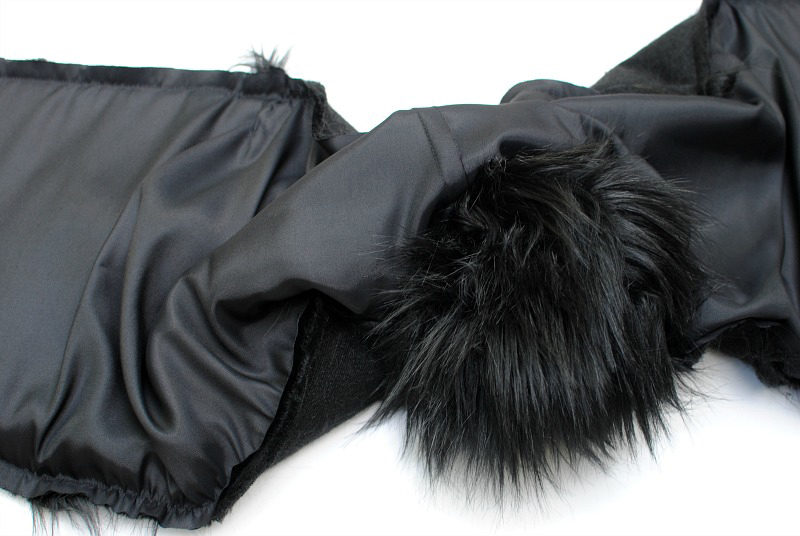
 Step 7
Place liner and faux fur rights sides together and pin generously around making sure the fur is tucked inside the edges. Sew with a ½” seam allowance around the edge leaving 5” open at the bottom center.
Step 7
Place liner and faux fur rights sides together and pin generously around making sure the fur is tucked inside the edges. Sew with a ½” seam allowance around the edge leaving 5” open at the bottom center.
 Step 8
Flip right side out through the opening and hand sew the opening closed.
Step 8
Flip right side out through the opening and hand sew the opening closed.


Related Projects
Stay Connected
* Required fields